
How to Make a Tripod More Stable in Wind: Field-Tested Fixes That Work
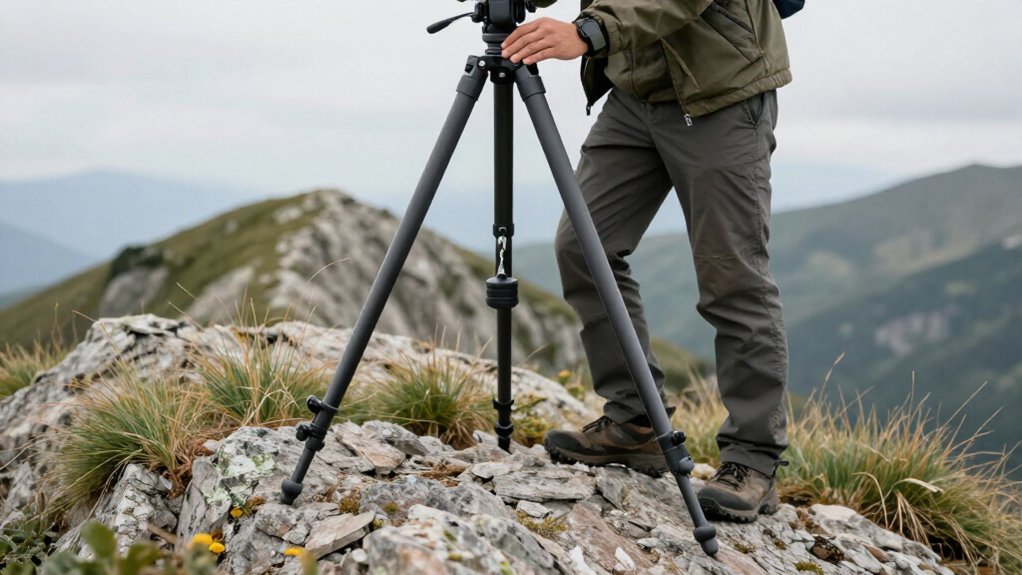
Lower your tripod’s center column and hang a low, non-swinging weight from its hook, within the hook’s rated capacity. Face or shelter the rig from crosswinds, spread the legs, and seat each foot firmly.
Lock every leg-angle latch, secure loose straps, and check for slipping after each move. Clear grit from joints before tightening. Use a remote release and mirror lockup, then test shutter speeds in gusts; the checks below help you refine your setup.
How Do You Test a Tripod’s Wind-Speed Limits?
Test on the exact spot where you’ll shoot: mount your heaviest lens, frame a focus target, and make exposures from 1/100s down to 1/2s with a remote release. Note where blur or doubled target lines begin; the fastest shutter speed that stays sharp is your practical wind limit for that rig.
Test wind limits on the exact spot where you’ll shoot: mount your heaviest lens, frame a focus target, and make exposures from 1/100s down to 1/2s using a remote or cable release and mirror lockup if available. Record each frame and note where blur or doubled target lines begin. Repeat the sequence after changing only tripod height: lower it to its most compact position and avoid extending the center column.
If sharpness improves, that setup defines your practical wind limit. If it doesn’t, check the head and quick-release locks; vibration often enters through that interface. Shoot one calm-air set and one during gusts. Treat the fastest shutter speed that stays sharp as your limit for this rig and location. Finally, align two or three frames at one shutter speed in a layered comparison. If their alignment breaks in wind, you’ve exceeded stable performance, even when one frame looks acceptable alone. Keep exposure and focus settings unchanged throughout testing.
How Do You Set Up Ballast to Stabilize a Tripod in Wind?
Once you know the rig’s wind limit, lower its center of mass by hanging dead weight from the tripod’s center hook. Keep the weight low and non-swinging, within the hook’s rated capacity. Also lower the tripod to its compact position and avoid extending the center column.
Once you’ve found the rig’s wind limit, lower its center of mass with dead weight on the tripod’s center hook.
Hang a bag or sack of rocks to reduce tipping when gusts push sideways. Keep ballast low and central; the combined center of forces must stay inside the tripod’s triangular footprint.
Use stationary support: place the bag on the ground and connect it to the hook with a bungee or rope. A swinging load can act like a pendulum and amplify motion.
- Check the hook’s capacity before loading it.
- Don’t rely on a heavier camera; vertical mass placement matters more.
- If the hook can’t carry ballast, use a ground anchor where soil permits.
- Avoid loose sand and concrete; tension the line.
How Do You Shelter a Tripod From Gust Channels?
Move the tripod out of gust channels by shifting a few feet sideways or stepping behind terrain or a structure, so the obstruction blocks the wind stream. At boardwalks, overlooks, and sidewalks, relocate to the nearest spot with less lateral airflow, since funnels can load the camera even when the legs seem sheltered.
Move the tripod out of gust channels by shifting a few feet sideways or stepping behind terrain or a structure, so the obstruction blocks the wind stream rather than merely sitting downwind of the camera. At boardwalks, overlooks, and sidewalks, relocate to the nearest spot with less lateral airflow or lower turbulence; funnels can load the camera even when the legs seem sheltered.
Place an obstruction at lens height, or stand between the wind and camera, to reduce pressure on the camera body. If you can’t relocate, keep the center column as low as possible and face into calmer airflow; raising the camera increases leverage on flexing legs and head. Secure loose straps and remove dangling items, since flapping can transmit movement despite shelter.
How Do You Lock Every Leg-Angle Latch on a Tripod?
Fully seat and lock every leg-angle latch before shooting in gusts, so wind load can’t make a leg shift. After tightening, push sideways at the head. Any delayed wobble suggests a latch hasn’t seated, so reopen it, engage it again, and test once more.
Before shooting in gusts, fully seat and lock every leg-angle latch so wind load can’t make a leg shift when the tripod releases. After tightening hinges, push sideways at the head. Any delayed wobble suggests a latch hasn’t seated; reopen it, engage it, and test again.
Extend the tripod only as far as framing requires. Use thicker leg sections first, then thinner sections, and confirm each angle latch remains tight after changing height. If each leg has a separate height lock, secure that too; a tight length lock won’t prevent movement at an unsecured angle hinge. Recheck every latch whenever you relocate the tripod, after a small nudge too. Partial loosening can create a vibration path that gusts amplify, so verify the joints before you resume shooting.
How Do You Seat Tripod Feet in Soil?
With the leg locks secure, press each foot firmly into the soil so it resists sideways force. Spread the legs to widen the stance, then check that all three feet sit level and make full contact with the ground so no leg is left carrying less of the load.
With the leg locks secure, seat each foot firmly in the soil so it resists sideways force. Spread the legs to widen the stance, then check that all three feet sit level and make full contact.
Press each foot down until it compresses soft dirt; if safe, step on the tripod’s center. Install detachable spikes where they can penetrate soil, but avoid them on delicate ground where marks matter or clean entry isn’t certain.
On damp soil, apply a sideways push to test traction. If a foot slides or squishes, reseat it. Recheck the feet after every position change and gust. If a touch still moves the tripod, relocate to firmer soil or drive the feet deeper; don’t try to solve movement by tightening the head.
Should You Aim a Camera Into the Wind on a Tripod?
Yes. Aim the lens partly or fully into the oncoming gusts to reduce the force pushing the camera away from the tripod. Wind striking the front face creates less lever effect than wind pushing broad surfaces sideways. Turn the camera before composing, and stand upwind when practical so your body blocks gusts.
To reduce wind-driven wobble, aim the lens partly or fully into the oncoming gusts, which lessens the force pushing the camera away from the tripod. Wind striking the front face creates less of a lever effect than wind pushing broad surfaces sideways. Turn the camera before composing, and, when practical, stand on the upwind side so your body blocks gusts from reaching the setup.
Keep the center column low; raising the camera increases leverage and makes small flex in the legs or head more visible. Remove a lens hood or dangling strap if it’ll catch wind, then aim the remaining profile into the gust. These changes work together: reducing exposed surfaces and directing the camera into airflow limits the load transmitted through the tripod.
How Do You Recheck the Horizon After Gusts?
After each gust, check the horizon in the viewfinder or on the live-view grid. The tripod head or quick-release connection can shift even when the legs look still, so verify the framing before your next exposure and correct the setup if the horizon has tilted.
After each gust, check the horizon in the viewfinder or on the live-view grid; the tripod head or quick-release connection can shift even when the legs look still.
Pause after the gust and compare the horizon with the grid before you resume shooting. A wobble can leave the rig at a new angle; the head or quick-release interface often accounts for most movement.
Lightly tap the camera strap or rig, then watch the horizon settle. If it continues to drift, lower the setup or move to a more sheltered position instead of trusting it. Keep the center column low, and avoid changing height during the shoot: raising it lengthens the lever arm and makes later alignment less reliable. Recheck promptly when wind direction changes, and correct any tilt before framing or exposing the next image.
How Do You Tether Loose Accessories on a Tripod in Wind?
Remove loose straps and dangling lens hoods, or secure them tightly so they can’t catch the wind and tug the tripod head. A free bag strap can act as a wind-blown lever. If an accessory must stay nearby, connect the tripod’s center hook to a ground anchor with rope or a bungee.
Before shooting in gusts, remove loose straps and dangling lens hoods, or secure them tightly so they can’t catch the wind and tug the tripod head. Also secure bag straps; a free strap can act as a wind-blown lever and transmit force to the tripod head. If an accessory must stay nearby, connect the tripod’s center hook to a grip stake or other ground anchor with rope or a bungee.
Keep the tether short so the item hangs close and can’t swing side to side in gusts. Don’t hang a backpack from the tripod unless you’ve stabilized it; its movement can increase motion rather than reduce it. After a change, release; check oscillation. If it continues, re-tether or reroute it until no movement remains.
How Do You Inspect Long-Exposure Sharpness in Wind?
Shoot a printed test pattern or fine lines on a stable nearby surface, using a shutter-speed series from 1/100 second to 1/2 second without changing framing. Compare the fine edges as exposure time increases to see where movement begins to soften the image in gusty conditions.
Check long-exposure sharpness with a printed test pattern or fine lines on a stable nearby surface. Shoot a shutter-speed series, from 1/100 second to 1/2 second, without changing framing; compare the fine edges as exposure time increases.
Enable mirror lockup or its equivalent and trigger the camera with a remote or cable release. Magnify the patterned lines in your editing software; doubled lines or softened edges reveal motion. If slower frames soften, lower the tripod and collapse its center column, then repeat the series.
If reduced height helps but doesn’t solve the problem, reduce extension and test again to isolate movement at the head or quick-release. For confirmation, compare two or three exposures at identical settings, or layer separate frames and check alignment.
Why Do Gusts Loosen Tripod Leg Locks?
Gust-driven vibration can make a slightly unsealed lock creep, so inspect each lock before shooting and re-check it after gusts. Set height with thicker top sections first, avoid loading thin extensions that amplify slack into wobble, and keep all three legs evenly extended and firmly seated.
If your long-exposure tests still show movement, inspect the leg locks: gust-driven vibration can make a slightly unsealed lock creep. Before shooting, check each lock and re-check it after gusts. Set height with thicker top sections first; avoid loading thin extensions, which amplify slack into wobble. Keep all three legs evenly extended and firmly seated so crosswind tension doesn’t favor one lock.
| Check | Action |
|---|---|
| Lock slips | Collapse to last tight section; retighten |
| After moving | Lightly shake-test; tighten or lower |
On breezy overlooks or boardwalks, touch the camera lightly after every move and watch for persistent movement. If it continues, tighten the locks again or lower the rig. Don’t keep shooting on a slipping leg; reset before exposing. Repeat this check before each long exposure.
How Do You Flush Grit From Tripod Leg Joints?
Flush each joint with compressed air or a soft brush after setting the tripod stance and lowering it. Work from the farthest leg joint toward the closest so sections slide smoothly, then cycle each lock after brushing, because trapped sand or salt can prevent tightening and leave play that wind magnifies.
Grit in leg joints can make sections stick, then release in gusts, so flush each joint with compressed air or a soft brush after setting the tripod stance and lowering it. Work from the farthest leg joint toward the closest, clearing so sections slide smoothly. For sections or flip locks, cycle each lock after brushing; trapped sand or salt can prevent tightening, leaving play that wind magnifies.
Clean the center-column connection and head interface, including the quick-release plate seat; grit can cause tilt despite clamps feeling tight. In seashore conditions, wipe joints with a barely damp cloth, then dry them. Re-grease only if the manufacturer permits it. After relocating, inspect and flush joints near boardwalks, sandy overlooks, or marsh edges before exposures or video.
Conclusion
Before you trust a tripod in wind, test it at the site and keep exposure limits conservative. Add low, secured ballast; position yourself outside gust channels. Lock every leg-angle latch, seat feet firmly in soil, and tether straps or other loose accessories.
Check test frames at your intended shutter speed for sharpness. After gusts, inspect locks for slipping and flush grit from joints before reuse. These checks won’t stop all motion, but they reduce surprises.
