How to Use a Tripod Mount Adapter Without Stripping the Threads
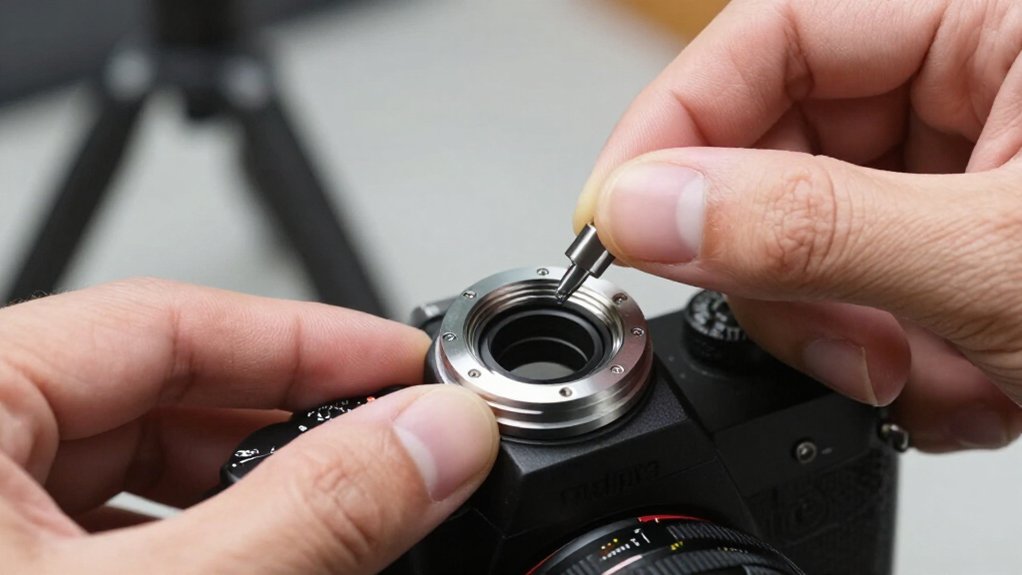
To use a tripod adapter without stripping its threads, clean and dry the mating parts, then inspect for burrs, rounded peaks, or damaged starts.
Align the adapter with the tripod stud and turn it by hand for rotations; stop if it binds, back it off, and realign.
Support camera, then tighten only until snug.
Confirm the base sits flush and the mount stays steady.
Wipe away shavings, and see what to check if it loosens.
Prevent Cross-Threading the Mount
To prevent cross-threading, clean dust, grit, and moisture from both mating threads, then align the 1/4-20 adapter’s axis with the tripod stud.
Especially at awkward angles, check coaxial alignment before turning fully. Place the adapter against the stud and turn it by hand only. Let the first threads catch without applying force.
Continue with light finger pressure, keeping the adapter straight as it advances.
If you feel resistance or binding, stop. Back the adapter off, realign its axis, and try again by hand. Don’t force a hesitant start; misaligned threads can cross-cut and damage the adapter and tripod mount. Tighten gently only until the connection feels snug and stable. Avoid adding torque to compensate for poor alignment.
Inspect the Adapter’s Threads
Before mounting, inspect the 1/4-20 threads for rounded peaks, burrs, frayed metal, or missing starts: early signs of stripping risk. Use the adapter and tripod socket as a matched pair; inspect both under good light.
- Run a fingertip over male and female threads; smooth surfaces should feel even, while grit flags contamination or corrosion.
- Sight the adapter’s thread axis; it shouldn’t lean or bend.
- Check the first few turns for even engagement; misaligned starts suggest cross-threading.
- Examine the first two or three threads for rust or pitting, which can weaken contact.
- Reject an adapter with missing starts, damaged peaks, or burrs; don’t force it into the socket.
If you’re unsure, compare it with a known-good adapter or replace it; damaged threads can’t hold securely.
Step 1: Clear Dust From Threads
Grit in the thread grooves can grind against the metal as you tighten the adapter, increasing friction and stripping risk.
Before attaching anything, use a small, dry brush to clear grit and packed dust from both the adapter and the mating 1/4-20 threads. Compressed air can remove particles from narrow grooves, but keep the nozzle controlled so debris doesn’t shift into nearby equipment.
If sand or damp conditions have left residue, wipe the threads with a lint-free cloth, then let them dry completely; moisture can promote corrosion and binding.
To check your cleaning, inspect contact as you thread the adapter on and off: it should feel smooth and continuous, not gritty. Store it capped or bagged between uses to keep dust from building up in grooves again.
Step 2: Hand-Tighten the Adapter
Start the 1/4-20 adapter by hand, turning it gently for several rotations to confirm it engages smoothly without cross-threading. If you feel gritty resistance, stop immediately; back the adapter out, then realign it before trying again. This prevents the first thread crests from catching or deforming.
Keep your fingers clean and dry, and use gentle, steady pressure as you turn. If dust or moisture remains on either threaded surface, wipe it away first; debris and moisture can increase friction and abrasion, making smooth engagement harder to judge. Once the adapter seats, tighten it only until snug, roughly finger-tight, followed by a small additional turn if needed. Don’t use a tool or force extra rotation to make the connection feel secure. Excess torque can deform or strip the threads, especially during repeated mounting. A clean, aligned, lightly tightened connection preserves thread life over time.
Step 3: Support the Camera Body
When the adapter supports the camera, keep the camera’s weight centered over the 1/4-20 mount to avoid side-load torque on the threads. Keep the body aligned as you position it; don’t let a long lens or accessory pull the camera off axis.
Start the connection by turning the adapter by hand for several turns. This lets you feel whether the threads engage and helps prevent cross-threading, especially when the adapter supports the camera from above.
Before each attachment, brush dust and grit from threads. Contaminants can act as abrasive wear accelerators, damaging thread surfaces under the camera’s load. Periodically inspect the 1/4-20 threads for fraying, flattening, or wobble.
If you feel grinding or notice reduced hold strength, stop using the adapter to prevent camera-support failure.
Step 4: Stop at Snug Resistance
Once the camera is aligned and the threads engage smoothly, tighten the adapter by hand until it feels snug and the rig is stable.
Begin with finger-tight engagement, using your fingertips to keep the 1/4-20 threads aligned without cross-threading. Apply a small turn with light torque; stop as soon as you feel snug resistance. That point should hold the camera without loading the thread flanks beyond what the connection needs.
Keep the threads clean and dry. Remove grit and dust before mounting, since debris can raise friction and make the adapter feel tighter. Check for shiny galling, metal shavings, wobble, or difficulty engaging. If you find these wear signs, stop using the adapter and replace it rather than tightening harder to restore a snug fit.
Step 5: Back Off If Resistance Increases
If resistance increases while threading a 1/4-20 adapter, stop and back it out rather than forcing it; continued torque can cross-thread or strip the male or female threads.
When resistance rises after a few turns, back the adapter out completely. Check whether it entered at an angle and inspect both thread sets for damage before trying again. Start with the adapter aligned straight to the mount; don’t use the screw to pull it into alignment.
Apply light hand-tight force only, stopping when the adapter feels snug. If it binds again, don’t add torque: repeated force can worsen cross-threading or strip either side. Dust or grit can raise friction, so clear threads before re-engaging them. In humid or dusty conditions, use a little lubricant sparingly.
Step 6: Wipe Away Metal Shavings
Even with the adapter aligned correctly, debris can damage the threads. Before you thread the 1/4-20 adapter on, remove dust, grit, and metal shavings from both male and female threads. Use a dry cloth and small brush; use compressed air if available.
If you recently drilled, tapped, or modified the adapter, inspect the thread channel closely and wipe out fresh aluminum or steel chips. They can act like sandpaper and rapidly strip threads.
After cleaning, hand-thread the adapter for one or two turns. If grinding or resistance occurs, stop and re-clean; shavings commonly cause it. Avoid swaps in dirty environments; check threads between setups, especially after carrying gear in a bag. Afterward, wipe threads lint-free; a tiny amount of suitable lubricant can reduce friction and scoring.
Verify the Mount Holds Steady
After mounting, check that the adapter’s base sits flush against the surface and the camera is level. Apply gentle side-to-side pressure to the camera or rig and watch the joint. A properly seated mount won’t rotate or wobble under this light check. Use your hand rather than a tool so you don’t apply excessive torque to the threads.
If you feel grinding or notice debris around the joint, remove the adapter and inspect the threads for dirt before remounting. Stop if the adapter rocks, binds, or feels uneven while you’re seating it; forcing it can cross-thread the connection. Confirm that light hand pressure doesn’t make the camera tilt or the adapter back off; either result suggests poor seating or damaged threads. Check again before use.
Adapter Loosens During Shooting
Vibration can loosen a tripod adapter, especially when it’s misaligned or overtightened. Hand-thread the 1/4-20 mount clockwise for two or three turns before tightening; don’t force a cross-threaded fit. Stop at a firm seat, since excess torque can damage thread flanks and weaken grip under movement or wind.
Brush dust from the threads and dry them regularly; grit can help the adapter back out.
| Symptom | Practical response |
|---|---|
| Adapter backs out | Check alignment and clean threads |
| Loosening persists | Inspect threads; replace damaged adapter |
A little low-strength threadlocker or a thin nylon insert can resist vibration loosening. Confirm fit first. If it loosens during shooting, inspect for worn or stripped threads and replace the adapter; don’t keep tightening damaged threads, which can’t maintain preload reliably during the shoot.
Apply a Tiny Drop of Thread Lubricant
A tiny drop of suitable thread lubricant on the 1/4-20 male threads can reduce friction and help prevent galling during repeated tightening.
Before you install the adapter, place only a pinhead-sized drop on the threads; spread it lightly if needed, keeping lubricant away from nearby surfaces. Excess lubricant can hold dust and dirt, which may abrade the thread crests over time. After installation, wipe away visible excess so grit won’t grind into the threads when you remove and reattach the mount.
If the threads become dirty or sandy, clean and dry them first, particularly in humid conditions, then apply a fresh minimal drop. Start the adapter by hand to avoid cross-threading, then snug it lightly; lubricant won’t protect threads from overtightening or excessive force.
Conclusion
To avoid stripping your tripod mount, inspect and clear the threads before installation. Align the adapter carefully, then hand-tighten it while supporting the camera body; don’t force a resistant fit. Wipe away any metal shavings and verify the mount holds steady before shooting.
If the adapter loosens, stop and check the threads rather than overtightening. Use only a tiny drop of suitable thread lubricant when needed. These steps help preserve the mount and keep your camera secure.