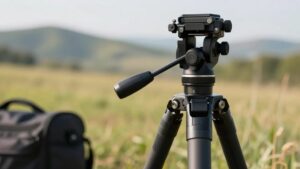
Do All Binoculars Fit on a Tripod? How to Check for an Adapter Socket
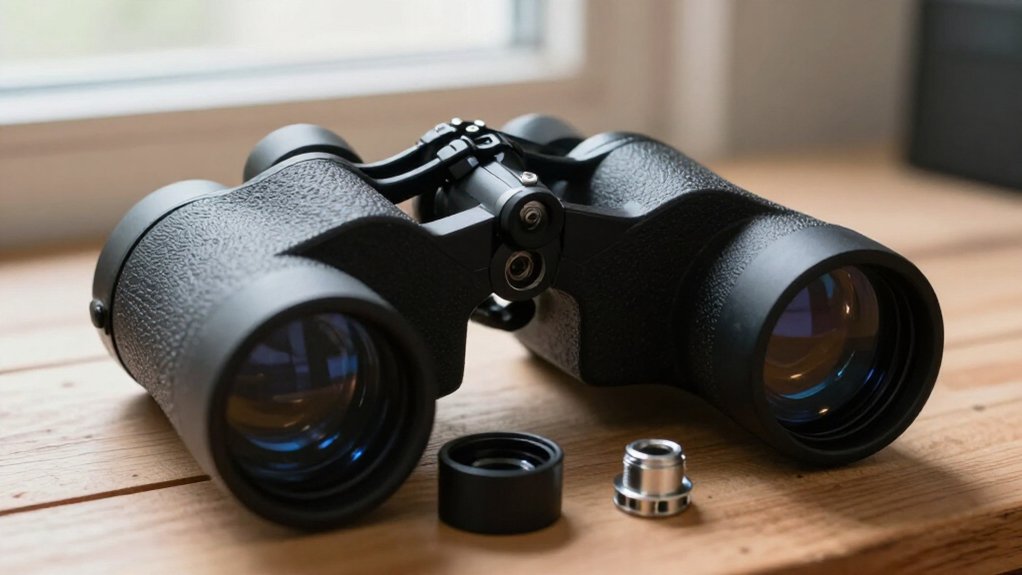
Not all binoculars fit directly on a tripod; you need a compatible adapter and mounting point.
Verify the center hinge or pivot for a cap, then rotate it counterclockwise to reveal the threaded socket.
Examine threads for debris or damage, and make sure the adapter starts smoothly by hand.
Align thread diameter and pitch, and ensure the adapter fits flat without contacting the barrels.
A clamp-style option may work if no socket exists.
More practical checks come next.
Check for a Threaded Socket
On the binocular’s front hinge or central pivot, look for a threaded socket, often hidden beneath a small cap. This port is where most screw-in tripod adapters attach. If you find a cap or threaded cover, turn it counterclockwise and remove it. Inspect the exposed threads under light; clear away debris, and don’t use an adapter if the threads look cross-threaded, stripped, or damaged.
Before fitting an adapter, verify its thread standard. Many tripod setups use 1/4-20 threads, but check your binocular and adapter specifications rather than assuming they match. Nikon models may require a compatible adapter, such as the TRA-3. Check the nut diameter and thread-to-nut geometry, too, since these affect whether the adapter seats firmly. If you can’t find a socket, don’t force a screw-in adapter; consider a universal clamp or central-shaft adapter.
Why Socket Location Matters
Once you’ve removed the cap and checked the threads, confirm the socket sits where the adapter can mount squarely on the binocular’s central hinge.
Socket position affects more than whether the threads engage. If the adapter sits off-center or doesn’t seat flat, the binoculars can wobble, making viewing harder. Thread the adapter into the mounting point, then orient it before tightening.
Check that the adapter and tripod head clear the barrels and don’t block your view. This matters with roof-prism binoculars, whose compact barrel geometry can leave less room around the hinge. If you can’t locate a threaded point or the design won’t accept a standard adapter, use a central-shaft adapter or clamp instead. Don’t force a location-dependent mount that can’t sit securely there.
Removing the Hinge Cap
At the binoculars’ front hinge or pivot, locate the tripod adapter mounting point and unscrew its small cap counterclockwise with a medium flathead screwdriver, or by hand if it turns easily. Work slowly and keep the screwdriver centered in the cap’s slot to avoid slipping onto the hinge or nearby body. If the cap resists, don’t force it; check that you’re turning counterclockwise and use a suitable grip.
Set the cap aside with any packaging or carrying parts, so you can reinstall them when you want ordinary handheld use and prefer the socket covered. Once removed, you’ll see the adapter socket. Before fitting an adapter, inspect the opening for debris and make sure its entry is aligned; this helps prevent cross-threading. Don’t discard the cap, since it protects the mounting point when you’re not using a tripod. Store it securely in your case during setup, transport, and later handheld use.
Adapter Thread Standards
Most tripod heads use a 1/4-20 thread, but your binocular socket has its own thread standard, which you must match separately. Check both thread diameter and pitch, since metric and imperial threads can appear similar yet won’t fit reliably.
Also confirm the adapter nut clears the socket area; if the thread’s unclear, use a model-specific or non-threaded universal adapter rather than forcing a mismatch.
Standard Thread Sizes
A 1/4-20 thread is the most common standard for binocular tripod adapters, but matching the thread alone doesn’t guarantee a proper fit; the surrounding nut geometry must also match.
Check the binocular’s central pivot for a covering cap; beneath it, you’ll usually find the threaded socket used by a tripod adapter. Confirm the specified standard in the manual or product documentation before ordering, rather than relying on appearance.
For example, Nikon’s TRA-3 adapter supports a 1/4-20 connection. If your model’s thread size is uncertain, choose an adapter made for that manufacturer or model family; this can help match both the screw and the surrounding seating dimensions. If you don’t find the expected socket, a universal adapter may still provide a mounting option, but a standard threaded socket is the most direct, common route. Check that the adapter seats flush without forcing it. Use the model-specific specification to confirm the adapter’s intended mounting interface.
Thread Pitch And Compatibility
Thread compatibility hinges on both the screw’s diameter and its pitch, the spacing between threads, not just a “1/4-inch” label. Most binocular tripod adapters attach behind the pivot or cover cap. Check the adapter’s thread against your binocular’s specification before installation. If the pitch doesn’t align, the screw may cross-thread or fail to bite.
Remove debris, then inspect both threads for damage and start the screw by hand. Don’t force resistance. Matching diameter by itself may not ensure fit: nut size and clearance around the mount can vary by model. Some Nikon binoculars need model-specific adapters; the TRA-3 uses a 1/4-inch screw. Don’t assume every adapter bearing a 1/4-20 label fits. If your binocular lacks a suitable socket, consider clamp or central-shaft designs rather than forcing an incompatible thread.
Metric Versus Imperial Threads
Although tripod adapters may look alike, their screws can follow different standards: imperial 1/4-20 or metric. Most binocular adapters use one of these thread systems, but you must match the socket’s type, diameter, nut size, and pitch before buying. Similar-looking parts can bind incorrectly or wobble if any measurement differs.
Check your binocular’s manual or inspect its socket specifications rather than relying on appearance. For example, Nikon TRA-3 takes a 1/4-inch tripod or monopod screw, so it won’t fit a metric-thread tripod without an adapter. When standards vary by model, choose the same manufacturer’s adapter whenever possible. If your binoculars lack a standard socket, or the threads don’t match, use a clamp or central-shaft adapter. Don’t force an incompatible screw into the socket.
Hinge-Cap Access Clearance
Locate the hinge cap on the binocular’s central pivot; it may conceal the threaded adapter socket. Check that you can remove the cap and attach the adapter without the mount, your forearm, or the binocular housing getting in the way.
If access is tight, choose a low-profile or clamp-style adapter that clears the hinge during attachment and removal.
Locate The Hinge Cap
At the binoculars’ central pivot, check the hinged cap and surrounding clearance before fitting an adapter. Locate the small cap on the hinge between the barrels; it often covers the tripod-adapter socket. Keep the binoculars steady and inspect the pivot from above and below so you can identify the cap without mistaking a hinge screw or trim piece for the access cover.
If the cover is threaded, note its position and turn it counterclockwise when you’re ready to expose the mounting point. Retain the cap for storage and later replacement. Match the opening to your adapter type: screw-thread models need access to the socket, while clamp-style models need room at the hinge. Identify this access point before bringing the adapter into position to mount.
Check Cap Clearance
Check cap clearance before positioning the adapter: make sure the hinge cap can unscrew fully counterclockwise without colliding with the adapter or your hands, and stays accessible while you thread in the mount.
At the central hinge, inspect the cap’s full removal route and the space required to hold it after removal. If a cover conceals the threaded socket, turn the cap counterclockwise and set it aside where you can retrieve it; don’t let the adapter or your fingers block its route.
On roof-prism binoculars, check the narrow gap between barrels and nearby components, since the adapter may need room to slide into position. For a quick-release model, ensure the hinge cap won’t obstruct the post or base as it seats.
In a cold-weather dry test, remove the cap and fit the adapter once; check that nothing binds and the cap can close afterward. Repeat this inspection with your typical hand position and gloves, if applicable, in place.
Confirm Adapter Access
Before fitting the adapter, confirm that removing the center-hinge cap exposes an accessible socket and leaves enough room to seat and rotate the adapter without interference from the cap, strap hardware, or binocular barrels. Check whether the cap is removable, then inspect the hinge after taking it off. If your binocular has a threaded tripod socket, verify that the hole is exposed and that the adapter can engage it squarely.
A covered, blocked, or inaccessible socket may require a clamp-style adapter instead. For an adapter that sits beneath the cap, test whether you can tighten it and align its body for smooth locking and quick-release access. Dry-fit the adapter before heading out; in cold weather, confirm you can seat and lock it with gloves or reduced dexterity.
Don’t force a tight fit: contact with the strap lug or barrel can prevent full seating, damage threads, or leave the connection unstable. Also check clearance throughout the adapter’s entire rotation.
Steadying Distant Wildlife Observations
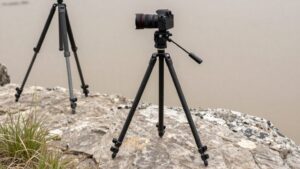
When you’re watching distant wildlife, mounting high-magnification binoculars, especially 12x to 18x models, on a tripod reduces hand shake and sharpens the image. At magnifications like these, even hand movements can shift your view across an animal or obscure fine detail.
A stable support lets you track behavior longer and compare features without repeatedly correcting the image. First check for the adapter socket beneath the cap at the central pivot. If you’re using standard threads, choose a screw-thread adapter with a compatible 1/4-20-style interface; verify the thread and fitting dimensions.
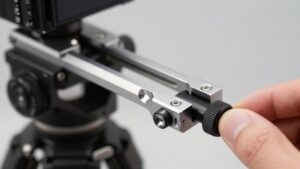
If no threaded socket exists, a central-shaft adapter may suit many Porro prism binoculars, while a clamp-style mount can fit compatible tubes. A quick-release adapter helps you remove the binoculars after viewing, particularly when cold-weather gloves make handling fittings less convenient. Lock the tripod head before observing, then adjust its position to keep your subject centered.
Preventing Hinge-Thread Damage
A secure tripod setup also depends on protecting the binoculars’ hinge threads. Before fitting an adapter, unscrew the factory hinge cap counterclockwise and store it safely; don’t force it. Confirm that the adapter’s thread size matches the binocular socket, including nut-size tolerances, since a small mismatch can strip the threads.
Start the adapter by hand and make sure it threads smoothly before using a screwdriver to tighten it. If a quick-release adapter won’t tighten or sits crooked, back it out. Inspect the threads for debris or damage, then correct the problem instead of applying more force.
In cold weather, metal contraction can alter the fit slightly. Test the adapter’s seating and locking before critical glassing, so you don’t place stress on the hinge threads.
Loose Hinge Cap Risks
If the hinge cap or adapter socket cover is loose, the adapter can shift or seat unevenly, adding play and reducing stability while you glass. Before mounting, remove the cap screws and check that the threaded point is clean and intact; otherwise, you could cross-thread an adapter in a partly seated socket.
- Test the adapter for firm engagement and wobble after installation.
- In cold weather, metal contraction can make looseness more noticeable.
- Secure the cap after removal to keep debris out of threads.
- Debris can make future adapter fits looser or harder to engage.
- A loose interface can let the adapter disengage as you move.
Confirm the locking interface feels solid before you rely on it for observation, especially while traveling between viewing positions.
Check Your Binocular Manual
Start with the manufacturer’s manual for your exact binocular model; tripod sockets vary by brand and series. Look for the tripod-mounting point on the central hinge or pivot. Many models cover it with a removable cap; follow the manual’s steps to expose the socket without stressing the hinge.
Check whether your binoculars use a screw-thread adapter, then verify the specified thread size and the nut’s size and shape. Matching only the thread can leave the connection loose or prevent proper seating.
If the manual lists no standard thread or tripod interface, check whether it recommends a central-shaft mount or a universal clamp. For quick-release adapters, confirm the socket’s location and orientation against the approved parts list so your binoculars lock securely before you buy.
Conclusion
Before you mount your binoculars, check the manual and inspect the hinge for a threaded socket. Confirm its position, thread size, and adapter compatibility; don’t assume every model uses the same standard.
Remove the hinge cap carefully, ensuring the adapter clears the body and tightens without forcing the threads. A secure fit helps steady distant wildlife views, while careful handling prevents damage or a loose cap. If anything feels uncertain, stop and consult the manufacturer.