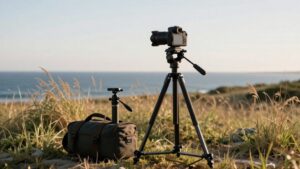
Do You Need a Ring Light With Your Tripod? When It Improves Your Videos
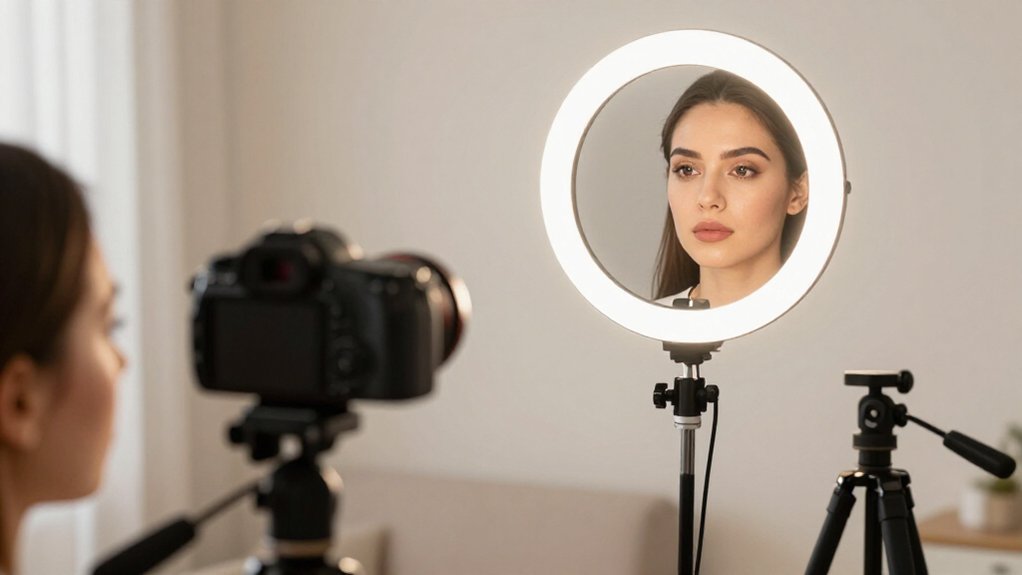
You don’t need a ring light with your tripod, but pairing them can improve videos when room light is uneven or you’re recording. A tripod steadies the setup, while a ring near lens height gives your face softer, even illumination.
Center the camera in the ring, keep it slightly above your eyes, and start with low brightness to avoid glare. The size, stand, and color setting depend on your space and needs; see how to choose them.
Tripod Ring-Light Pairing Advice
Pair a ring light with a tripod when you want steady, hands-free lighting as you adjust your framing. You don’t need the pairing, but a stand keeps the light at eye level or in the upper third of your face while you reposition the camera.
For even illumination, place your phone or camera lens through the ring’s center, so the LEDs surround the camera axis and reduce shadows. Choose a 10-inch model for tabletop selfies and close-up video; an 18-inch light takes up more space.
If you want to change output mid-recording, pick a unit with stepless dimming or a remote. Set color temperature from 3200K to 5600K. Skip tripod pairing with clip-ons unless your phone mount stays secure and leaves the rear camera clear.
Subject-to-Light Distance
Move the ring light close to your subject for more even illumination and softer shadows beneath the eyes and nose. At this distance, light wraps across your face instead of leaving sharp dark patches. Step back, and brightness falls quickly; raise the dimmer to preserve exposure, but watch for washed-out skin.
Keep the ring near lens height, slightly above your eyes. Then move the camera while the light stays fixed, checking the preview at each position. Aim for skin that looks bright and natural, not glossy, and keep highlights from clipping.
A 10-inch tabletop model suits tight selfie framing and short working distances. An 18- to 20-inch ring can cover a broader area, yet you’ll need to control spacing so facial features retain shape.
Catchlights and Eye Reflections
A ring light near the lens axis puts a clear, circular catchlight in each eye, keeping reflections bright rather than dull or shadowed. Center the ring at eye level, or slightly above, and aim it directly toward you. Circular reflection then lands evenly across both pupils, especially in close-ups.
| Choice | Visible result |
|---|---|
| Lens-height aim | Balanced pupil highlights |
| 3200K to 5600K match | Natural reflection color |
| Lower dimmer setting | Less glare on glasses |
Use stepless or stepped dimming to keep the ring’s reflection controlled without losing eye sparkle. If you wear glasses, adjust brightness first; excessive output can create a distracting circle on the lenses. Check both eyes in the camera preview before recording, since small shifts can make one highlight appear brighter than the other in close-up shots.
Desk Clamps vs. Floor Stands
A desk clamp saves space and keeps your ring light near eye level, but it can crowd a wide frame or limit height adjustment.
A floor stand clears your desk and lets you raise and angle the light for different shots, with steadier aiming during longer sessions. Choose the setup that fits your space, gear, and preferred shooting position.
Desk Space Savings
A desk-clamp ring light frees floor space by replacing a stand, while letting you position the light at eye level or slightly above to soften harsh shadows. On a crowded desk, the clamp grips the edge, so you can keep your keyboard, notes, and tripod in place. A clamp-on tabletop model can be ready in about 10 seconds; the UBeesize 10 Table Top costs around $21.
Its modest output—about 155 lumens—works best when you’re lighting a webcam or selfie close-up, not a whole room. Place the USB-powered lamp near your face, then angle it toward the center or upper third of your face to avoid glare. If the image still looks dim, the light may not deliver enough exposure for your setup.
Floor Stand Flexibility
Floor stands give you more control than desk clamps, letting you raise, lower, and tilt the ring light until it sits at eye level or slightly above. That angle directs light across your face, softening shadows beneath your eyes and shaping more flattering skin tones.
Desk clamps suit small rooms and stable desk-height shots, but their limited range can leave the light too low for virtual meetings. Place a floor stand behind and above your computer or tablet, then adjust its height and angle for even illumination.
When you use a camera or phone tripod, align the ring’s center with the lens to keep catchlights visible and reduce facial shadowing. A tabletop light may not reach standing height; choose by framing target and placement.
Setup and Stability
Beyond choosing the right height, secure the setup to keep your light steady. In a small room, clamp your ring light to a sturdy desk: the rigid mount saves floor space and avoids the sway a tripod can develop on uneven flooring. Tighten the clamp before recording, then position the light directly in front of you, near lens or eye level.
Your tripod can hold that angle between takes, so you won’t need to readjust and risk shifting the catchlights.
A floor stand gives you a wider range of shooting heights, but you’ll need to level its base carefully. Choose a sturdy stand, check for wobble, and avoid bumping it while tapping controls.
Either setup can deliver even, shadow-reducing illumination; a securely fastened mount helps prevent tiny movements from changing highlights across your face.
Choosing the Right Fit
Choose a desk clamp for quick, repeatable eye-level lighting in a tight space, especially for close-up phone or tablet shots. It keeps your setup compact and puts the light where you need it without spreading tripod legs across the floor. But check brightness: a tabletop UBeesize 10 costs about $21 and tops out around 155 lumens, while a Xinbaohong clip-on costs about $14 and delivers only 13 lumens, basic fill, not strong illumination.
Choose a floor stand when your frame or room needs more flexibility. Its height lets you place the ring slightly above your face, align it with your upper face, and center it over the lens for even light and clear catchlights. You’ll also adjust more easily as your camera angle or subject height changes, helping control shadows and glare during video calls.
Remote Call Lighting Setup
For remote calls, place your ring light at eye level and align your camera with its center to fill facial shadows evenly. Dim the light and balance it with your screen and room lighting so your skin stays natural, not blown out.
Angle the light slightly off-center to reduce glare on glasses while keeping your eyes bright.
Position Light at Eye Level
On a remote call, set the ring light directly in front of you with the ring at eye level, and place the camera lens in the middle hole for centered catchlights. Adjust the tripod’s height until the ring aligns with your eyes or the upper third of your frame. Tilt it slightly up or down so your face stays clear and the light doesn’t create glare.
Keep the lens centered in the opening; this alignment makes the reflections in your eyes look balanced rather than offset. If you’re fine-tuning during your call, use a remote to adjust brightness without disturbing your precise framing. Set output with a stepless dimmer or available brightness steps, matching the room so your face looks naturally lit, not overexposed.
Soften Harsh Shadows
Once the ring light is at eye level, use it to fill shadows from the front rather than casting hard light from the side. Place it in front of your face, aligned with the upper third, so catchlights sit in your eyes and your features read evenly on camera. Raise it above eye level and tilt it toward you; this wraps light around facial contours and softens contrast beneath your eyes and along your jaw.
Use dimming to lower brightness until glare fades but shadows remain filled. A stepless control, or a unit with several brightness steps, lets you make adjustments without losing front fill. Mount the light on your tripod to keep its angle consistent between takes as you move or reframe.
Balance Screen and Room Light
For remote calls, where you place the ring light can keep your face bright without overpowering the room. Set it slightly above and behind your screen, aiming toward eye level so your face reads clearly while the room stays softer and less contrasty. Keep it close enough to limit side shadows, and direct the beam across the upper third of your face for a natural on-camera look.
Start the dimmer low, then raise it until your skin looks evenly lit rather than washed out. Match the color temperature to your surroundings; around 5500K suits daylight, while a bicolor or preset-range light can help avoid mixed-color shadows. With a compact tripod unit, center the light so it fills your face while the screen remains your reference.
Reduce Glare on Glasses
To reduce glare on glasses during a remote call, mount the ring light on or near your tripod at eye level, with the camera lens centered in the ring’s opening. Aim the light at the upper third of your face, then adjust its height or tilt while keeping your camera framing fixed. This even, shadow-softening beam can reduce reflections, but direct glare may remain if the ring faces your lenses squarely.
Shift the light slightly off-axis and test the view.
Choose a bi-color model with a broad range, such as 3200K to 5600K, to match room lighting and avoid harsh lens reflections. Use a remote to lower brightness or change color temperature from your seat; small adjustments can prevent bright hot spots behind the glass.
If you use a clip-on phone light, check portrait framing: it may block some rear-camera angles on an iPhone. Recheck both glare and composition before joining, keeping your tripod and camera fixed.
Phone Mount Clearance
Check phone mount clearance before tightening the setup: the camera bump or a thick case can hit the ring frame, while a close-fitting clip may cover a lens or cause vignetting. Measure the gap between holder and frame with your phone installed; check it with your usual case, not just a bare handset.
A clip that presses over the phone body can shade rear lenses, especially in portrait orientation. Tilt and height adjustments let you center the camera in the ring without pushing the phone forward into its housing.
For a larger light, confirm its phone or DSLR adapter reaches eye or upper-third face height while retaining clearance. Before recording, frame a test shot and look for dark corners onscreen.
Battery Replacement Costs
Once the phone clears the ring frame, compare how each light gets its power: USB models have no battery to replace, while battery-powered lights add ongoing costs.
Check the light’s power label before you buy: a USB-powered model draws from a port or power bank, so you won’t budget for cells. With AA-powered lights, every shoot can drain the set, especially when you run full output for a bright, even face. Rechargeable AAs cost more upfront but can cut repeat purchases; keep a charged spare pair ready so a dimming light doesn’t interrupt recording.
Common AA formats are easy to find at grocery and electronics stores. Proprietary batteries may cost more and take longer to replace, leaving your setup unusable while you wait. Estimate expenses from your brightness habits and shooting frequency, then compare that total with USB power. Your choice affects ongoing costs for you, not just the checkout price.
Tripod Load Capacity
When you raise a ring light to eye level, its weight and leverage can make a light-duty tripod wobble or sag. Check the published payload first. Add the ring light, phone or camera, and clamps or holders; compare the total with the tripod’s maximum, leaving headroom for tipping forces when you aim.
A heavier kit, such as the UBeesize 10 with Tripod, needs more support than clip-on or tabletop lights. Choose a sturdy, high-capacity tripod if you’ll reposition it often. At shooting height, it keeps the ring centered at eye level or your face’s upper third.
- Low capacity can let tripod legs or columns flex.
- Wobble or sag shifts the beam, changing facial brightness.
- A tripod holds your angle steady for even, shadow-minimized video.
Color Temperature Controls
With a tripod-mounted ring light, adjustable color temperature helps you match the room’s lighting and keep skin tones natural on camera.
Bi-color controls give you a Kelvin range, shifting from warm, flattering light to cooler daylight that reveals crisp detail. Match nearby lamps or window light; mixed sources can cast orange and blue across your face.
Use these controls to keep each setup consistent:
- A 3200K–5600K range covers warm interiors through daylight.
- Selectable presets may include 2800K, 4500K, or 6500K.
- Filter-based options work, but require more handling than bi-color controls.
Brightness matters, too: dim the light to prevent overexposure while preserving your chosen white balance. A digital readout makes adjustments repeatable.
If you film in multiple rooms, prioritize adjustable Kelvin settings and readouts or presets; fixed warm LEDs can shift color between scenes.
Conclusion
You don’t need a ring light with every tripod. Add one when your face looks dim, shadows distract, or your eyes need clear catchlights on camera. Position the light close enough for soft, even coverage, then check phone-mount clearance, stand stability, and load capacity.
For calls, a desk clamp saves floor space; for flexible setups, choose a floor stand. Before buying, compare color controls and battery costs. Test the setup on camera: if your image looks balanced, you’re ready.