Types of Camera Slider Shots: Reveals, Parallax, Push-Ins and More
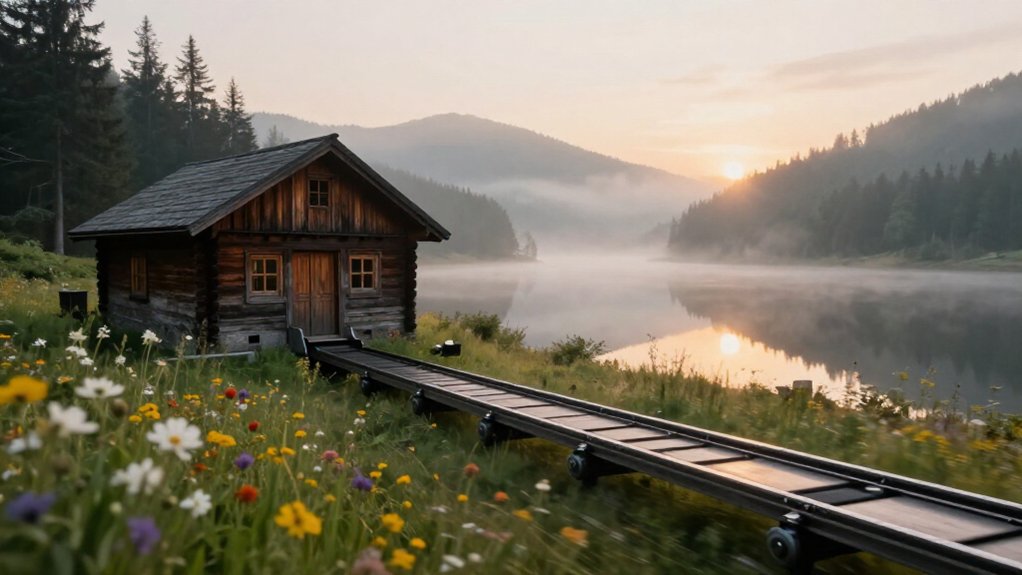
A camera slider lets you create reveals, where a foreground object clears the subject; parallax, where travel and counter-panning keep your subject anchored as the background shifts; and push-ins that move closer without changing your angle.
You can also combine a diagonal slide with depth change, or track past a product for emphasis. In tight spaces, use short travel, mark repeatable endpoints, and keep your horizon level.
Next, you’ll see how to plan each move.
Foreground Reveals Build Depth
Place a plant, table edge, or product accessory close to the lens, then start with it partly obscuring the subject. As you slide the camera a few centimeters, the near object shifts rapidly across the frame while the subject and background move less. This foreground parallax creates a distinct depth reveal: the subject emerges from behind the obstruction, and the scene appears to open.
Keep the travel slow and even, particularly in interviews and product shots, so the foreground doesn’t overpower the frame. For a product reveal, position the item slightly off-center; this lets the background shift behind it while the near layer separates clearly. Mark a repeatable A-to-B route from overlap to clear, and preserve matching camera height and angle at both endpoints.
Slider Shot Movement Patterns
Once a foreground reveal establishes depth, vary the slider’s path to shape how the scene unfolds. Match movement to the visual effect you want:
| Pattern | Camera path | Visual effect |
|---|---|---|
| Reveal | Slide A to B steadily | New scene areas enter frame |
| Parallax | Slide, pan oppositely | Subject stays anchored; background shifts |
| Push-in/pull-out | Move camera forward or back | Perceived distance changes |
| Product anchor | Travel slowly laterally | Off-center product dominates shifting background |
| Interview depth | Short, timed lateral travel | Adds dimension without distracting from faces or gestures |
For products, keep the move slow so details remain dominant. In interviews, limit travel and hold timing steady; subtle shifts add depth without pulling attention from faces or gestures.
Move forward or backward when you need to change perceived distance. For a reveal, maintain consistent speed along the straight A-to-B path. These patterns let you control what shifts, what stays fixed, and how viewers read space.
Diagonal Slider Moves
With a diagonal slider move, combine lateral travel and subtle depth change to build parallax; a wider lens and close foreground layers intensify the shift. Start slightly off-center, then keep your A-to-B path and speed consistent as you reveal the background.
For product shots, end with the key detail centered and hold briefly.
Creating Diagonal Motion
For diagonal slider motion, angle the track so the camera moves across the scene and slightly toward or away from the subject, creating a combined slide and push or pull. Keep your head level to preserve a clean horizon and perspective. This path shifts foreground and background positions faster than a lateral move, strengthening parallax.
Mark A and B endpoints, then travel between them at a consistent speed. For a controlled product or detail shot, move slowly rather than adding energy. To build a stronger reveal, place a foreground element about 0.5–2 feet (15–60 cm) from the lens; its movement across the frame will separate it from the background.
Add a counter-pan to keep your subject framed as the background slides behind it.
Choosing Your Angle
Angle the slider so the camera travels across the scene while moving slightly toward or away from the subject, adding natural perspective change to the reveal. Keep the subject visually anchored in your frame as the background shifts behind it; this contrast makes the diagonal move feel three-dimensional rather than like a straight lateral slide.
Before filming, mark a repeatable A-to-B track and align the camera’s framing at both endpoints. A consistent path maintains uniform parallax and prevents the reveal from drifting.
Then select a focal length to shape depth: a wider lens makes parallax more visible, while a longer lens compresses the scene and softens the shift. Check the angle through the viewfinder, keeping the subject’s position steady while the background’s displacement remains clear.
Revealing Foreground Layers
To reveal foreground layers, place a nearby object between the lens and your subject, then slide diagonally so it crosses the frame at a different angle than a straight lateral move. At the A point, let the object partially block your subject. End at B when the foreground clears enough to expose the subject cleanly; the change should read as a reveal, not a vague drift.
Keep the object close to the lens—about 0.3–1 m when possible—so a short diagonal travel produces a pronounced crossing. Hold a controlled, steady speed: move more slowly for product or detail shots, and go faster only when you want energy. Choose a wider focal length, such as 24–35 mm on full-frame, to make the foreground shift more visible.
Frame the subject’s destination before moving, and check that the object exits the intended area without obscuring key details. Avoid abrupt starts or stops that distract from your main subject.
Building Parallax Depth
As the camera slides diagonally, pan against its travel to keep the subject nearly centered while the background shifts behind it. That counter pan holds your subject as the visual anchor, while foreground and distant layers shift at different rates. A wider lens or closer camera position exaggerates the effect, so even a short diagonal track creates pronounced separation.
Place a foreground object close to the lens, perhaps 0.5 to 1 meter away, and let it cross the frame during the move. Keep pan adjustments subtle enough that your subject remains nearly stationary; the foreground’s faster apparent motion contrasts with the slower background. Define an A-to-B diagonal path and compose the endpoint so the background alignment feels intentional. This separation makes depth readable.
Controlling Speed and Direction
A controlled diagonal slider move starts with a clear A-to-B path and a consistent travel time across the full distance. Program the same duration for every take, or practice until your cadence stays repeatable.
Split the move into a lateral slide and, if needed, a slight pan. This lets you hold the subject at center or shape a reveal. Slower travel suits product details and interviews, where subtle depth supports attention.
Choose a faster pace only when you want energy, urgency, or a stronger reveal.
For more parallax, use a wider, closer setup: bring a foreground element near the lens, then adjust framing as you slide to keep the subject anchored. Focal length changes the effect. A wide view makes parallax and direction changes more apparent; a longer lens compresses the background, so the same diagonal feels tighter and less expansive.
Planning Start and End Points
Once you’ve set the move’s speed and direction, mark its start and end positions on the ground. Mark A and B to define both the lateral shift and the slight change in distance; this keeps the diagonal path intentional.
Position your subject slightly off-center at A, then check the background separation at B. Choose a travel direction that supports the reveal.
Keep your camera aim consistent as you move, so foreground and background shift in parallax without requiring a dramatic rotation. Set a repeatable path length and use the same travel distance each take; consistent displacement preserves the perceived perspective change.
Before loading the camera, rehearse the route with the camera off or at low load. Verify the lens stays aligned with your subject at both marks.
Best Shots for Tight Spaces
In tight rooms, use a 50–120 cm slider span for compact lateral reveals, starting slightly off-center and moving slowly to shift the background behind your subject. For foreground parallax, slide one way while panning the other; for controlled push-ins, move the camera just enough to change perspective without destabilizing the framing.
In interviews, keep lateral travel subtle so you add depth without distracting your subject.
Short-Rail Slides
When a longer track would block movement, a short-rail slide, typically 48–120 cm of travel, lets you create a controlled lateral reveal or parallax in a confined space.
For product or food setups, place your subject slightly off-center, then slide far enough to shift the background behind it. In a tight room, move laterally while panning the camera in the opposite direction; this keeps your subject sharp and separates foreground from background to build depth.
For detail shots, use a slow, consistent push-in or short dolly-in, avoiding the abrupt perspective change a larger indoor move can produce. Mark clear A-to-B endpoints: define the opening and stopping frames before rolling. That discipline makes each move intentional and repeatable in a hallway, studio, or interview space.
Compact Lateral Reveals
For a compact lateral reveal, mount the camera on a short slider and limit travel to about 10–30 cm, even if the rail allows more. Keep your subject as the visual anchor, then move perpendicular to it at a smooth, constant speed. Mark repeatable A and B positions before the take; this keeps your framing consistent and prevents jittery micro-changes.
In a tight product setup, place the subject slightly off-center. As you slide, the background shifts behind it, adding depth without requiring a wide camera path. Choose a slow pace—about 0.05–0.15 m/s—when room is limited, and make the short move deliberate rather than abrupt. End on a clean stop at the moment the scene feels complete; that controlled landing gives the reveal a precise finish. A 48- or 120-cm-class slider can provide the rail, but you’ll need only a small, repeatable section of its travel during each take.
Foreground Parallax
A short lateral reveal can gain more depth through foreground parallax: slide the camera sideways while keeping your subject framed, and nearby objects will shift faster across the image than the background. In a tight space, a compact 48- or 120-centimeter slider gives you enough travel to make that difference visible without a long track. Place a hand prop, plant, or product edge close to the lens; keep your subject steady as a mid-frame anchor.
Choose a short, slow A-to-B move to reveal surface texture cleanly, and keep its pace even so the layered motion feels deliberate, not jittery. As you slide one way, pan slightly the other to hold the subject clear while the foreground sweeps across the frame. The nearby element supplies the strongest shift; the distant background moves less, defining space around your subject. Check framing at both endpoints, since a foreground edge can leave frame and alter your composition more than expected visibly.
Controlled Push-Ins
In a tight space, a controlled push-in moves the camera closer along a straight A-to-B slider path without requiring major repositioning. This lets you approach your subject while keeping framing and background separation consistent. Begin with the subject slightly off-center, then travel at a slow, predictable speed so labels, jewelry, or architectural edges stay readable as they enlarge.
Place a foreground element close to the lens to strengthen the reveal: even a small change in distance can create pronounced motion in a cramped room. Choose a mid-wide lens for tight interiors to preserve parallax and avoid the compressed look of a longer focal length when you can’t back up. Stop at a planned key moment, using a preset or repeatable travel distance. Your subject comes alive without drawing attention to the slider.
Choosing a Slider Path for Reveals
To make a reveal feel intentional, start with a complete composition and place the subject slightly off-center so the background emerges as the camera slides. Define a repeatable A-to-B path, marking a clear start frame and end frame. Keep the slider on a straight lateral line; a 48- or 120-centimeter track lets you control how quickly new information enters the frame.
Plan the travel distance so the reveal lands when you want viewers to notice the change. For product details, move slowly to give the new feature time to register. Add a foreground element close to the lens to strengthen parallax: even short travel can create a dramatic shift between foreground and background. Choose direction to suit the story. Slide sideways for a clean reveal, or preserve subject framing while foreground elements shift.
Locking Slider Tripod Feet
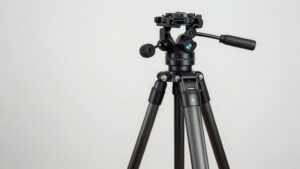
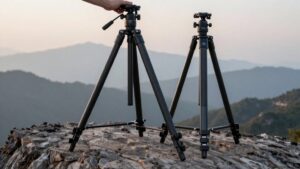
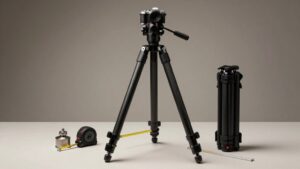
Before recording, lock the slider’s tripod feet to keep the rig from creeping during lateral travel. After you level the rig, tighten each leg clamp and firmly secure every foot before moving the camera. A loose contact point can shift under carriage motion, changing the rail’s position and disturbing parallax between foreground and background.
On compact rails, even a small shift can alter a controlled A-to-B distance of about 47–48 cm. Lock the feet consistently so your start and stop frames land in the same place, reducing micro-jitters in interviews and product reveals. Check the locks again if you change ground conditions or reposition the tripod. Then gently push the assembled slider by hand. If the feet move, stop and relock before you record.
Keeping Horizon Lines Level
Across a slider move, a level horizon depends on keeping the camera’s roll and pitch steady. Lock the camera into a stable mount, then check the tripod head’s bubble level and confirm the slider carriage sits level, too. Set your composition at position A, with the horizon aligned where you want it.
Move to position B and check again; twisted rails or uneven travel can shift the line across the frame. For lateral moves and parallax shots, use gimbal or slider settings that preserve roll and pitch, since slight tilt makes the horizon walk. Keep the tripod and slider on firm, level ground, adding shims where needed. If your camera offers electronic horizon leveling, test it first: stabilization can crop the frame or introduce distracting micro-jitters.
Macro Product Slider Shots
With the horizon level, a macro product slider shot can use a lateral move of just a few centimeters to reveal depth. Keep the product as your visual anchor while foreground detail shifts against the background, creating clear parallax without changing the product’s orientation.
Place it slightly off-center along the slider path so textures and edges gain dimension.
For a controlled result, refine four variables:
- Move slowly and consistently; fast travel can blur fine textures or make micro-scratches appear shaky.
- Start wider and closer when possible; wider framing increases perceived parallax during the lateral slide.
- Mark repeatable A-to-B start and end points to match takes.
- Keep framing and focus steady, then capture alternate macro angles along the same path for comparisons in your edit.
Conclusion
Choose the move that serves the frame: a foreground reveal adds depth, a lateral pass builds parallax, and a push-in directs attention. Map your path before you roll, especially in tight spaces or near macro subjects.
Lock the tripod feet, level the horizon, and watch how each layer shifts across the image. When you match movement to subject scale, your slider shots feel cinematic.