Tripod Parts Names Glossary: Every Component Explained
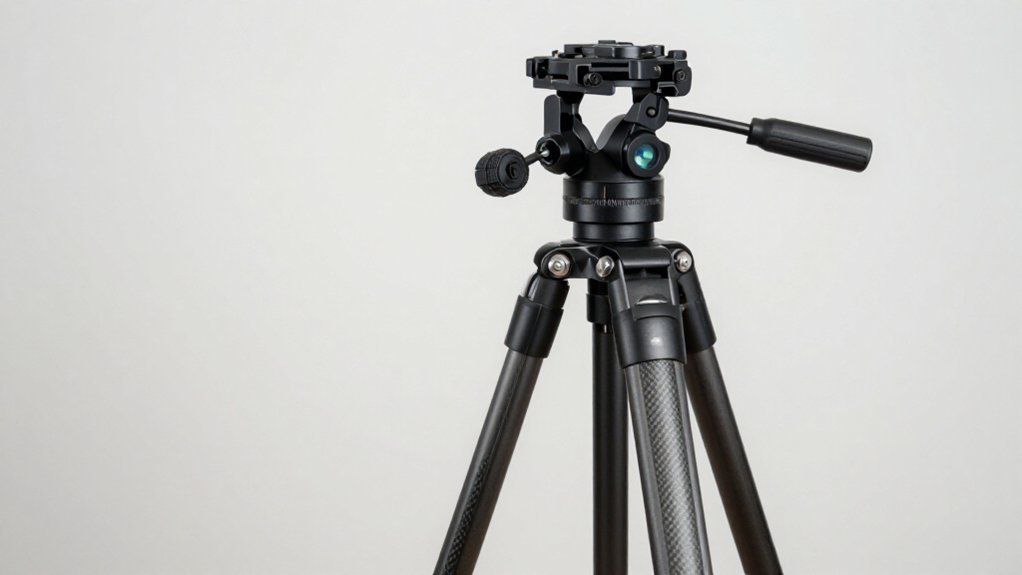
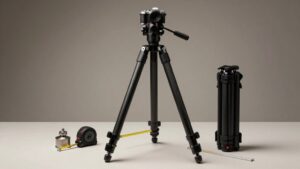
Use this tripod-parts glossary to identify components before you shoot. The legs support your camera, while locks secure telescoping sections; extend fewer sections for better stability.
The chassis joins the legs, and the head controls aiming through pan, tilt, drag, and axis locks.
A mounting plate screws to your camera and seats in the quick-release clamp. Check the spirit level and matching thread sizes, usually 1/4-20 or 3/8-16.
You’ll see how setup choices affect stability.
Using the Glossary in the Field
When you set up in the field, use the glossary to identify the tripod’s three main sections: the head, which controls aiming; the body or chassis, which serves as the mounting hub; and the feet or leg tips, which contact the ground. Match glossary terms to visible parts before you shoot.
Distinguish fluid pan-and-tilt controls from ball or pistol-style heads. Fluid heads support smooth motion; ball and pistol-style heads let you reposition quickly. Set drag to control resistance and keep movement deliberate.
Learn the quick-release plate and camera screw as separate parts. Seat the plate firmly, then tighten the screw to create a consistent camera connection. Before each setup, inspect both interfaces and confirm that the camera won’t shift or detach during normal use.
Leg Locks and Center Columns
After identifying the tripod’s main parts, check the leg locks: these levers or twist collars secure the telescoping sections and prevent them from shifting under load. Tighten each lock fully; extra leg sections generally reduce stability, so fewer extended sections often hold steadier.
The center column raises your camera without extending the legs, but raising it lifts the center of gravity and reduces stability. A removable or reversible column enables low angles, though it sacrifices rigidity.
| Feature | Effect | Use |
|---|---|---|
| Leg locks | Secure sections | Tighten fully |
| Fewer sections | Greater steadiness | Limit extension |
| Standard column | Lower profile | Prefer for rigidity |
| Geared column | Fine height control | Adds weight |
Keep the camera near the chassis when stability matters. A geared design helps with fine adjustments but adds weight overall.
Tripod Head Components
Your camera mounts to the head through a mounting plate secured by a quick-release clamp, which lets you attach or remove it quickly. Pan and tilt locks hold each axis in position between adjustments or takes.
On a ball head, a lock clamps the ball joint to secure your chosen angle.
Mounting Plate
On top of the tripod head, the mounting plate connects your camera to the head’s clamp. You fasten the plate to your camera with its mounting screw, creating the interface between camera and tripod.
Many modern heads use Arca-Swiss-compatible plates, a widely adopted format supported by multiple major camera brands. That standard can simplify cross-compatibility, but it doesn’t make every plate interchangeable. Plate dimensions and profiles vary, so check the requirements for your specific head and use the correct plate, bracket, or collar.
A properly matched component helps keep your camera seated securely and limits unwanted movement during use. On some video heads, the mounting platform works with additional controls and locks; plate compatibility so affects how reliably you can reposition the camera consistently.
Quick-Release Clamp
A quick-release clamp (QR clamp) secures a compatible plate to the tripod head, letting you attach or remove your camera quickly. It locks the plate through a lever or knob, which applies pressure to hold your camera firmly. When you release the lever, the clamp disengages the plate, allowing a fast camera swap without removing the clamp from the head.
Many current systems use Arca-Swiss-style plates, but the standard doesn’t guarantee fit: clamp geometry and plate shape determine compatibility. Check the clamp against your head, plate, and any bracket or collar variation before mounting. A correctly matched pair locks rigidly, helping your camera return to a repeatable position and preserving consistent framing between takes. Verify full engagement before you begin shooting with your camera.
Pan Lock
After securing a camera with the quick-release clamp, use the pan lock to fix the tripod head’s left-right rotation and prevent drift during a static shot. The control holds the pan axis rigidly, keeping your composition steady between takes and supporting repeatable framing. Tighten it after you position the head when you need a fixed view or a critical exposure; this reduces unintended movement from handling or vibration.
On a fluid head, release the lock before making a smooth horizontal pan, then engage it again to secure the frame. Its form varies by head design: you may turn a knob, lever, or other dedicated control. It stops unwanted left-right rotation when you need the camera to stay pointed in one direction during exposure.
Tilt Lock
The tilt lock secures a tripod head’s up-and-down angle, keeping the camera from drifting during a take. You loosen it to aim the camera vertically, then tighten it once you’ve composed the frame. This hard hold is distinct from tilt drag: drag adds friction or fluid resistance to control how smoothly the head moves, while the lock prevents movement after positioning.
On many heads, you can set the desired tilt, engage the lock, and fine-tune with fluid movement before fully securing the head. Some fluid or video heads provide separate locking nuts for side tilt and overall vertical tilt; the latter can preserve repeatable vertical positions. Before an exposure, retighten the tilt lock, especially for static shots, zooms, long exposures, or dialogue setups. Check that the camera stays level at your chosen angle.
Ball Joint
With a ball-joint head, one ball inside the casing lets you rotate and aim the camera quickly in any direction. The ball, usually made of metal or high-quality plastic, sits in a socket connected to the tripod platform. You can loosen the head, reposition your camera across a 360-degree range, then fully tighten the lock to clamp the ball and hold your selected pan and tilt angles firmly between takes.
This direct movement makes a ball head faster to reframe than a fluid head, but smooth motion depends more on your handling and feel. Ball heads suit still photography and general-purpose shooting because they’re compact and quick to operate. For very heavy telephoto setups, however, a gimbal head may balance the load more effectively.
Friction Control
Unlike a ball head’s free movement, friction control sets how much resistance a tripod head applies as you pan or tilt.
Friction control uses fluid viscosity or surface drag to regulate movement. On video and pan-tilt heads, you can adjust drag separately for pan and tilt. Increase resistance when you need slow, controlled motion or want to prevent the camera from drifting after you release it.
Higher drag steadies framing during shots but requires more force to reposition the camera. Reduce drag when you need faster movement; however, precise framing may become harder if the head slides too freely.
First unfasten the head before you move it, then set drag to suit the shot. Lock the head afterward to keep framing unchanged between takes.
Pan Handle
A pan handle lets you rotate the tripod head left or right in a smooth, repeatable motion. You grip it to control panning without shifting the tripod’s position. On many three-way pan/tilt heads, the handle operates the horizontal axis independently of tilt and, sometimes, another axis. This separation lets you refine framing while keeping other movements fixed.
Video-style fluid heads often pair the handle with adjustable drag resistance. Set the drag to regulate how quickly the head accelerates and stops, helping you maintain consistent movement. Before panning, release or set the head’s locks for movement; lock the axis when you need a shot. During setup, position the handle where your hand can reach it comfortably.
Your grip affects how accurately and consistently you execute each pan.
Leveling Bubble
Check the leveling bubble, or spirit level, built into the tripod head to center and level the head bowl. The bubble or vial sits where you’ll see it clearly during setup, so you can level faster and more accurately than by eye. A centered bubble indicates that the bowl is level; adjust the tripod head until it aligns. This helps keep your camera horizontal or at its intended tilt.
Some fluid or video heads place the bubble near the pan-and-tilt controls, letting you verify level before setting pan or tilt drag. Proper leveling matters because even small horizon errors stand out in still photos, architectural shots, and pan-and-tilt work where you need a consistent horizon.
After you adjust tripod height or extend the center column, recheck the bubble: raising the camera can subtly shift level. If the bubble remains off-center, correct the support before you lock the head or begin a move.
1/4-Inch vs 3/8-Inch Threads
You’ll find 1/4-inch threads on most cameras and small accessories, while 3/8-inch threads are common on tripod heads and heavier gear. Check that your head’s stud and camera plate match; the wrong size can leave the connection loose.
If they differ, use a compatible adapter or swap the plate insert.
Thread Size Basics
Match the camera’s mounting insert to the tripod head’s receiving thread: both are commonly 1/4-inch UNC or 3/8-inch UNC. Match size and pitch: the screw and socket must be compatible. A 3/8-inch connection typically supports heavier photo or video heads and payloads.
Don’t assume the camera and head match: many cameras have a 1/4-inch underside insert even when the head provides a 3/8-inch screw. Check head or platform markings before assembly. If sizes differ, use a suitable adapter bushing when permitted; never force a mismatched screw, which can damage threads or leave the camera insecure.
If markings aren’t clear, measure with calipers and confirm thread pitch rather than guessing. Both use Unified National Coarse (UNC) threads. An adapter bridges the standards when properly fitted.
1/4-Inch Threads
After confirming the screw and socket are compatible, compare the two common camera-mount sizes: 1/4-inch and 3/8-inch. A 1/4-inch thread has a major diameter of one-quarter inch and typically follows the 1/4-20 standard, meaning 20 threads per inch. This size appears on many consumer cameras and small accessories, including basic tripod heads and some quick-release plates.
Check the camera’s socket and the mounting screw before attaching a plate or head; matching sizes let the connection seat correctly. A mismatch can damage threads or keep a quick-release plate or head from locking securely. If your components use different sizes, select a thread adapter rated for the intended hardware instead of forcing the screw. Confirm the adapter’s male and female thread sizes before mounting your equipment.
3/8-Inch Threads
A 3/8-inch tripod thread has a major diameter of about 0.375 inches and commonly secures a tripod head to its support platform.
This size identifies the mounting bolt that joins the head and platform; it doesn’t describe a camera’s own threaded socket. In “-inch vs 3/8-inch threads,” the distinction is between a general inch-based specification and the specific 3/8-inch diameter standard.
You may see this larger mounting screw on many photo tripods, while 1/4-inch screws are another common size. Check the head or platform specification before mounting your equipment, and confirm that the screw and threaded opening match exactly. A mismatch can leave the head loose or damage the threads if you tighten it. Thread diameter alone also doesn’t tell you the thread pitch.
Choosing an Adapter
When a tripod head and camera use different threads, choose an adapter that converts in the correct direction: for example, 1/4″-20 male to 3/8″-16 female, or the reverse. Camera tripods and heads typically use either 1/4″-20 or 3/8″-16 threads; an adapter bridges the mismatch. 3/8″-16 fittings are common on larger video heads and heavier setups, while 1/4″-20 threads suit small cameras and many still-photo quick-release plates.
Check which component has the male or female thread; reversing the ends prevents proper seating. Match both thread size and pitch, since diameter alone doesn’t confirm compatibility. Start threading by hand to avoid cross-threading and damaging the mount.
With an Arca-Swiss-style plate, the mismatch usually concerns the mounting screw joining camera or plate to head, not the plate-to-plate interface. If resistance appears, stop, remove the adapter, and verify the specifications before tightening with a tool or mounting your camera.
Choosing a Tripod for Macro Photography
For macro photography, choose a tripod that keeps the camera low and resists small shifts, since magnification makes vibration and movement especially visible. Look for a reversible or low-position center column, so you can bring the camera near the ground without extending the legs. Raising the column reduces stability.
Choose sturdy legs with good locks; three-section legs generally flex less than four- or five-section designs. Stable joints help you preserve fine framing. Select a ball head for quick aiming, or a fluid/video head when you need micro-pan and tilt adjustments. Check that the head accepts your quick-release plate, an Arca-Swiss type, for fast setup changes. Match the feet to your location: rubber suits surfaces, while spikes or claws provide consistent footing on uneven ground.
Preventing Tripod Tip-Overs
Preventing tripod tip-overs starts with sturdy legs and joints that don’t shift under load; leg stability matters more than head design. You should choose a tripod with robust leg tubes and secure joints; thin members flex, while loose connections let the frame move under camera load. Prefer three-section legs when stability matters, since each additional joint creates another potential flex point.
When you extend the legs, spread them evenly and keep the camera low. Avoid relying on a raised center column: extending it lifts the center of gravity and increases leverage, making a small disturbance more likely to overturn the setup. Lock every leg and height adjustment fully before shooting, then check for movement between takes. A slight shift can grow into a fall.
Rubber Feet and Spikes
Rubber feet grip smooth surfaces such as concrete, wood, and indoor flooring, while metal spikes bite into soft or uneven ground like dirt and grass. Choose interchangeable tips to match your shooting surface; you can switch from rubber blocks to spikes without changing the head or center-column setup.
- On concrete, wood, or indoor floors, rubber feet provide grip and help prevent slipping.
- On dirt or grass, spikes bite into soft ground and stabilize legs.
- Spike points reduce tripod skate through increased point contact and friction.
- Avoid spikes on finished floors; they can damage surfaces and create safety risks.
- If traction fails, your locked legs can still tip; match feet to terrain.
Check each foot before setup, and confirm it sits firmly on the ground.
Conclusion
Use this glossary to identify each tripod component and understand how it affects setup and stability. Check leg locks, column travel, head controls, and mounting threads before you buy or adjust your gear.
For macro work, prioritize precise positioning and minimal vibration. On uneven ground, secure the legs and choose rubber feet or spikes to match the surface. These checks help you prevent tip-overs and keep your camera stable when conditions change.