C-Stand vs Light Stand: Which Stand Does Your Studio Actually Need?
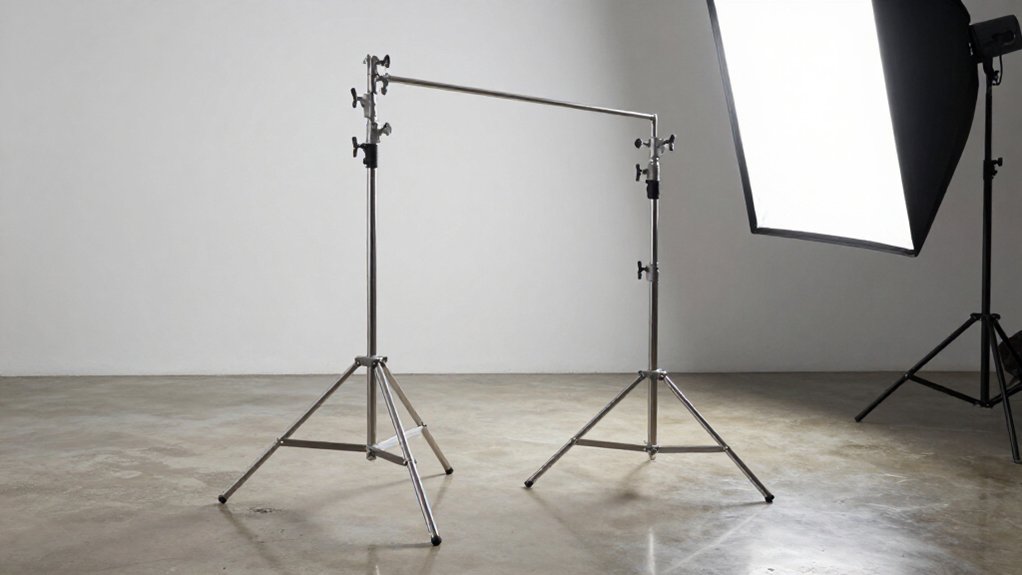
Choose a light stand when you need quick setup, compact storage, and transport; choose a C-stand for stable, precise rigging of flags, scrims, or overhead lights.
C-stands use heavier steel columns, grip heads, and arms, handling off-axis loads better but taking more space, setup time, and budget.
Lock every riser and grip, balance loads, and add suitable sandbags to reduce tipping risk.
Your workflow and space deserve closer comparison.
Storage and Transport Needs
The weight difference becomes obvious when it’s time to pack up: C-stands are often several times heavier than regular light stands, so they’re better suited to studio use than frequent location transport. If you move gear between locations, compact light stands fold down and simplify packing; C-stands demand more vehicle space and careful lifting. Plan storage before adding a second or third C-stand: their bulk can crowd a small studio.
Nesting leg designs reduce floor clutter, while locking-wheel bases help you reposition stands indoors; a wheel kit may add about 13 pounds.
| Stand | Storage and movement |
|---|---|
| Light stand | Folds compactly; easier to stack and carry between rooms. |
| C-stand | Reserve floor space; use wheels for controlled studio moves. |
Lock wheels before loading or adjusting equipment.
Construction and Component Differences
Beyond storage demands, construction determines how each stand handles equipment: C-stands use sturdy steel frames, telescoping columns, and locking tension systems, while lighter aluminum stands rely on simpler folding adjustments. For your setup, that difference affects how you attach and position modifiers. A C-stand gives you a grip head, knuckle, and arm, allowing you to mount flags, reflectors, or other accessories at varied angles.
Check each connection is seated and tightened before positioning gear overhead. A lightstand usually offers fewer accessory points and focuses on holding a light or modifier in position. Its folding sections and adjustment locks keep setup straightforward but give you fewer mounting options. C-stands use leg geometry suited to angled configurations; inspect hinges, locks, and contact points during setup.
Load Capacity and Stability
C-stands generally provide greater stability and load capacity than typical light stands, especially when supporting a boom arm or a heavy fixture with a large modifier. Their heavier construction and tension-mount pole-and-knuckle system handle off-axis loads when you use the arm and grip hardware correctly.
With a boom, balance the arm and add an appropriate counterweight or sandbag; an under-counterweighted rig can tip. Light stands may be borderline with heavy fixtures and large modifiers, and can become top-heavy as you reposition equipment.
Before raising either stand, check the rated load, account for the modifier’s size and height, and place sandbags securely to reduce tipping risk. If your setup exceeds safe capacity, choose a C-stand; don’t rely on a light stand that’s only barely adequate.
Locking Mechanism Differences
When you position a boom or overhead fixture, the locking system matters as much as the stand’s rated capacity. A light stand typically uses knobs or collars to clamp telescoping tubes for mostly vertical loading, while a C-stand uses grip heads and tightening levers to secure arms and pivots.
- On a light stand, lock the risers and keep the load aligned above the base.
- A C-stand’s knuckles let you clamp an arm at angles; tighten each joint to resist movement under an off-axis load.
- Don’t treat a locking screw as a stop; use the clamp, then verify the head and arm remain fixed before adding gear.
- If you’ll boom overhead, choose the C-stand for multi-joint control; a light stand generally locks height, not precise arm placement.
Uneven-Ground Setup Considerations
Locking a stand securely doesn’t help if its base rocks on uneven ground.
A C-stand’s leg geometry can help you keep the riser vertical on a slope, ramp, or stair. Models with adjustable legs let you set each foot at a height; the LS.3 Master Stand is one example.
That matters when you mount a light or modifier on a boom, where a tilted or shifting base can create a hazard. A light stand’s tripod base may not sit squarely on steps or uneven flooring, so don’t assume its feet are stable just because they touch the surface. Choose a leveling-leg C-stand for work on imperfect ground. Position its legs securely, then add sandbags to improve stability. Check the stand before loading it.
Solo-Shooter Setup Speed
For quick locations or frequent scene changes, a traditional light stand’s lighter, foldable design usually speeds solo setup, especially with moderate gear such as a strobe and medium softbox. You’ll spend less time moving hardware and more time confirming output, stand footprint, and cable routing.
- Choose a light stand when you need rapid repositioning and your modifier stays within its rated load.
- Pack it collapsed; extend sections only as far as framing requires, then secure each lock.
- Pick a C-stand when an arm must hold a precise, repeatable position; its grip system can reduce readjustments.
- Balance and clamp it correctly, adding counterweight when needed, so the setup stays stable between takes.
For heavier or position-critical gear, that setup time can prevent leveling and adjustments.
Overhead Rigging Safety
Overhead rigging demands a deliberate balance: a C-stand can tip or drop its boom if the base, arm clamp, or counterweight is wrong. Set the legs for stability, then place the load so its weight tightens the grip head instead of loosening it. Clamp the arm at the proper point and add a counterweight to the boom tail; don’t trust a locking screw to prevent height changes.
A clamp-style counterweight gives you a more controlled balance than a bag, which can shift and complicate reliable loading. Keep people clear of the suspended load, and secure every component before positioning equipment overhead. If you leave the stand empty, cap exposed ends with tennis balls to protect eyes and reduce floor scuffs.
Check the base before loading carefully.
Setup Time and Workflow
For quick, simple setups, you’ll usually deploy a light stand faster; a C-stand takes more time to position and secure. With practice, you can speed up repeatable C-stand rigs by setting the legs first, then clamping and tightening the arm.
For complex overhead setups, a C-stand can reduce stand changes, but you’ll need to balance and sandbag the arm to prevent slips or tipping.
Setup Speed
When you’re moving between small setups, a regular light stand is usually faster to carry, deploy, and reposition because it’s lighter and folds more compactly. For quick still-life or table work, it gets you shooting sooner; repeated resets across locations can make that handling advantage decisive.
- Use a light stand when you need a single fixture and a fast move.
- Choose a C-stand when flags, scrims, or diffusion need exact, repeatable angles; its grip head and arm lock securely.
- For overhead or backlight placement, allow time to clamp the boom, add a counterweight, and check stability before raising it.
- That preparation can prevent repeated re-leveling, but never leave a loaded arm unsupported.
Match the stand to the task, then secure the load before you work.
Workflow Flexibility
Setup speed is only part of workflow flexibility: a light stand is usually quicker for simple raise-and-point setups, while a C-stand can save time on complex placements. You’ll find a traditional stand easier to move between changing shots, especially with a small or medium softbox, because it weighs less and gives you fewer mounting decisions.
C-stands demand more setup: clamp the boom correctly, balance the load, and tighten the grip head; don’t loosen it under load. But for flags, scrims, diffusion, backlights, or gobos, the grip-head system lets you lock repeatable angles, reducing readjustments.
With a counterweighted boom, you can hold a heavy head overhead and out of frame, avoiding retries and re-leveling. Use it when a rig beats repositioning; otherwise, choose portability.
Footprint in Tight Studios
In a tight studio, a C-stand’s wider base needs more clearance than a compact light stand, so position its legs to keep walkways clear. When working around corners or sharing floor space, check each stand’s footprint and keep loads out of traffic paths.
Choose only the height and boom reach you need, since an arm’s sweep can create additional hazards.
Stand Base Clearance
Although both stands can clear overhead space, a C-stand often needs less floor area because its staggered legs nest without tangling and keep the base closer to the pole. Judge clearance by leg sweep, not just the pole’s position: raised or repositioned legs can occupy the path you need.
- Check the fully assembled stand on your shooting floor; catalog dimensions won’t show usable clearance.
- Keep the C-stand’s feet clustered beneath the pole; many tripod bases splay wider.
- Leveling legs can stabilize a C-stand near obstacles without demanding extra base clearance.
- Include rollers or wheels in your footprint; they enlarge the base and affect stability.
Choose the configuration that keeps every leg clear, then secure the stand before loading the arm or raising equipment.
Working Around Corners
Around tight studio corners, a C-stand’s offset legs can nest closer to the pole than a light stand’s wide tripod base, reducing interference in narrow paths. Use the arms to reach a modifier or flag around an obstacle without pulling the base into the path. Near a wall or tight aisle, adjust the legs, including leveling legs on uneven ground, to position the head while limiting protrusion.
Clamp the arm so the light or tape stays close to the line you need; this can work better than angling a tripod stand and compromising stability. Because a C-stand is heavier and bulkier, map its leg and arm positions before loading it. Lock it securely; once the corner’s set, you can’t easily shift a C-stand three feet.
When several stands share a tight studio, C-stands’ low, medium, and high leg positions let you nest them closer together and keep more floor clear than wide tripod bases do.
A typical light stand’s spread legs can block walkways and create trip hazards. For overhead or angled work, keep a C-stand planted while its arm reaches around obstacles. Many models let you level individual legs on uneven floors or stairs without extra tripod clearance.
As your setup grows, assess:
- Map clear walking routes before placing stands.
- Nest C-stands where their legs won’t conflict.
- Keep arms and flags outside traffic paths.
- Check stability before raising gear.
This matters as you add stands.
Cost and Budget Considerations
Budgeting for stands means weighing upfront price against lifespan and the hardware each setup needs. C-stands cost more and weigh several times as much as common lightstands. Their durable construction can make them cheaper per year when you use them regularly over the long term.
Account for the full C-stand setup, not just the base: you may need a boom arm, grip head, and wheel kit. Add counterweights where the configuration requires them, and don’t cut safety hardware to meet a target price.
Basic lightstands are cheaper, and you can buy multiple sizes for varied setups.
If funds are limited, use a lightstand for small modifiers and short sessions; reserve C-stands for heavy booms or overhead loads. Consider secondhand C-stands from reputable brands to reduce costs.
Buy fewer C-stands, then add compatible accessories carefully as needs and budget allow.
Conclusion
Choose a stand by matching its strengths to your studio workflow. A C-stand gives you rugged support for overhead rigs, modifiers, and uneven floors, but its weight and setup time demand careful handling and storage. A light stand packs and deploys faster for routine fixtures, though you must respect its load limits and footprint.
Check every lock, secure each leg, and add appropriate counterweight before raising gear. If you’re unsure, choose the safer-rated option.