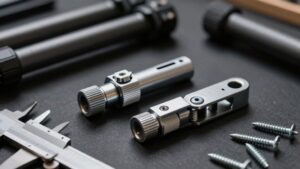
Carbon Fiber Tripod Maintenance: A Routine That Keeps Legs Smooth for Years
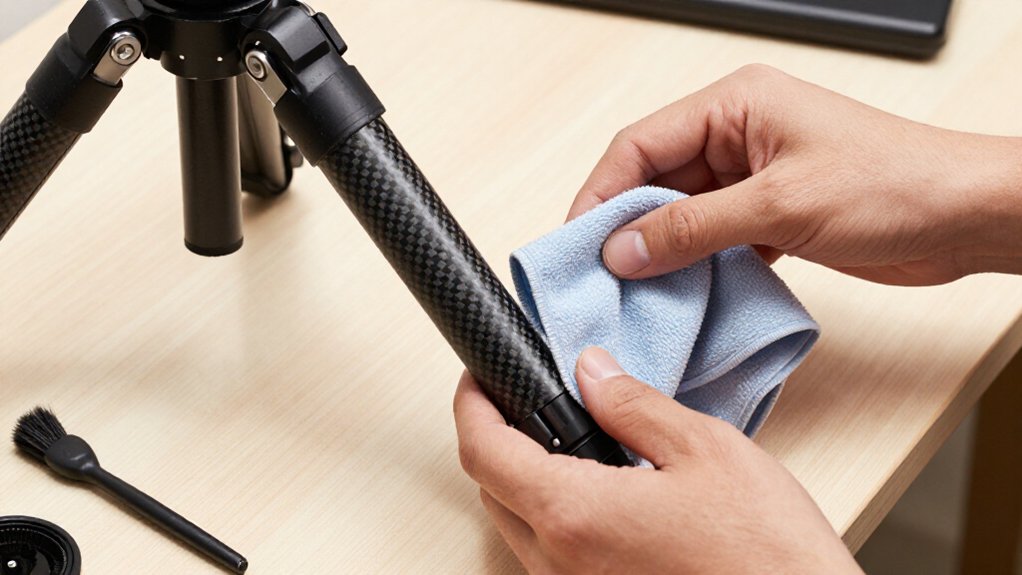
After each shoot, extend and collapse your tripod legs gently, then turn each twist lock to check for grit or sticking.
If a lock feels rough, don’t force it; clean it before use.
After sand, rinse locks with fresh water and a soft toothbrush; after saltwater, flush tubes and threads thoroughly.
Keep legs extended until every section is fully dry before storage.
The routine below adds practical checks for keeping every section moving smoothly year-round.
Leg-Twist Smoothness Check
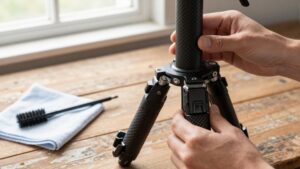
After each shoot, briefly extend and collapse the legs, gently rotating each twist lock to check for smooth movement. Each lock should move without grinding, sticking, or a gritty catch. Inspect exposed leg sections and joints near the locks for sand or grit, especially after dusty or beach conditions, since debris can travel inside when you collapse the legs.
If a lock sticks or grinds while locking, treat it as contamination in the threads or twist-lock mechanism and clean it before using the tripod. Don’t force a rough lock; grit between moving surfaces can accelerate wear. After wet or salt exposure, locks may feel smooth while dry yet turn gritty later. Rinse and flush, then dry the legs extended to prevent residue from affecting deployment.
Gather Cleaning Supplies
Before disassembling the tripod, gather two or three containers for leg parts, running fresh water, a towel for wet components, and manufacturer-approved waterproof grease for reassembly. Set up a clean, designated drying area, and work on one leg at a time so small internal pieces stay organized.
- Soft toothbrush: loosen fine grit from threaded ends without pushing it deeper into locking threads.
- Fresh water: rinse components clean; use warm water and mild dish soap for heavier grime.
- Containers: separate leg parts as you remove them, preventing mix-ups during teardown.
- Towel: place wet components on it, then let them dry thoroughly before reassembly.
- Grease: reserve approved waterproof product for reassembly; don’t substitute an unapproved lubricant.
Salt can persist after evaporation, so never rinse parts with seawater.
Monthly Carbon Fiber Leg Check
Set a monthly reminder to extend every carbon fiber leg and inspect the locking interfaces and exposed tubes for sand or grit. It can lodge between plastic parts and carbon fiber, making locks feel rough. As you remove and reinstall each twist lock, listen for grinding or feel for sticky movement; both suggest debris in threads or internal sleeves.
| Check | Sign | Response |
|---|---|---|
| Threads | Grinding or sticking | Note location |
| Gitzo sleeves | Cracks or anti-twist failure | Inspect before storage |
After reassembly, confirm smooth, lubricant-free thread engagement once parts are clean. If threads feel dry, apply only a very small amount of waterproof grease.
Persistent roughness or grit that careful rinsing of threaded ends won’t clear calls for a deeper monthly clean before wear worsens. Record affected legs and locks for future comparison.
Rinse Sand From Locks
After a sandy shoot, keep the legs extended, wipe off visible grit, then rinse the locks promptly with gently running fresh water. Use a soft toothbrush and flush again to clear hidden grit; avoid high pressure, which can drive particles deeper.
Dry the locks thoroughly before retracting the legs, so moisture and grit don’t form an abrasive paste.
Rinse Locks Promptly
Sand can jam leg-lock threads and make them rough to operate, so rinse them promptly after a dusty or gritty shoot.
Open each lock to expose its threaded end. Rinse the threads promptly, directing water rather than forcing debris deeper into the mechanism. If particles remain, lift them out with a soft toothbrush; don’t scrape carbon surfaces with a tool.
When contamination may have reached the tubes, rinse their length before collapsing the legs, or grit can be carried into the telescoping sections. Keep the legs extended while the lock area dries, so moisture doesn’t remain trapped and collect more dust. Don’t apply lubricant before cleaning: it can bind leftover grains into an abrasive paste that wears threads and makes locks harder to turn.
Use Fresh Water
Once you’ve cleared loose grit, flush the leg-lock threads with gently running fresh water before sand embeds in the locking interfaces.
After a sandy or dusty outing, rinse promptly, directing water across each threaded end. If you’ve used the tripod in fresh water without immersing it, a rinse will usually suffice; still check the interfaces, where sand often collects.
For a lock that feels gritty or sticks, use a soft toothbrush under the running water to loosen particles from the threads. Continue rinsing until the threads feel smooth. Clean the locks before retracting the legs, so loose sand doesn’t get carried inward. Then dry each leg piece thoroughly. Leaving the legs extended overnight helps moisture evaporate and prevents residue from creating roughness during future use.
Flush Hidden Grit
When grit reaches the leg locks, extend the legs, wipe loose particles from the exposed tubes, then flush the threads with gently running fresh water. If sand catches or a twist lock turns gritty, wet the threads again and rotate the lock to carry water through its engagement surfaces. Repeat until movement feels smooth, then dry the tube.
Where salt may be present, rinse the tube, not only its exterior; residue can dry inside threads. If fine grit remains, use a soft toothbrush on the threads. Rinse thoroughly afterward so you don’t drive abrasive particles deeper into the lock.
Leave the legs extended while they dry, and allow trapped water time to evaporate before collapsing them. Residual grit and moisture can make locks rough again faster.
Avoid High Pressure
After a sandy session, extend the legs and brush visible grit from the tubes and open threads before rinsing.
Use a soft toothbrush to clear sand from the twist-lock locking surfaces and male/female threads. Rinse with low pressure, directing water toward the threads and tube openings. Don’t use a high-pressure stream: it can force fine particles past seals and into moving parts, where they’re harder to remove.
Keep the flow gentle enough to lift loosened grit without driving it deeper into inner sleeves.
If a leg still feels gritty or stiff after rinsing, partially disassemble the lock and wash its interfaces. Sand left in the threads can become grinding paste as you lock and open the tripod repeatedly. Inspect each surface carefully.
Dry Locks Thoroughly
After a sandy shoot, extend the legs and wipe off visible grit with a clean microfiber cloth before collapsing them.
To keep abrasive particles out of telescopic sections and lock interfaces, fully unscrew each twist lock. Rinse its threaded end under gently running fresh water, directing flow through the threads to flush trapped sand.
If a lock feels gritty or sticky, use a soft toothbrush to scrub its threads and inner lock area until no gritty residue remains.
Separate components and leg sections, then let every part dry completely before reassembly or storage.
Don’t close a wet lock: trapped water can promote corrosion, mold, and unpleasant odors.
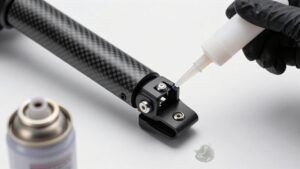
Once everything’s clean and dry, reassemble the locks. Apply only a very small amount of waterproof grease to the threads; too much can attract dirt and grit. Check lock movement before use.
After Saltwater Exposure
After saltwater exposure, rinse your tripod promptly with fresh water, focusing on threaded ends and joints. For immersion or heavy splash, disassemble and flush internal areas, then inspect threads and moving interfaces for salt deposits.
Keep the legs extended until fully dry before reassembly or lubrication.
Rinse With Fresh Water
If salt water reaches your tripod, rinse the tubes and leg assemblies promptly with fresh running water, flushing internal tube sections as well as the exterior. Evaporation leaves salt residue that can bind moving interfaces. Direct a gentle stream over every leg, then let fresh water pass through each tube section so hidden surfaces receive a rinse.
Give threaded lock areas extra attention; salt and grit collect in the threads and can make locks feel gritty or stiff. Then extend the legs fully and dry the tripod thoroughly before storing it. This helps prevent trapped moisture from causing mold, odors, or corrosion in metal components. Don’t add lubricant while salt or grit remains; the mixture can form an abrasive paste and worsen smooth operation.
Disassemble and Clean
Because dried salt crystals can abrade threads and internal locking surfaces, disassemble and clean the tripod as soon as possible after saltwater exposure, especially immersion. Work on one leg at a time. Fully unscrew the twist locks and pull out the lower leg section. Keep its internal plastic sleeves together in a container.
Rinse threaded ends and the full tube with gentle running water. Scrub threads with a soft toothbrush until they no longer feel gritty. Wash and rinse plastic pieces and twist locks, rotating internal sleeves under water until smooth and grit-free. Repeat for each leg.
Don’t apply grease over salt or grit; it can turn contaminants into abrasive paste that wears threads and locking surfaces and causes rough locking action over time.
Dry Before Reassembly
Once cleaning is complete, dry every component fully for at least 24 hours before reassembly; trapped saltwater can cause mold, bad odors, and internal corrosion even when the outside looks dry.
After saltwater exposure, extend the legs and rinse them with gently running fresh water. Flush threaded ends and internal sections so crystallized salt can’t bind the threads. Rotate internal sleeves under the rinse until they’re smooth and free of grit. Set components on towels or in containers; damp parts can transfer salt grit back into telescoping interfaces. Allow all pieces to dry before assembly. Refit only dry components, then apply a very small amount of waterproof grease to twist-lock threads. Don’t use oil, which attracts grit. Reassemble and test each lock for smooth operation.
No Moisture Inside Leg Sections
After rain, sea spray, or accidental wetting, fully extend the tripod so trapped water can evaporate from the leg interfaces. If you rinsed the tripod, salt water in particular, flush mud and rinse each section. Dry each leg section thoroughly, checking threaded ends and the interiors of telescopic tubes.
Use a soft toothbrush to loosen grit from threads, then keep drying until they feel smooth and dry.
Leave the legs extended so standing water can escape from between carbon fiber tubes and plastic sleeves. Don’t reassemble or pack the tripod for at least 24 hours after rinsing. This interval helps prevent mold, odors, and internal corrosion.
Before storage, confirm every section feels dry to the touch and moves smoothly. Dampness can dry into residue, making locks sticky or gritty.
Cracked Leg Clamp Housings
If you find a crack in a leg clamp housing, stop using the tripod immediately; the locking sleeve can shift or fail under load and may not hold the leg sections securely. Grit or salt in twist-lock threads can worsen damage.
Before reassembly, clean and inspect threads and internal plastic anti-twist guides. During teardown, unscrew the twist lock before removing lower legs. Keep white sleeves in a labeled container; check whether the housing or internal parts are cracked.
If an anti-twist sleeve or Gitzo component is broken, contact customer service for spare parts. Don’t rely on lubricant or adhesive alone. After repair, reassemble from the largest leg sections. Fit twist-lock threads onto the carbon-fiber leg first, confirm orientation, and test for tightening without grinding.
Preventing Clamp Over-Tightening
Tighten each clamp only until it holds the leg securely; extra force can grind grit into the threads and mating surfaces, making the lock sticky or gritty. Use the manufacturer’s specified feel: firm, not forced. If rigidity requires extra torque, clean the clamp threads instead of tightening harder.
- After sandy or dusty use, wipe exposed tubes and leg-lock threads before clamping.
- Remove particles so tightening won’t press grit into threads or mating surfaces.
- If locks feel dry or squeaky, clean them first; then apply a tiny amount of specified waterproof grease to threads.
- Don’t flood the mechanism; excess grease can attract debris.
- After cleaning, test smooth engagement without grinding before relying on the tripod; lubrication won’t repair damaged threads. Inspect the lock under load.
Note Cleaning Frequency Changes
Make a quick wipe-down of your tripod legs after each shoot, paying particular attention to the leg locks. This removes surface dust without a teardown. Change that schedule when conditions demand it.
After water or mud exposure, clean the legs thoroughly right away; grit and residue can otherwise enter the telescoping interfaces and wear them. At the beach or in salt water, rinse and flush more carefully, then dry each section so salt crystals don’t remain and make locks gritty. If a lock feels sticky or grinds, stop routine care and disassemble the leg for deep cleaning immediately. Don’t wait for service.
In city or indoor use, periodic maintenance and one annual deep clean may suffice. Increase cleaning frequency for travel, sand, or dust.
Conclusion
Keep your tripod legs clean, dry, and free of grit, and check that each section twists smoothly before use. Rinse locks after sand or saltwater exposure, then dry every section fully before collapsing the legs.
Inspect clamp housings for cracks, and tighten clamps only enough to hold securely. Adjust your cleaning schedule to match your conditions: dusty trails and coastal trips call for more frequent care. A few routine checks help your carbon fiber tripod stay reliable for years.