How to Choose a Tripod for a Spotting Scope: Height, Head and Stability
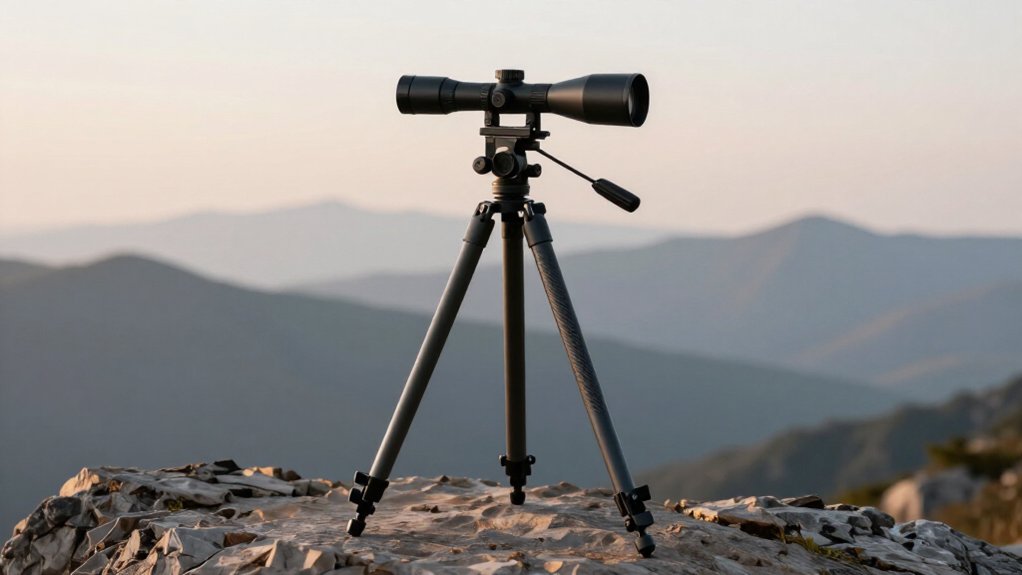
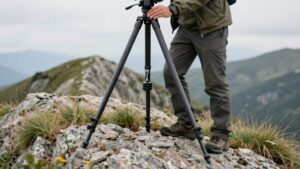
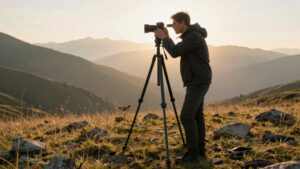
Choose a tripod whose legs reach your viewing height with the center column retracted; this keeps high-magnification views steadier. On slopes, prioritize independently adjustable legs over column extension, and use a leveling platform.
Match a rated fluid or pan head to your scope and scanning style, then secure a compatible quick-release plate without play. Carbon fiber saves weight, while aluminum can cost less. Compare system weight and height before choosing. More setup tips follow.
Spotter Tripod Stability
Spotting scopes need a steadier platform than hand-held binoculars because higher magnification makes small shakes obvious during long glassing sessions. A spotting scope magnifies vibration, so compare the tripod’s legs and head together. Weak legs or an under-rated head can spoil the view, even with a high-end scope.
Keep the setup’s working height as low as practical, and avoid extending the center column more than necessary; extra elevation makes vibration easier to trigger. Check the scope foot, mounting screw, commonly ¼-20, and quick-release plate for a tight, play-free connection. Any looseness can turn small movement into visible jitter.
Check load capacity: the tripod must support more than the combined weight of the head and scope, so it stays rigid in wind and on uneven ground.
Leg Length for Slope Use
On sloped ground, choose legs with enough adjustment range to keep the scope at a comfortable height without relying on the center column, which can add vibration when extended. Compare the tripod’s height with its center column retracted against your seated or standing eye level; prioritize the minimum leg extension that fits your posture.
On uneven slopes, independent leg adjustment gives you more control than equal-length sections, while a leveling center column or ground-spread feature can help you keep the scope level and comfortable. If you glass steep hillsides often, a 45-degree angled eyepiece may let you use shorter leg extensions for the same viewing position, improving stability.
When available, use the column’s leveling or anti-twist groove to limit rotation as you adjust legs.
Pan-Head Scanning Control
A pan head lets you sweep a ridgeline or basin with a twist-lock handle, then secure the scope at a chosen angle.
A pan head gives you repeatable pan-and-tilt placement across a wide view, more precise than a ball head for following movement. Its rigid lock can steady a heavier scope against wind and gear load, but it may feel less planted during scans: adjust carefully to limit drift. Compare the trade-offs before you set out:
| Need | Pan head | Your payoff |
|---|---|---|
| Track movement | Precise, repeatable | Less guesswork |
| Hold heavy scope | Rigid resistance | More confidence |
| Reposition quickly | Levers may snag | Watch brush |
Sweeps help you check a wide basin methodically, but each lock takes attention. Choose a pan head when exact framing beats fluid movement.
Carbon Fiber vs. Aluminum
Carbon fiber legs can weigh up to 30% less than aluminum while offering comparable sturdiness, but they may cost more than twice as much. For backcountry use, you’ll value the lighter carry; either way, match the legs and fluid head to your scope’s weight and compare working height with the center column retracted to limit vibration.
Consider field durability and long-term value alongside upfront cost before choosing.
Weight And Portability
If you’ll carry your tripod to distant glassing spots, carbon-fiber legs can save about 30% in weight compared with aluminum while offering similar rigidity, but they usually cost more.
Your choice depends on how far you’ll hike and how often you’ll move between viewpoints. A lighter setup reduces the load you carry, while aluminum may suit vehicle-based trips or tighter budgets.
Compare complete-system weights, including the head and scope, rather than legs alone. Check capacity too: it should exceed the combined weight of your scope and head. Leofoto LV-284C legs, for example, are rated to 202 pounds; the BV-5 head is rated to 23.6 pounds. Confirm ratings suit your gear before buying.
Include accessories you’ll carry; they add weight to your full pack on hikes.
Rigidity And Vibration
Prioritize rigid legs to keep high-magnification views steady during long glassing sessions. Carbon fiber offers rigidity comparable to aluminum while cutting leg weight by up to 30%, but you’ll pay more. Aluminum can deliver similar steadiness for less, though you’ll carry more weight. Either way, check that leg sections lock firmly; loose extensions invite shake.
Keep the center column retracted whenever possible. Raising it adds leverage, reduces rigidity, and makes vibration more visible. Set working height with the legs instead. Match the head to the combined weight of your scope and head, and stay within the tripod’s load rating, especially in wind or on uneven ground.
For scanning, a fluid video-style head’s hydraulic damping can further reduce jitter even when the legs flex equally.
Durability In The Field
When you’re setting up on rough terrain, leg clamps often matter more to long-term reliability than the leg material alone.
Carbon-fiber legs are typically up to 30 percent lighter than aluminum while offering similar stiffness, so you’ll carry less weight on long hunting days. In backcountry terrain, that lighter assembly can help you keep the scope steady at a useful height without extending the center column too far. Aluminum remains a durable choice when you need rugged support for heavy loads.
Whichever material you choose, inspect the clamps: sturdy designs, such as Leofoto’s FlipLock with cushioned contact, can speed setup and resist wear from grit and repeated use. Keep clamps clean, lock each section firmly, and check for play before mounting your scope. Choose carbon fiber to reduce weight; choose aluminum when you prioritize sturdy, dependable support under demanding field conditions and daily use.
Cost And Long-Term Value
Compare the full tripod system, not just the legs: carbon fiber can cut leg-section weight by up to about 30 percent, but may cost twice as much or more than aluminum.
That matters on long backcountry hunts, but price legs, head, and scope together. Compare package weight and packed length: carbon may repay its premium through easier transport and field use year after year.
Material alone won’t steady your view. For all-morning glassing, match fluid-head capacity to your loaded scope and choose legs that stay rigid at working height; otherwise, instability may force another purchase.
Check common 1/4-20 or 3/8 mounts and confirm your quick-release plates, ARCA or Manfrotto-style, remain supported. That fit can prevent costly upgrades later in the field.
Phone Digiscoping Setup
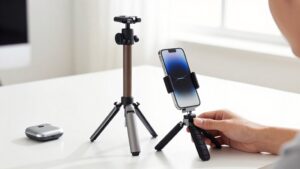
Add a phone adapter only after your scope’s stable on the tripod, and check that it fits the eyepiece and keeps your camera aligned. A fluid-damped video head and a retracted center column usually hold framing steadier than a raised column or extended legs, while a compatible quick-release plate helps you remount the scope consistently.
Before field use, test your camera settings and focus, then check for vibration as you scan.
Phone Adapter Compatibility
For stable phone digiscoping, match the adapter to your scope’s straight or 45-degree eyepiece and the same quick-release interface used by your scope, such as ARCA or Manfrotto-style. Check that the mount works with your phone case and eyepiece dimensions before buying; a universal clamp may fit several phones but can add bulk.
An adapter designed for a straight eyepiece differs from one shaped for an angled body, so choose the matching model rather than relying on a generic fit.
When you attach it, make sure the tripod is stable with the center column retracted; extending it increases vibration during long-range viewing. Add it once steady. Check that the quick-release plate and head won’t let the scope rotate or shift as you mount the phone.
Secure Phone Alignment
Once your scope is steady, mount the phone adapter and center the camera over the eyepiece’s optical exit pupil. Before attaching your phone, confirm the quick-release plate and head are locked; scanning vibrations can shift a loose connection and spoil alignment. Keep the center column retracted, or extend it only as much as necessary, because phone digiscoping magnifies vibration more than viewing.
Match the mount’s height to the eyepiece so the camera stays centered over the exit pupil rather than sitting high or low. A 45-degree angled eyepiece makes this easier than a straight-through design, letting you position the phone without twisting your neck or reaching awkwardly. Once mounted, check that the adapter holds the phone square and secure as you move the scope. A stable head and compact setup help preserve alignment while you scan.
Camera Settings And Focus
With the scope steady and aligned on your target, attach the phone adapter and center the camera on the eyepiece’s optical axis. Use the phone’s live preview to tap the subject and lock autofocus; this usually gives sharper results than relying on the scope’s focus alone. For an angled eyepiece, keep the phone centered at the same angle each time, since a slight shift can cause focus drift.
Set exposure manually or use a fixed exposure mode. Lower brightness and disable HDR to prevent auto-exposure hunting between frames, especially when light or backgrounds vary. Keep the tripod’s center column retracted and match its height to your stance for less vibration.
A timer or burst mode reduces movement when you press the shutter; compared with a single touch capture, it helps preserve detail. Use a timer for still subjects; burst mode suits brief moments or moving wildlife.
Test Before Field Use
Before heading into the field, test the complete phone digiscoping setup at full working height, with the center column retracted. Set it up at the height you’ll actually use; this is often your height minus 12, 14 inches. A retracted column feels steadier than an extended one, especially in phone images.
Secure the scope to a compatible quick-release plate before fitting the phone adapter, then check that nothing shifts. Loose mounting can spoil alignment before you begin.
At 22–45x, practice slow pans and tilts with the fluid head; compare movement and confirm your phone keeps focus-lock.
Repeat the trial at midday and at dawn or dusk. Dimmer light can make a compact setup harder to frame, so you may need to re-center, particularly with a 65mm objective.
Quick-Release Plate Compatibility
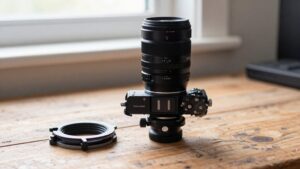
Check that your spotting scope’s mounting foot matches your tripod head’s quick-release standard, such as ARCA or Manfrotto-style, and choose a plate made for your scope model.
A model-specific plate reduces fit problems; Canati offers ARCA adapters and replacement plates, including designs that resist unwanted rotation. Compare plate geometry: the Falcam F38 uses two raised elements to limit twisting, while Leofoto NP-50 and NP-60 raise an edge and tighten with a wrench.
Match the plate’s screw and interface to your head—typically ¼-20, sometimes 3/8—so it clamps firmly without play. For scanning, a standard plate lets you rotate the scope smoothly; an anti-deflection design restricts rotation for alignment. Choose based on how you aim and whether you need free panning or a fixed position.
Leg Lock Cleaning Schedule
To keep your spotting scope steady, wipe the leg locks and mating surfaces weekly, and after any rainy or windy trip, to clear grit that can prevent full locking and add wobble under load.
Every one to two months, inspect the lock grooves, including cushioned FlipLock-style clamps; sand or dried oil can make extension stiff or uneven.
If a lock feels sticky or retracts inconsistently, clean it right away. Start with a dry brush, then use a slightly damp cloth and let parts dry completely before reuse. Apply a small amount of manufacturer-approved lubricant to moving lock points, never clamp surfaces. Open and close each lock 10–20 times, checking for solid, repeatable tension. Repeat the check after cleaning or whenever lock resistance changes noticeably.
Avoiding Wobbly Center Columns
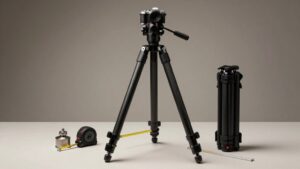
For a steadier view, keep the center column as low as possible and compare tripods by their height with the column retracted. You’ll get a firmer setup when the legs, rather than a raised column, provide most of your working height. Even a capable tripod can transmit noticeable shake when you overextend its column.
- Check whether retracted-column height reaches your viewing position; prioritize it over maximum advertised height for stable viewing at your site.
- If raising it, choose a leveling column with an anti-twist groove to reduce rotation and side-to-side wobble.
- Use a properly clamped fluid head rated for your scope; flex can amplify jitter as you scan.
- On uneven ground, use a leveling platform instead of raising the column to preserve rigidity.
Glove-Friendly Leg Locks
When you’re wearing bulky gloves, wide flip locks, such as Leofoto’s FlipLock style, let you extend and secure tripod legs faster than small, fiddly clamps. Choose broad levers you can grip decisively rather than narrow collars that demand finger pressure. Cushioned locking surfaces make repeated adjustments more comfortable during long sessions. Operate locks without shifting the tripod’s center to limit vibration while you’re glassing. Check that every section extends fully at your working height without raising the center column, since retracted columns stay steadier.
- Test levers with your gloves on; easy reach beats tiny tabs.
- Check clamps lock firmly, so bumps won’t loosen them mid-session.
- Prefer cushioned surfaces if you adjust leg sections repeatedly outdoors.
- Keep legs centered; full extension avoids relying on a raised column.
Conclusion
Choose a tripod by matching its height and stability to where you spot: longer legs help on slopes, while a sturdy setup matters more than a tall center column. For scanning, compare pan-head control and quick-release compatibility before you buy.
Carbon fiber saves weight; aluminum often costs less. Check that you can operate leg locks with gloves, and clean them regularly. If you digiscope, confirm your phone mount fits. Prioritize steady viewing over extra features you won’t use.