How to Choose a Phone Tripod: Height, Mount Grip and Remote Features
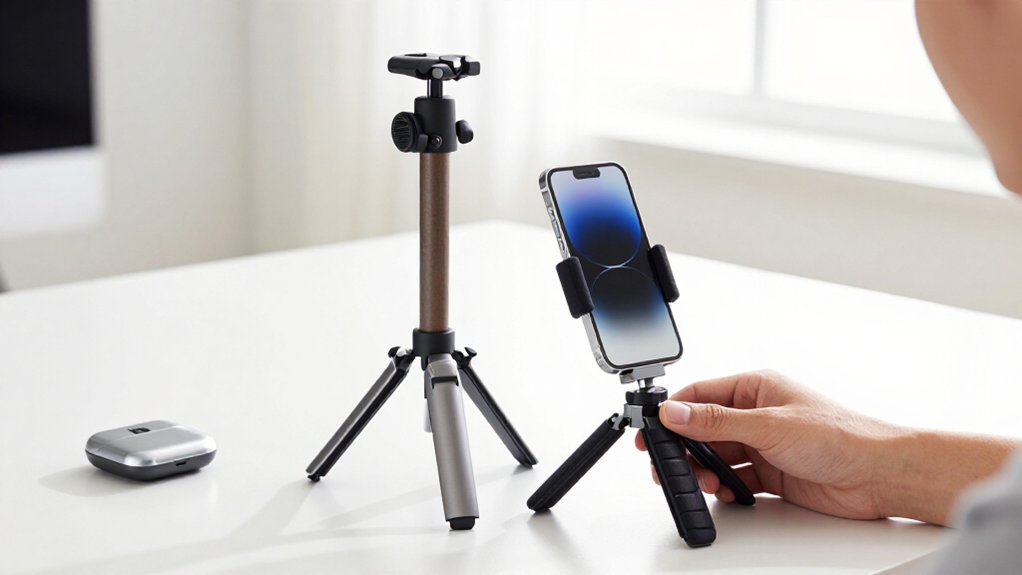
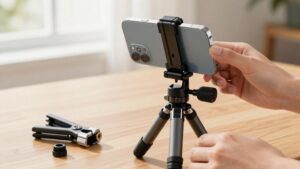
Choose a phone tripod by matching its height to your setup: 30–80 cm suits tabletop work, while 120–180 cm offers travel or eye-level framing.
Check that the clamp fits your cased phone, clears its lenses, and grips with padding without excessive tightening.
For hands-free shots, compare Bluetooth remotes by range and video start-stop support.
A timer also reduces shake.
Rigid legs generally stand more steadily than flexible legs, and a retracted center column helps during night exposures.
The details below clarify these trade-offs.
Choose by Height, Grip, and Remote
Choose tripod height by matching it to your usual shots: low models around 30–80 cm suit tabletop work, 120–160 cm models work well for travel portraits, and 150–180 cm models can place a phone near eye level for talking-head video. Compare the clamp and padding with your phone’s size and case. A secure grip should hold firmly without excessive tightening, reducing pressure on your device.
For hands-free starts, choose a Bluetooth remote with a range up to about 30 feet. A controller that starts and stops recording helps you frame group photos or solo clips, avoiding screen taps that can make your phone jiggle. Check for quick portrait-to-landscape rotation, preferably with lockable detents at 90-degree steps, so you can reframe without losing stability.
Travel Shooting Priorities
For travel, prioritize a compact, lightweight tripod that fits your bag and still extends to about 120–160 cm; 30–80 cm models suit tabletop shots but offer less reach. Compare folded dimensions before materials: aluminum keeps cost and weight moderate, while carbon fiber can reduce carry weight at higher cost. Choose a design that fits a small bag or pocket without sacrificing extension.
For varied locations, height matters more than tabletop stability alone. Check the clamp’s padded contact surfaces and locking action; your phone shouldn’t shift when you reframe. Match its load rating to your heaviest phone-and-case setup, with many models supporting about 1–2 kg. A lockable adjustable head, often a ball head, lets you switch between portrait and landscape while maintaining stability at each location.
Remote Range in Crowds
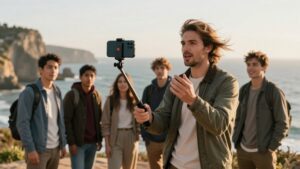
In a crowd, a Bluetooth remote rated for up to about 30 feet lets you trigger shots without touching the phone and shaking the tripod. Choose a model that starts and stops video, not one limited to photos; pressing the phone can introduce shake. For group portraits and self-portraits, frame the phone, step back, and avoid stretching an arm into the image.
A 30-foot rating is an upper estimate, not a guarantee: bodies, shoulders, and walls can block Bluetooth, so check line of sight at your venue. A detachable remote or multiple trigger modes helps you time capture as subjects move.
| Condition | Effect on control |
|---|---|
| Clear path | Best range |
| Dense bodies | Shorter range |
| Video control | Less phone shake |
| Group portraits | Hands-free framing |
| Moving subjects | Flexible timing |
Tripod Leg Styles
You can choose rigid telescoping legs for adjustable height, flexible wraparound legs to grip poles or branches, or compact tabletop legs for flat surfaces. Full-size folding legs provide greater reach but add bulk, while compact models travel more easily.
Compare leg stability, folded size, and foot design for your shooting conditions.
Rigid Telescoping Legs
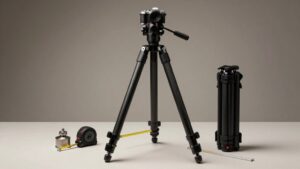
Rigid telescoping legs extend in sections to provide greater height and a straighter, more stable stance than mini flexible or foldable legs. Choose a model that reaches your shooting height while keeping its center column retracted; raising that column can reduce stability. Telescoping legs usually trade compact packing for extra reach: longer sections add height but also make the collapsed tripod bulkier to carry.
For travel content, compare the tripod’s working height with your usual framing needs. A range that comfortably covers about 120–160 cm suits travel angles. Check whether flip or twist locks feel easy to operate and hold securely. Reliable lock tension keeps the legs from shifting when you frame or start recording. Prioritize sufficient leg extension over a tall center column when you need a steadier setup.
Flexible Wraparound Legs
When a standard tripod can’t stand on the available surface, flexible wraparound legs can grip poles, branches, railings, and other irregular supports. You bend articulated legs around a support and press them into place. This setup trades always-flat stability for versatility, so secure multiple points of contact rather than depending on one small foot area.
Longer legs extend that reach: the Joby GorillaPod 1K, for example, has legs about eight inches from mount to foot, helping you grip thicker posts or branches. You can position, wrap, and tighten the legs faster than extending rigid sections. In wind or on smooth surfaces, spread the legs to maximize contact and tighten the grip so the phone mount can’t shift; otherwise, wobble can affect photos and video.
Compact Tabletop Legs
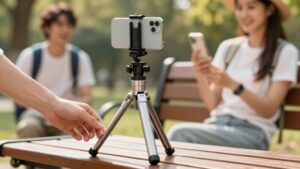
Designed for flat surfaces such as tables, rocks, and ledges, compact tabletop tripods provide a stable base without adding much height. Their legs typically use three-piece rigid mini sections, though some models use a small fold-out design that packs down quickly for travel with little added packing bulk.
Choose rubber or ribbed feet for hard floors; they resist slipping and damp vibrations that could blur photos or handheld video. Compared with flexible wraparound legs, tabletop legs offer a more rigid base for crisp shots, but they can’t grip poles or railings. You’ll trade maximum reach for portability, so use this style when you need close-up compositions, self-recording, or low-key scenes rather than elevated framing. Its limited height makes placement, not extension, the main factor in framing.
Full-Size Folding Legs
For framing beyond tabletop height, full-size folding tripods collapse into three to five leg sections, balancing packability with greater stability than mini models. Choose a design that opens to a wide stance; broader leg angles improve balance and reduce wobble, helping you capture sharper photos and steadier video.
Look for secure leg locks: twist locks tighten simply, while flip or lever locks speed setup. Quick, secure locking helps prevent gradual leg slip. For travel-oriented stability, choose durable aluminum or carbon fiber legs with rubberized or interchangeable feet; these maintain grip on hard floors and outdoor surfaces.
Compare height gained by adjusting legs with an extendable center column. Keep the column retracted; raising it can reduce stability, whereas leg adjustment preserves a more steadier base.
Best Choice for Night Shots
For night shots, choose a sturdy travel tripod and secure phone clamp; a heavier load rating can reduce drift during long exposures. Compared with a touch-operated shutter, a Bluetooth remote helps prevent micro-blur, while a firmly locking portrait/landscape mount keeps your framing consistent.
Keep the center column retracted when possible for greater stability, and enable long exposures only when your phone’s grip and tripod can hold steady.
Prioritize Maximum Stability
For sharp night shots, choose a tripod with a clamp rated for at least your heaviest cased phone and keep its center column retracted; a secure grip and low center of gravity help prevent shifts during long exposures. Set the legs to reach your working height instead of extending the column; this keeps the load lower and reduces sway. Choose feet with rubber tread for smooth indoor floors and wet pavement, or spikes for loose gravel.
A stable footing matters more than maximum height when a long exposure magnifies movement. Trigger the shutter with a Bluetooth remote, ideally rated for about 30 feet, so you don’t transfer vibration by touching the phone. Compared with a timer alone, a remote lets you capture the chosen moment while standing clear of the setup. Check each leg lock before shooting, and place the tripod on the firmest available surface. These choices reduce motion without relying on software sharpening or higher ISO settings in practice.
Choose A Sturdy Grip
Choose a phone mount with a firm clamp that locks securely without excessive tightening, plus padded or rubber contact points to grip glass-backed phones, even when condensation makes them slick. During long exposures, slight movement can soften detail, so compare clamps by holding force, not cranking effort. Test it before your night session.
Soft pads or rubberized contact points generally grip a glass-backed phone better than bare hard jaws, and they reduce sliding if nighttime condensation or sweat makes the surface slick. Check that the clip supports your heaviest setup, including a large cased phone, with margin; many phone-tripod kits list stability ratings of only a few pounds.
Positive detents or a rotation lock also keep portrait-to-landscape adjustments from loosening and drifting during a shot.
Use A Remote Shutter
At night, a Bluetooth remote shutter is the best choice for starting photos or videos without touching your phone, reducing shake that can blur low-light shots. A remote rated for about a 30-foot range lets you trigger the camera while standing apart, which helps you frame street scenes or landscapes without reaching for the phone.
Look for a detachable controller with a clip and timer support; you can secure it nearby and trigger several shots hands-free. For video, choose a remote that starts and stops recording, avoiding phone movement when you capture city lights or fireworks. Pair it with a steady tripod grip and keep your phone level; a bubble level can help prevent tilted horizons as well as movement-related blur in each frame.
Enable Long Exposures
To capture sharper night scenes with long exposures, mount your phone on a stable tripod before using Night mode or manual low-light settings. Choose a travel-friendly model whose firm clamp securely holds your heaviest cased phone; a loose grip can introduce blur. Compare leg designs: a wide stance and non-slip rubber feet resist small shifts better than narrow, slick supports.
Set the tripod low to mid-height for city scenes, and retract the center column to reduce flex and improve steadiness. Then trigger the exposure with a Bluetooth remote or timer, rather than touching the phone. Enable Night mode or manual controls, and use slower shutter speeds only when the phone is fully locked down. Prioritize stability over height nightly.
Phone Case Clearance Check
Before buying, check that the clamp’s range accommodates your phone with its current case, since a mount that fits a bare phone may not fit a cased one. Compare whether the holder leaves lens clearance and lets the case sit flat; a poorly positioned edge can prevent full seating or cover the camera lens. Look for protective padding and universal grip surfaces, which can limit slippage; firmer plastic jaws may feel less secure on thick cases.
If your case has a ring grip, rugged corners, or a thick MagSafe attachment, confirm it fits beneath the clamp and still allows portrait or landscape rotation to lock. On a flexible clamp-style tripod, tighten until the phone feels snug, then check that the clamp moves freely without overtightening, which could damage the case or mount.
Compare fit with and without the case if the manufacturer provides both tests; prioritize secure seating across your setup and orientation.
Clamp Spring Fatigue Checks
Because a spring clamp can weaken with repeated use, test its grip periodically by mounting your cased phone, tightening the clamp, and gently tugging the phone sideways and upward. Check whether it slips or rotates, and watch its position for several minutes. A slow shift after locking, called clamp creep, may indicate spring fatigue or inadequate clamp force.
To compare performance, open and close the clamp 20–30 times, then repeat the same tug test. Reduced hold after cycling suggests fatigue more strongly than a single weak test. Before drawing that conclusion, inspect contact pads for flattening or peeling; worn padding can lower friction and mimic a weak spring.
If your mount uses a clamp knob and inset ring, engage both, since partial locking can produce looseness. Compare results with the mount’s initial grip, and stop using it if your phone won’t stay secure.
Check Hinge Lock Wear
Even if the phone clamp passes its grip test, check the tripod’s hinge locks for wear. Before each trip, gently test joints at full open and full closed. Wobble suggests looseness. Inspect lock points for flattened plastic edges, shiny rubbing areas, or cracks; repeated tightening can degrade these surfaces. Compare both positions rather than relying on a visual inspection alone.
- Engage clamp-style detents; they should click and hold without slipping during a light shake.
- Test with your heaviest phone and thickest case; watch for hinge slip or angle sag.
- If either occurs, avoid stability-critical shots and replace the tripod or mount.
A lock that feels uncertain shouldn’t support low angles, windy locations, or long exposures. This comparison checks structural support, not clamp grip.
Bluetooth Remote Pairing Test
A Bluetooth remote should trigger your phone’s camera without contact, so test pairing and shutter response before filming. Turn on the remote, enter pairing mode, then open your camera app and select the remote or shutter option. Press the shutter once and confirm a photo saves without touching the phone.
- Walk away from the tripod after pairing; many travel remotes work up to about 30 feet (9 meters), but walls or interference may shorten range.
- Start and stop video remotely; reliable control reduces phone movement and the blur it can cause.
- If pairing fails, power-cycle both devices and pair again. Keep the mount and phone clamped securely, isolating Bluetooth as the variable.
A remote that passes these tests supports dependable hands-free framing in practice.
Conclusion
Choose your phone tripod by balancing height, grip security, and remote range against portability. For travel, compare folded size and leg styles; for night shots, prioritize stability over minimum weight.
Confirm the clamp clears your case, then test spring tension and hinge locks for secure positioning. Pair the Bluetooth remote and check its range in a crowded setting before you buy. A tripod that passes these checks should suit your phone and shooting conditions reliably.