How to Convert a Manfrotto Tripod to Arca-Swiss: Adapters and Clamp Swaps
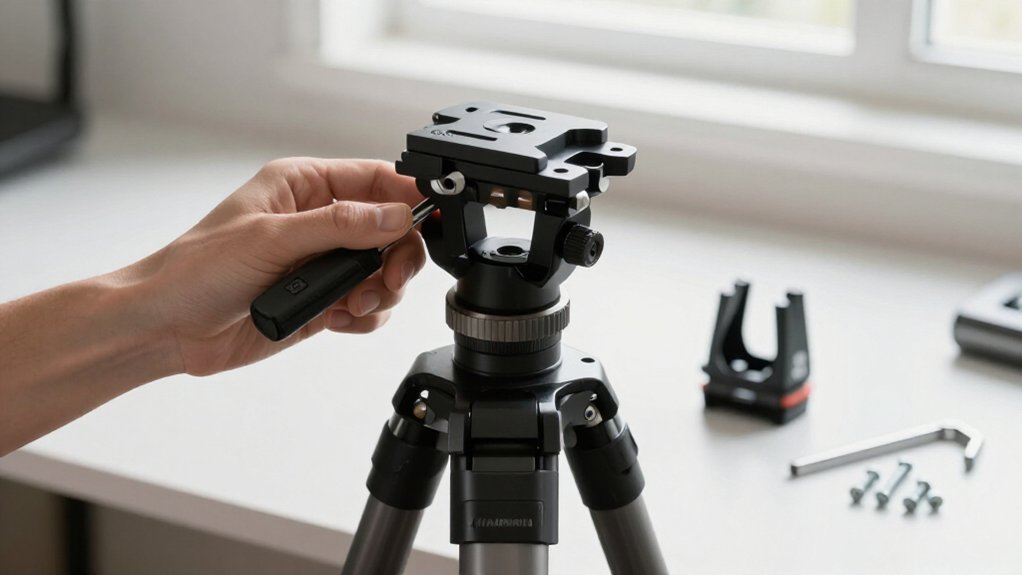
Identify your Manfrotto head first; RC2 and MVH500 variants may need model-specific adapters.
Replace the top interface with a compatible F63 clamp; changing only the camera-side plate won’t fix a mismatch.
Remove the original plate assembly, then install the clamp and check clearance.
Apply blue threadlocker only after seating the assembly.
If the bolt bottoms out, verify stack height and fit the longer screw.
Test an Arca plate for secure locking without play, and inspect for wear.
Continue for fit checks.
F63 Clamp Compatibility
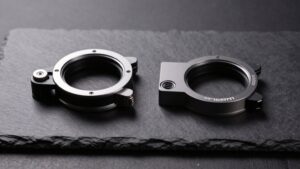
An F63 clamp can convert a compatible Manfrotto head to accept Arca-Swiss-style plates by replacing the head’s top mounting interface. Before you buy one, identify your head model and confirm that the clamp’s mounting pattern and hardware match it. The F63 approach changes the head side; changing only the camera-side plate won’t correct a mismatch between a Manfrotto head fitting and standard Arca clamp geometry.
Check the product’s stated support for your head family, including MVH500 or RC2 variants, rather than assuming all Manfrotto heads share one interface. Some adapters don’t fit particular fluid heads; reports point to the Haoge CP-MA90 as an alternative where a different adapter can’t be used. Test the installation before a shoot, and confirm the clamp locks without play.
Quick-Release Plate Compatibility
For quick-release plate compatibility, convert the tripod head to an Arca-style interface rather than trying to match every plate to each clamp. Most Manfrotto ball heads use a proprietary slot, so many Arca clamps’ dual prongs won’t fit directly. Haoge kits can bridge that mismatch:
- They pair an Arca-style clamp with a Manfrotto-to-Arca adapter.
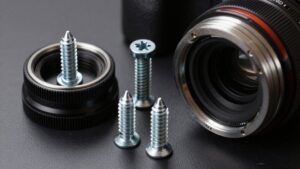
- A longer screw accommodates the adapter’s added thickness.
- Tighten the assembly securely, then check clamp engagement before mounting your camera.
- Standard Arca-style accessories can then attach to the converted head.
- You can move among compatible supports without changing your camera plate each time.
Confirm each accessory’s dovetail profile and clamp width match; Arca-style products vary, so test fit and lock the plate before use with the camera supported safely.
Step 1: Identify Your Head Model
Before buying a converter, identify your exact Manfrotto head model: an RC2 head needs an adapter made for its slot-based interface, while an MVH500 fluid head may need a replacement top bridge or a model-specific adapter.
Check whether your head uses Manfrotto’s slot-based interface or a two-prong reference; don’t assume every Arca-style clamp mates with either design. For an RC2 mount, select a converter explicitly listed for RC2-to-Arca-Swiss use, such as a Haoge kit or the AKIROOD AK-AM50CP.
For an MVH500, compare replacement-bridge options such as Kirk Photo’s MVH500-BQRV2 with adapter-based choices from Henjar or KES. Before ordering, inspect the head’s attachment pattern and screw geometry; adapter thickness may leave the supplied screw too short, so verify the required length and thread before purchase.
Step 2: Remove the Manfrotto Plate
Remove the Manfrotto plate or adapter assembly from the head rather than stacking it under an Arca-Swiss clamp. Before loosening anything, confirm that your intended converter is designed for your head’s Manfrotto RC2 or RC2-type interface. Verify compatibility first: the replacement must align with the head’s attachment area.
If your head uses RC2 mounting, release and remove the plate or adapter assembly. Don’t leave the original interface in place as a spacer. On an MVH500 fluid head, conversion kits such as Kirk/Henjar replace the top bridge or attachment area rather than simply adding another plate.
If your Manfrotto plate uses a hex fastener instead of a coin slot, select the right hex key and loosen the hardware before lifting the plate away. Keep track of the original screw and note its length; added adapter thickness may require a longer fastener later.
Step 3: Install the F63 Clamp
Once you’ve removed the original top mounting, attach the Hejnar F63 clamp in its place with the supplied fasteners. Typically, you’ll unscrew the head’s existing quick-release mechanism, then secure the F63 using its included hardware. Confirm that the replacement matches your Manfrotto head’s mounting interface; some models use slot or prong references that differ from Arca arrangements.
Tighten the fasteners firmly according to the hardware design, without forcing threads. Operate the clamp’s quick-release action and check that it locks as intended. Before mounting your camera, test retention with an Arca-Swiss-style plate and verify it stays secure under a controlled, light hand pull. Recheck the clamp’s tightness once after installation. If it remains solid, avoid repeated tightening, which can stress the connection or damage threads over time.
Step 4: Align the Arca Dovetail
Seat the Arca dovetail fully in the clamp’s jaws and center it before tightening. Before mounting, use a caliper or ruler to verify your plate’s width and profile; the common Arca-Swiss standard is 38 mm.
With the clamp on the Manfrotto head or adapter, keep the plate centered and engaged across the jaws; a skewed seat can prevent lock-up. Manfrotto’s slot-based interface and Arca’s prong-based interface reference different attachment planes, so check the dovetail’s height and rotation point relative to the head. Tighten the clamp with the plate inserted.
Lock the head, then pull the plate to test for sliding. If it moves, reseat and retighten it. Fit a compatible Arca accessory, such as a Capture Clip or Gorillapod plate, and confirm it locks consistently without micro-adjustments.
Step 5: Check Clamp Clearance
Before buying an Arca clamp, check that its body and release knob or lever clear the Manfrotto head and neck. Check the clamp against the head in its installed position; a lever that swings freely in your hand may still strike the neck when you close it.
Inspect the Manfrotto top mount as well: many models use a slot or proprietary geometry, while conversion clamps often expect two mounting prongs. Confirm whether the adapter references the top or bottom of its attachment area. A mismatch can shift clamp alignment and reduce repeatability.
If the knob contacts the head or neck, choose a model-specific conversion kit or assess a spacer arrangement. Also compare the adapter’s added thickness with your original screw length; verify the screw won’t bottom out and still clamps the assembly securely in use.
Step 6: Apply Medium Threadlocker
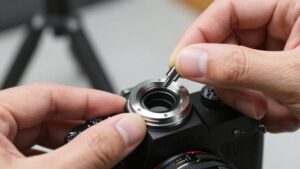
Apply a small amount of medium-strength (blue) threadlocker to the conversion-kit screw threads only after the slot-to-two-prongs adapter and Arca-style clamp sit fully seated and aligned. Use the correct longer fastener if the added adapter thickness leaves the original ball-head screw too short. Keep the compound off the Arca-style clamp’s quick-release interface; it belongs only on the screw threads securing the adapter to the Manfrotto ball head.
Tighten the screw to a firm, snug fit, not beyond what the hardware requires. If your adapter is marked “can’t be used for Manfrotto fluid head,” stop and choose a compatible option, such as the Haoge CP-MA90, before applying threadlocker. Let the threadlocker cure fully before you swap among Peak Design Capture Clip, Gorillapod, or other Arca-clamp accessories.
Test With Your Camera
Attach your camera with the Manfrotto setup first, then mount it using the Arca-style plate or converted clamp. Clamp the plate and check that it locks firmly, with no movement between the camera and head.
If your head uses an RC2-style system, confirm the adapter matches the 15 mm rods or head components in your setup before shooting. Inspect the clamp’s path as you open and close it; knobs and neck geometry must not prevent full seating or release.
With the camera mounted, loosen and retighten the clamp several times, checking that positioning remains controlled and the lock engages consistently. At low height, perform a gentle drop and recatch check to verify the latch holds during ordinary handling. Repeat any failed check before you commit to shooting.
Clamp Bolt Bottoms Out
If the clamp won’t tighten fully, check whether its bolt is bottoming out against the Manfrotto head before the clamp seats. An RC2 slot or notched top can change the adapter stack’s height. With a threaded conversion kit, that added thickness may leave the original screw too short—or make it hit the bottom before the clamp and adapter tighten.
| Check | Sign | Action |
|---|---|---|
| RC2 slot | Alters stack height | Inspect |
| Adapter | Adds thickness | Measure |
| Original screw | Reaches bottom | Replace |
| Longer screw | Fits kit | Install |
Haoge’s Manfrotto-to-Arca kit converts the RC2 slot to two Arca-style prongs and specifies a longer screw. Use the screw matched to that adapter’s thickness; don’t force the original hardware. Tighten the assembly fully and verify the clamp seats with clearance, not a nearly tight fit.
Inspect Clamp for Wear
Before installing an Arca-Swiss adapter, inspect the Manfrotto clamp’s contact surfaces and neck for flattening, burrs, or metal dust that could prevent proper seating.
Check the top attachment interface where the prongs or a slot conversion will mate; worn features can keep the adapter from seating fully and engaging the clamp. Examine the mounting screw or bolt area for deformation, looseness, and damaged or stripped threads, which can shift alignment or reduce clamping force.
Then operate the locking knob or lever. It should tighten smoothly and hold without play; slop signals wear that may let an Arca-style plate move. Don’t use the conversion kit to compensate for a damaged clamp. If you find significant wear, replace the Manfrotto component or adapter hardware before installation.
Conclusion
Once you’ve confirmed your head model and F63-compatible clamp, remove the Manfrotto plate and install the clamp with medium threadlocker. Check that the bolt tightens fully without bottoming out, and inspect the clamp and threads for wear.
Fit an Arca-Swiss plate, lock it in place, then test the camera with a firm hand tug before shooting. If the fit feels loose or uneven, stop and correct the hardware rather than trusting the connection in use.