How to Set Up a Tripod for Astrophotography: Sharp Stars Step by Step
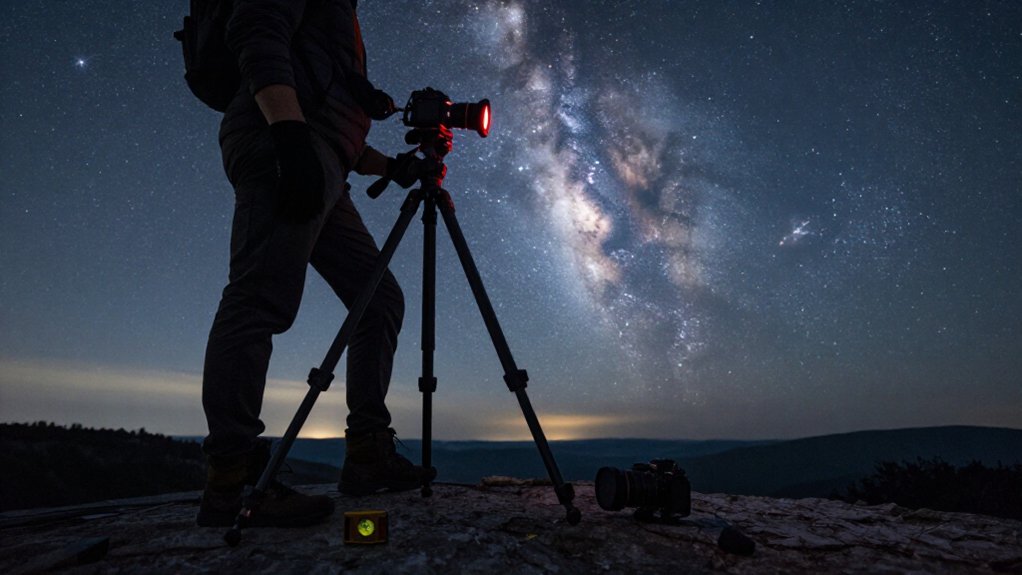
Set your tripod on firm ground, spread its legs, and extend only the sections you need. Check each twist collar or lever lock, then press each foot to confirm it won’t shift.
Keep the center column retracted, level the head, and tighten the mount and ball head.
Use a two- or ten-second delay or remote release. Focus manually on a star until it’s pinpoint.
Check corner stars and lens fogging; the next steps will help you refine stability.
Avoiding Tripod-Induced Star Trails
To prevent tripod shake from smearing stars, use a sturdy tripod, keep its center column down, and extend the legs only as far as needed. Wind or a loose center column can introduce micro-shake and make stars look smeared or traily. In windy conditions, add a counterweight to reduce sway.
Before each exposure, set a two- or ten-second in-camera delay, or use a remote shutter or intervalometer. Let movement settle. Use the intervalometer for repeated six- to fifteen-second exposures rather than one long press-and-hold session; movement during a long exposure is harder to fix. Don’t touch or bump the tripod during capture. Zoom into the frame’s middle and check for round, pinpoint stars. If stars remain oblong across frames, address tripod shake before changing exposure settings.
Check Tripod Leg Locks
Lock each tripod leg firmly before mounting your camera: open the legs fully, set the head at a stable height, and check every lock after extending a section. Then match the lock action to its design:
- Twist-locks: turn each collar until you feel solid resistance; “just snug” isn’t enough.
- Lever locks: flip each lever fully closed, then recheck it after adjusting a section.
- Test stability: gently push the tripod sideways and press down on the head; check for wobble or slipping at every lock.
- In wind, use the fewest leg sections you need; extra extension makes vibration and slippage more visible in star images.
A loose lock may let a leg drop during long exposures, shifting framing and blurring stars.
Step 1: Level the Tripod Head
Once the leg locks hold firm, level the tripod head in both directions before mounting your camera. Point the tripod roughly toward your target first; for example, aim south for a Milky Way view in the Northern Hemisphere.
Extend the legs fully, then adjust their lengths until the top plate sits level. Use the built-in bubble or a phone level on the head. Check side-to-side, then front-to-back; even a small tilt can distort framing and complicate star alignment or tracking.
If your head has leveling knobs, loosen them slightly, center the bubble, and retighten firmly to prevent creep during long exposures. Test for wobble. If the tripod shifts, correct the leg lengths, level again, and tighten each adjustment before you begin capturing long-exposure star shots.
Step 2: Attach Camera and Lens
With the tripod head level, mount your camera on its plate and tighten the screw securely, then check for wobble before aiming at the sky.
Choose a wide-angle lens with a fast aperture between f/1.4,f/4; use roughly 14 to 24mm on full-frame or 10 to 18mm on APS-C. Wider views let you use shorter exposures. Set the lens to Manual Focus (MF) and leave autofocus off; stars are too dim and small for reliable nighttime autofocus.
Recheck the camera’s balance on the head and keep it level as you compose. Any looseness or tilt can soften stars. In Live View, zoom in on a bright star, then turn the focus ring until the star becomes a pinpoint. Watch the image while focusing; if it shakes, tighten the mount.
Step 3: Keep the Center Column Retracted
Keep the center column retracted whenever possible: raising the camera on the middle mast adds leverage without improving stability, making long exposures more susceptible to wind and vibration. Extend the leg sections evenly while keeping the column compressed; use them to set your working height. Aim for a position near chest level, which limits leverage while keeping the camera accessible.
If you need a small framing adjustment, use the tripod head rather than raising the mast. When column extension is unavoidable, raise it only slightly and hang a weight, such as your camera bag, from the hook to damp movement. Before an exposure, gently push the tripod and watch how quickly it settles. A prolonged oscillation indicates that the extended column is transmitting motion; retract it and test again. These checks help you choose a stable setup before you begin long exposures of the night sky for sharper pinpoint stars in frames.
Step 4: Lock the Ball Head
After stabilizing the tripod, level and aim the camera, then tighten the ball head’s main locking knob while supporting the camera or lens. Set the framing before you lock it; holding the camera prevents a sudden shift as the ball clamps. Turn the knob firmly until the ball can’t drift when you let go. If the head has a separate friction or tension ring, adjust it so you can aim smoothly, but make sure the main knob still immobilizes the ball.
For windy nights, also lock any secondary panning or base joints; small vibrations can otherwise alter your composition. After tightening, gently nudge the camera and check the framing.
The star direction should remain very nearly unchanged. If it moves, retighten the lock and check again.
Step 5: Test Stability on Uneven Ground
On uneven ground, adjust the legs to different lengths until the head is level, then press each foot firmly into the surface to limit settling during long exposures.
For soft terrain, spread the feet wider or fit a wider base plate so each leg sinks less and the camera stays fixed. On rock, choose flat contact points and tighten leg clamps; slight rocking can soften stars even when you don’t touch the camera.
After leveling, brace the tripod and test it side to side. If you see any shift, reposition the feet and repeat the test before shooting. In wind, add weight by hanging a bag from the tripod hook. This can reduce micro-movement, which matters during multi-second exposures because they magnify tiny vibrations.
Step 6: Pack Away Loose Accessories
Before you move the tripod, tighten the head-lock knobs and confirm the camera plate is fully secured so nothing shifts during packing.
Pack loose accessories, your remote/intervalometer cable, phone mount or adapter, lens hood cloth, and spare batteries, in a separate pouch. This keeps them from falling among the tripod legs. Close the leg locks as you collapse the legs, then wrap the tripod strap or ties around the tripod only, never around control cables.
Wipe dew or sand from the lens element and tripod feet with a microfiber cloth before stowing them; residue can grind against surfaces and cause wobble. If you used counterweights for wind stability, remove them and store them in a padded spot to prevent bumps from bending hardware.
Inspect Corner Stars
With the tripod packed securely, review your first test shot before changing any settings. Zoom in on each corner and compare stars with the center. Look for round pinpoint dots; smeared or comet-shaped stars indicate a problem.
If corner stars look soft or blurry while the center stays crisp, your focus may be off or inconsistent across the scene. This is especially likely at wide apertures such as f/1.8, f/4. Verify that the tripod and camera head are locked and level; even slight movement or tilt can reduce corner sharpness.
Take a second exposure with the same settings, then compare corners. If sharpness varies between shots, suspect wind, settling, or focus shift rather than optical softness. Inspect corners first; correct focus or stability before adjusting other settings.
Dew Prevention and Lens Fogging
Dew often forms on the coldest surfaces, and lens fog can creep in during long exposures. Mount a hood or keep a dew heater strap on the front element; it warms the glass before condensation begins. Wrap the tripod head and exposed metal with a rain cover or towel, and shade your lens from wind-driven moisture. Keep the warmer powered continuously; switching it on after fog appears won’t clear haze reliably. Avoid breathing on the front element or holding warm hands near it, since humid air can trigger fog quickly.
| Action | Check |
|---|---|
| Prevent | Hood or strap |
| Inspect | Every 15–30 minutes |
| Verify | Bright star in Live View or test shot |
Review short exposures; subtle haze can reduce star contrast before you notice it.
Clean Tripod Feet
Clean tripod feet help prevent movement that can turn sharp stars into trails. Wipe each foot with a dry cloth, then use a soft brush to remove sand and small rocks.
They can shift beneath the legs during long exposures.
On wet or sandy ground, replace or reposition the foot pads until each pad makes full contact and doesn’t rock. Before placing the tripod, check that every leg locking ring is fully tightened; loose locks allow movements.
Use the tripod’s leveling adjustments to distribute weight evenly, so no foot digs deeper and the setup won’t settle after you mount the camera.
After setup, press near each leg. Confirm the feet don’t move. If they do, clean or reseat them before you shoot.
Conclusion
Before you begin a long exposure, confirm each leg lock holds, level the head, and secure your camera and lens. Keep the center column retracted, stow loose accessories, and clean the feet so the tripod stays stable.
Check corner stars after a test frame; if they trail, adjust your setup or exposure. In damp conditions, prevent dew and lens fogging before you continue shooting.