Can You Use a Video Tripod for Photography? Pros, Limits and Workarounds
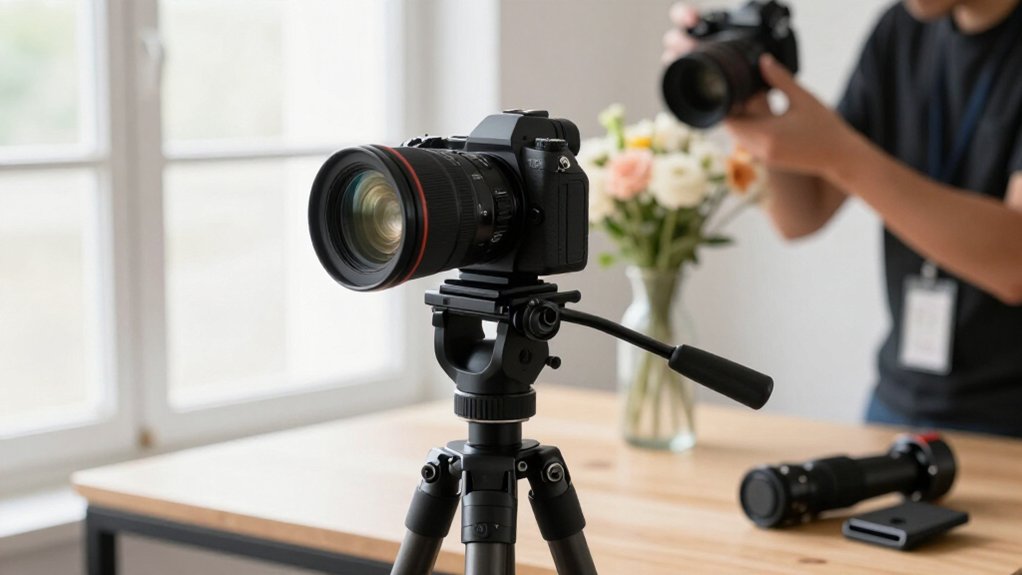
Yes, you can use a video tripod for photography, especially when a fluid head helps you make controlled pans, tilts, and small framing adjustments. Its resistance can steady panoramas or telephoto compositions, but it often makes quick reframing slower than a ball head.
For still shots, balance your camera, set drag carefully, and lock the head to prevent creep. Watch for cold-weather stiffness and vibration.
Next, you’ll find practical setups, workarounds, and checks for each.
Photographing With Fluid Heads
A fluid head can work well for still photography when you need fine, controlled framing adjustments. Its tension-controlled mechanism lets you pan or tilt smoothly, making it useful when you’re aligning a composition by small increments. For panoramas, you can move the camera at a consistent rate and keep adjacent frames easier to stitch.
When you’re tracking a moving subject and taking occasional stills, head resistance can help you hold a steadier composition. Before a static exposure, tighten the drag or tension until the camera stays put; for subtle reframing, use moderate resistance instead. Check that the camera doesn’t drift or wobble after you release the handle. This approach gives you controlled positioning, especially when precise movement matters more than rapid changes in framing.
Fluid Head Photo Tradeoffs
With a fluid head, smooth, resistance-based movement comes at the cost of speed: precise still-photo reframing can take longer than it would with a ball head or three-way head.
That delay matters when you need several small framing corrections, especially with a large, heavy video head that takes more effort to reposition than a typical photo head. For panoramas, however, its damped movement can help you sweep consistently; practice controlling the start and stop to avoid overshooting.
When you’re tracking a moving subject, subtle, controlled pans and tilts can improve your framing, though quick point-and-lock adjustments may feel sluggish.
For stills, you can increase fluid drag until the head nearly locks, then loosen it when you need movement. This workaround stabilizes framing, but adds a step and won’t make the head as responsive as a dedicated photo head. Consider whether smoothness or fast adjustment matters more for your typical shooting style.
Photographing a Moonrise Sequence
To photograph a moonrise sequence, lock your framing on a video tripod so the horizon stays put across many exposures.
A fluid head’s adjustable drag lets you re-aim smoothly as the moon climbs, reducing abrupt jumps that can disrupt time-lapse consistency. Before capture, tighten the head enough to stop creep during longer exposures. Keep focus fixed, and use manual exposure so changing settings don’t make frames flicker.
At ISO 400–800 and f/5.6–f/8, start near 1/125–1/500s, then adjust as clouds and altitude change moon brightness. Shoot a burst or set an interval of 10–30 seconds for one to two hours. Check frames for clipping and sharpness; the tripod stabilizes composition, but you still need to track the rising moon gradually between captures to maintain framing.
Counterbalance for Telephoto Lenses
Counterbalance helps you control a front-heavy telephoto lens and make steadier framing adjustments. Match the head’s counterbalance setting to your lens-and-camera weight, then check whether it holds the lens at your chosen tilt angle without creeping.
If it won’t balance reliably, your rig may exceed the head’s capacity, so use a higher-capacity head.
Why Counterbalance Matters
On a long telephoto lens, front-heavy weight can make the camera drift when you tilt, shifting a tightly framed composition. At 70–400mm and beyond, movement becomes obvious because your field of view is narrow.
A video head’s counterbalance uses a sliding weight or calibrated tension to oppose the lens’s forward torque, helping the head hold position instead of drooping on a downward tilt. When the balance is right, you can use less drag and make micro-tilts with finer control. If it’s off, the head may feel jerky or push back at certain angles, making corrections difficult.
That consistency matters in wind or low light, when a framing shift can spoil a shot. Counterbalance won’t eliminate vibration, but it can make tilt control more predictable.
Match Lens Weight
When you mount a telephoto lens, match the head’s counterbalance to the weight and balance of your full camera setup.
A fluid head can support pans and tilts when counterbalance offsets gravity. Check the payload; include camera, lens, plate, and accessories, and stay within specification. Secure the lens collar or plate on front-heavy 70–200mm or 100–400mm lenses, then adjust counterbalance for even movement rather than a nose-dive or sticky feel.
| Setup | Concern | Practical response |
|---|---|---|
| Light rig | Within payload | Keep accessories minimal |
| Telephoto rig | Front-heavy | Secure collar or plate |
| Near limit | Balance range | Remove extras or upgrade head |
For stills, stability helps, but fluid heads may reframe micro-compositions more slowly than ball heads. If your rig exceeds range, lighten it or choose a heavier-duty head.
Test Balance Range
After securing the lens collar or plate, test how the head balances your full telephoto setup at different tilt angles. Start with counterbalance near zero for a light load, then increase it in small steps until the camera stays neutral with only slight hand pressure.
Loosen the tilt lock and let the rig settle to find its balance point; check whether it holds at zero, 45 degrees, and near vertical. Heavy combinations, such as a 70–200mm or 100–400mm lens with a hood, follow-focus, or monitor, can shift torque and drift even at moderate angles.
If the head sags, raise counterbalance; if it pushes back or overshoots, lower it. Then verify corrections for panoramas, HDR brackets, or focus stacks; smooth-video settings may need stills-specific refinement.
Landscape Versus Portrait Framing
In landscape orientation, a fluid head helps you level the horizon and pan smoothly, while a heavier tripod can hold alignment for HDR or focus-stacking frames. For portrait orientation, its slower controls may hinder the quick, precise adjustments you need to center a face.
When switching between frames, keep leg height consistent and use fine controls for landscapes; use a faster head or plate setup for portraits if available.
Landscape Orientation
A video tripod can handle both landscape and portrait framing: rotate the head while keeping the legs and leveling in place for a consistent horizon. For landscape work, the fluid head’s pan-and-tilt resistance helps you hold a steady frame while refining composition. Make small adjustments and monitor the horizon as you pan. This control benefits panoramas, particularly multi-row sequences, where consistent alignment simplifies stitching.
A video head’s bulk can make quick recomposition less immediate than with a photo ball head. Still, you can work precisely: level the tripod, set appropriate resistance, then make deliberate framing changes. Before a long session, test the head with your camera and lens. The controls should steady the view without making fine adjustments tiring during careful landscape composition work.
Portrait Orientation
For portrait framing, rotate the head or camera 90° while leaving the tripod legs fixed, preserving their stable position and height.
A fluid head lets you fine-tune roll and tilt to keep the horizon level. Its smooth drag may reposition more slowly than a ball head. With a pan-only base, check tilt range: the camera may hit the head or plate before reaching eye-level angles.
Portrait framing adds leverage: extending the center column or aiming higher increases torque on the head. Keep movements controlled and don’t reduce tension too much. Video heads are often larger than photo heads, so the setup can feel bulky.
It suits planned, steady compositions better than quick reframing. That balance favors deliberate studio or location portrait work and patience.
Switching Between Frames
When you switch between landscape and portrait, rotate the head 90° while keeping the tripod legs in place; this preserves their stance, but a fluid head may need re-leveling to correct slight roll error that becomes more noticeable in portrait. Video heads typically carry larger, heavier bodies than photo ball heads, so changing orientation takes longer and feels less immediate. Keep the legs spread as set; moving them can alter your composition and disturb the horizon. With a long lens in portrait, vibration shows more readily than in landscape.
Before recomposing, tighten the pan and tilt locks and make sure each leg sits firmly on the ground. A quick-release plate makes the change easier, while a small mark at your preferred 90-degree rotation point helps you repeat the same framing on later shoots. Check the horizon after rotating, then fine-tune the level rather than assuming the head stayed true. That check matters when precise alignment or a consistent series matters to your final images.
Capturing Indoor Architecture
Indoors, a video tripod can steady architectural shots if you pair its fluid head with a wide or standard lens and adjust the drag to control reframing. You’ll often shoot exposures around 1/30–1/60 sec, or slower at low ISO, to retain highlight detail in mixed light.
A solid tripod limits micro-vibrations, helping you keep edges aligned, especially when you reframe carefully.
For panoramas or stitched frames, level the head, then lock its position or tension before each exposure to reduce drift. Bulk can slow walk-throughs in tight rooms, so check carry size and height range before choosing.
Quick-release compatibility can simplify setup changes, while fine height adjustments or extra leg sections help you repeat framing across interior angles. Balance consistency against the tripod’s weight.
Cold-Weather Fluid Drag
As temperatures drop, grease inside a video fluid head thickens, increasing drag and slowing pans and tilts. Many heads are designed for moderate temperatures, so near freezing you may notice stick-slip motion when you start a move. That resistance can force you to raise tension or move the joystick more slowly and deliberately.
Before composing precisely, let the head acclimate for several minutes; between shots, you can keep it inside your coat. A lighter camera load, while staying within the stated payload range, may also ease movement because heavy rigs resist the added drag.
If smooth tracking matters, test a pan and tilt at the actual temperature, then try a freer fluid setting to offset resistance without forcing the head through its full movement.
Avoiding Shutter-Induced Vibration
At slower shutter speeds, shutter-induced vibration can soften an image, particularly on older DSLRs, so a stable video tripod helps keep the camera steady as the mechanism fires. Even when your hands stay still, the mirror’s snap can start a small oscillation. Reduce it with these steps:
- Lock mirror-up or choose Live View/Electronic Shutter, if available, to remove the mirror’s impact from the exposure.
- Tighten leg locks and lower the center column; that shortens the support and limits vertical shake.
- For a 1/15-second frame, a 30-second exposure, or Bulb work, use a 2–3-second timer or remote release, then allow a brief delay for tripod oscillation to settle.
At long exposures, residual movement usually matters less than handholding, though tripod stability still sets practical limits.
Check Your Quick-Release Plate
Before mounting your camera, check that the video tripod’s quick-release plate matches its mounting system, such as Arca-Swiss or Manfrotto-style.
Confirm the plate sits firmly, then tighten the locking lever. Even slight looseness can create micro-movement that appears as blur during long exposures. If the fluid head uses a larger plate footprint, check that your camera’s tripod socket sits centered and that the screw doesn’t bottom out or leave the body wobbling.
For flexibility, use one plate across your video and still workflows so you can move between a still head, pan/tilt accessories, or camera setups without re-leveling each time. When you switch plates, tighten the quick-release clamp, twist the camera, and check for movement before using a slow shutter speed or long lens.
Conclusion
A video tripod can serve you well for photography when smooth movement and steady support matter more than quick repositioning. Its fluid head may complicate portrait framing, cold-weather operation, and fast still-photo adjustments, but you’ll work around these limits with a compatible plate, careful counterbalance, and deliberate shutter technique.
Before a shoot, test the head with your lens and camera, then decide whether its control outweighs the added setup.
Light Stand Height & Payload Picker
Enter fixture and modifier weight, needed height and a safety margin to get the minimum light stand payload and height, plus matching stands.
Phone Tripod Height & Clamp-Fit Finder
Work out how tall your phone tripod must be and how wide its clamp must open, then see listed tripods that meet both.
Video Tripod Payload & Bowl Matcher
Add up your camera rig's weight, compare it with your tripod's rated payload at a safety margin, and check that bowl and head base match.
Monopod Height Fit Calculator
Work out the extended monopod length you need from your eye height, head and camera, in cm and inches, and check a monopod's max length.