How to Mount a Camera on a Gimbal Correctly the First Time
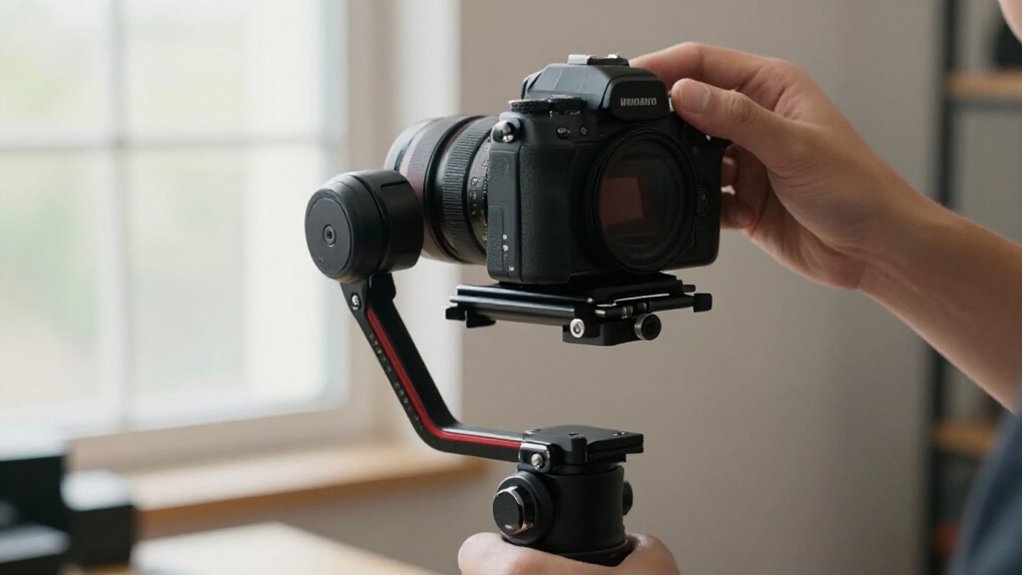
You’ll mount a camera by checking the gimbal’s payload rating against the camera, lens, cage, plates, and motors. Seat and center the quick-release plate, tighten its screw, then support the camera while locking the tilt arm.
Confirm battery and clearance, balance tilt and roll before pan, and route cables with slack.
Set focus mode, power on, and test horizon and movement. If motors overload, power off before repositioning; the steps below cover checks to prevent slips.
Quick-Release Plate Alignment
Seat the quick-release plate fully in the clamp and tighten its latch or knob so it can’t shift under motor load. Before sliding the camera onto the gimbal, align the plate so the camera’s center of gravity sits as close to the plate’s center as possible. Use mounting plates you need, but keep the weight centered to reduce tilt or pan imbalance at startup.
If you use clearance hardware, mount the plate first, then confirm the lens clears the plate and gimbal frame while the camera stays level. With power off, lock an axis and nudge the camera by hand; contact surfaces shouldn’t rock or move. After mounting, hold the camera’s weight, loosen and relock the tilt axis, then test for forward/backward and side-to-side tipping.
Check Gimbal Payload Capacity
Before balancing, check the gimbal’s rated payload and add the camera, lens, cage, plates, and any follow-focus motors to calculate your total. Compare that figure with the manufacturer’s published payload range; staying within it helps prevent motor overload and shaky performance.
- A SIGMA fp with a stills lens weighs about 800 g (1.8 lb), a load often suited to sub-$500, one-handed gimbals.
- Cinema glass can raise the load substantially. An fp with SIGMA Cine lenses may call for a higher-capacity model, such as a DJI Ronin RS or Zhiyun Crane s2.
- If you’re near the limit, choose slower, gentler moves; longer takes and aggressive motion stress motors further. Consider a larger-capacity gimbal instead of relying on a setup that barely fits under sustained operation.
Step 1: Set Lens Focus Mode
Once the payload is within the gimbal’s limits, set the lens focus mode for your shot: use AF-C for moving subjects, AF-S for mostly static ones, or MF for rack focus to prevent autofocus hunting as the gimbal moves. Choose continuous autofocus only if your lens supports it and the setup stays within payload limits; heavy focus motors or wireless controls may require a larger gimbal.
For stills, use internal AF, but keep subject distance consistent; the gimbal won’t change focus. After mounting, record a 10–15-second test while moving as planned. Check tracking on a moving subject and focus stability on a static one. Walking can make AF tracking fluctuate, so review the test before filming. If focus shifts, change modes or adjust your technique.
Step 2: Secure Camera Cables
Route every camera cable—including focus or zoom, HDMI, power, and audio—with enough slack for the pan and tilt axes to move through their full range without pulling or binding. Before powering the motors, lay cables flat along the side of the mounting plate or cage whenever possible.
Secure each run to the cage or rigging plate with Velcro straps or small zip ties; don’t let cables hang below the payload or shift its center of gravity. Avoid metal-to-camera contact. If you use wireless video or focus hardware, keep antenna and battery leads clear of the gimbal arms and pan-axis balance test.
With camera power off, turn the gimbal by hand through pan and tilt. Check for tension, friction, or clicking.
Step 3: Lock the Tilt Arm
With the gimbal assembled and powered, find the tilt-axis lock trigger beneath the camera and keep both hands ready to support the rig’s weight. Release the tilt arm only while you hold the camera’s full weight. This prevents the lens and rig from dropping or swinging forward or backward, which can disrupt balance.
Make a brief tilt-axis check before you balance pan or roll; an unbalanced tilt arm can overload the motors. After adjustment, relock the trigger firmly. Gently ease your hands away and confirm the camera stays level. If it tips forward or backward, support its weight again and release the tilt axis.
Reposition the camera or plate until the rig floats in space, then relock and repeat the gentle level check. Keep control throughout; don’t let the camera swing freely during testing. Confirm the trigger holds firmly before you proceed to balance pan and roll axes.
Step 4: Tighten the Mounting Screw
Seat the camera mounting plate fully on the gimbal’s quick-release interface, align the camera’s center of gravity near the plate’s center, then tighten the mounting screw by hand until it’s snug. Use a firm, controlled motion; don’t use an impact tool, which can crack a cage or plate or strip the mount. Stop when the screw clamps the plate securely; don’t force it past snug, because excess torque can damage the threads.
Once tightened, gently try to shift the camera a few millimeters by hand. If you feel movement or hear a creak, loosen the screw, reseat the plate fully, and tighten it again. For repeatable mounting, keep the camera’s center of gravity close to the plate’s center and tighten the screw once before you begin final checks.
Recheck the screw if later handling or repositioning changes pressure at the plate. This check helps confirm the mount remains secure without stressing the hardware during setup.
Step 5: Balance Each Axis Separately
Balance the tilt axis first: release its adjustment beneath or near the camera, hold the rig securely, and slide the camera until it floats without tipping forward or backward.
Next, loosen the roll adjustment, if present. Let go; the camera should stay level left to right. Retighten before testing.
Support the camera’s full weight, aim the gimbal like a flashlight, then stop. Check that pan doesn’t drift or rotate; it often needs careful testing.
Keep the camera’s center of gravity near the plate’s center; add plates or a cage if needed. Small fore/aft or side shifts can make each axis fight the motors. Once every axis feels neutral, lock all adjustments and run the gimbal for 10–20 seconds. Watch for motor overload or hunting.
Step 6: Check Battery Compartment Clearance
Before installing, remove the camera and plate and verify that the battery door clears the plate, cage, and any cables or connectors. Check the door’s full travel with camera seated; open it without force. If it hits the plate or cage, you can’t change batteries during a shoot.
With a cage or extra plate, ensure the door swings fully without contacting cage rails. Inspect both sides of the compartment: even a small obstruction can prevent the battery from seating or the door from closing. After mounting, keep the gimbal upright and gently open and close the door once. Confirm it doesn’t touch the gimbal with slight camera movement.
Adjust the camera or remove the obstruction before continuing. Repeat the check after any accessory change.
Run a Horizon Test
Power on the gimbal, then release the tilt axis while supporting the camera so it can’t drop. Set the tilt balance until the camera floats level, with no forward or backward tipping. Aim the gimbal forward at eye level, like a flashlight.
Tilt and pan through movements; check that the horizon stays level instead of drifting up or down. Lock the tilt, roll, and pan axes one at a time, checking the horizon when relocked. If it leans, loosen the camera plate and shift the camera forward or back to correct tilt, or left or right to correct roll.
Repeat the test until level. Then walk or make a pan for five to ten seconds. Motion can reveal drift that a stationary check won’t show.
Troubleshooting Motor Overload
If the horizon drifts despite a careful test, or the gimbal displays a “motor overload” warning, check the payload and balance before filming. Remove unnecessary covers and accessories; extra weight can exceed the rated payload. Keep the center of gravity near the plate center. A SIGMA fp setup weighs about 800 g (1.8 lb), within some sub-$500 one-handed gimbals’ limits.
| Axis | Check | Adjustment |
|---|---|---|
| Tilt | Release near camera | Move until level |
| Pan | Aim forward | Balance last |
| Retest | Power off | Test axes separately |
Lock other axes; move the camera until it floats level. Balance pan last, aiming forward like a flashlight while supporting the camera. If overload persists, power off, reposition, retest axes, re-lock, and record a stability check.
Clean Gimbal Contact Points
Clean contact points help the camera plate seat flat and stay secure. Before mounting, wipe the gimbal’s mounting surfaces and the plate’s contact areas with a dry microfiber cloth. Dust can keep the plate from sitting flush.
Inspect the plate and gimbal feet for scratches, bent edges, or missing screws; damage can let the rail or plate wobble.
If your kit has alignment pins or detents, check that they engage fully. Misalignment can shift the center of gravity, strain motors, or cause drift.
Secure the plate with the correct screw size, then tighten it to the manual’s snug torque. This compresses contact points without stripping threads. Before powering on, try to move the camera and plate by hand. Confirm there’s no play at interface.
Conclusion
Mount your camera by checking plate alignment, payload limits, focus mode, and cable routing before balancing. Lock the tilt arm only after confirming battery-compartment clearance, then power up and run a horizon test.
If a motor overloads, switch off the gimbal, rebalance the camera, and verify that no cable or accessory binds. Clean the contact points before storage. These checks help you avoid repeat setup, protect the motors, and start filming with a level, stable camera.