
How to Balance a Steadicam: Drop Time, Trim and Dynamic Balance
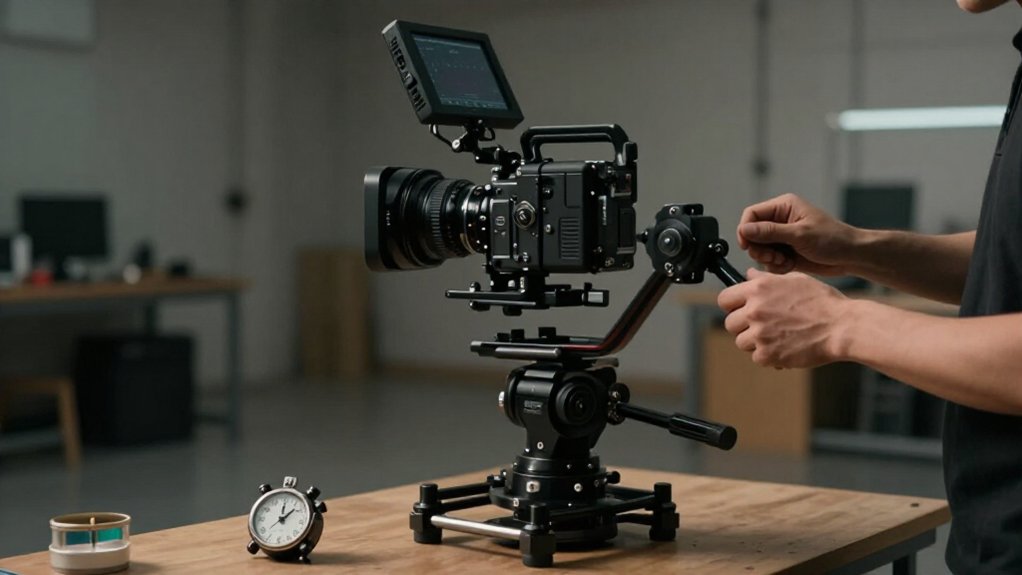
To balance a Steadicam, check that the gimbal moves smoothly without play or binding.
Mark the camera’s optical centerline, secure the mount screws, and level the monitor bracket.
Set drop time from a level start, repeating three consistent drops.
Then adjust fore-aft trim in steps until the rig settles without pitching.
Test a swing; shift weights until it floats level and returns neutrally.
If oscillation persists, inspect alignment and bearings.
The next checks refine stability.
How Do You Set Dynamic Balance on a Steadicam?
Move the slide or trim weights until the rig floats level during motion, not just at rest. Center the gimbal pivot, then adjust until the arm returns consistently when you release it slowly, without overshooting. Recheck dynamic balance whenever you change the battery or camera load, since a slight mass shift alters behavior.
Set dynamic balance by moving the slide or trim weights until the rig floats level during motion, not just at rest. Center the gimbal pivot, then adjust the weights until the arm returns consistently when you release it slowly, without overshooting.
Make a slow test swing and watch for forward, backward, or vertical drift; use small weight changes to remove it. During small controlled motions, aim for a neutral response: your rig shouldn’t speed up or lag noticeably.
Recheck dynamic balance whenever you change the battery or camera load, since even a slight mass shift can alter how the rig behaves in motion. Repeat the swing after each adjustment, and stop when the arm settles predictably and the sled tracks without directional pull.
How Do You Check Steadicam Gimbal Bearings?
With the rig safely supported, spin the gimbal and confirm it turns freely, without grinding or noticeable speed loss within a second or two. Rough bearings create stiction that makes trim corrections inconsistent, so check them before adjusting balance and resolve any roughness first.
Before adjusting balance, check that the gimbal bearings rotate smoothly; roughness creates stiction that makes trim corrections inconsistent. With rig safely supported, spin the gimbal and confirm it turns freely, without grinding or noticeable speed loss within a second or two.
Sluggish bearings often demand extra trim, disguising the actual cause. Then check for play:
- Rock the gimbal gently against its housing; feel for radial or axial movement.
- Treat any noticeable play as a bearing fault; it prevents stable neutral balance.
- Inspect and clean the bearing area using your model’s procedure.
- Verify lubrication; too little or contaminated grease can sharply increase friction.
- Re-test smoothness before drop-time and dynamic-balance work.
Bearing drag can mimic weight distribution problems, so correct it before you chase repeated balance adjustments.
How Do You Mark a Camera’s Centerline for Steadicam Balance?
With the rig on a level surface, identify the camera’s true optical axis and mark its centerline on the mounting plate or camera body with a thin strip of visible tape. Extend the mark to the back plate or center-post area so it stays consistent from front to back.
With the rig on a level surface, identify the camera’s true optical axis and mark its centerline on the mounting plate or camera body with a thin strip of visible tape. Extend the mark to the back plate or center-post area, aligning it with the rig’s reference line so your centerline stays consistent from front to back.
Use a square or measure from fixed points, such as mounting rail edges, to verify the mark sits halfway; don’t estimate by eye. Keep this axis as your alignment reference when you set balance, so gimbal and arm movements remain symmetrical around it. Recheck the mark after lens, monitor, or matte box adjustments, because shifting contents can move the optical center even when the rig remains centered.
How Do You Measure Drop Time on a Steadicam?
Hold the gimbal or center post in the same test orientation and time how long the rig takes to move from a marked ready position to a consistent end position. Repeat the drop three times and look for consistent results before you move on to adjusting fore-aft trim.
To measure drop time, hold the gimbal or center post in the same test orientation and time how long the rig takes to move from a marked ready position to a consistent end position.
Keep the rig level before release; even an initial tilt changes acceleration and skews the reading. Use the same arm height, vertical and horizontal orientation, and release method each trial so you can compare results over time.
Repeat at least three drops, recording each duration from the marked ready point to the same end position. Average the readings; small changes in release force or timing can alter a result.
If your trials vary, check that the rig’s components move freely without binding before you use drop time to guide balance adjustments.
How Do You Adjust Fore-Aft Trim on a Steadicam?
Once drop time is consistent, adjust the fore-aft trim in small steps so the sled settles without pitching forward or drifting backward. Briefly release the rig at operating height to test it, and repeat the adjustments until it stops pitching, then continue with the remaining trim checks.
Once you’ve established a consistent drop time, adjust the fore-aft trim so the sled settles without pitching forward or drifting backward when you briefly release it at operating height.
Set the drop time first, then make small fore-aft adjustments to move the rig’s center of mass. Each trim change alters the balance moment, so recheck the settling behavior after every move. If the nose drops, shift weight back or reduce forward weight until the sled no longer continues rotating forward.
If it backs off, shift weight forward until it stops drifting backward.
Make each release at the same point in time and from operating height. Check that fore-aft stability holds through the same drop-time window, not just at one exact position. Repeat controlled tests.
How Do You Level a Steadicam Monitor Bracket?
Level the monitor bracket from your normal seated or standing position, using its adjustment points to correct pitch, or front-to-back tilt, first. Even a slight angle changes your perceived center of mass and can affect balance adjustments, so do this before setting drop time or trim.
Before setting drop time or trim, level the monitor bracket from your normal seated or standing position. Use the bracket’s adjustment points to correct pitch, or front-to-back tilt, first. Even a slight angle changes your perceived center of mass and can affect balance adjustments.
Don’t judge level by eye; mount a small bubble level or phone inclinometer near the bracket for repeatable readings. Adjust until the monitor reads level from your viewpoint. Retighten the bracket’s clamp bolts after each change, since play can shift the monitor’s effective weight during operation.
Check that the screen remains level throughout the range you’ll use, including raising or lowering the rig and bracket travel. Then lock the bracket down before you set drop time and proceed to trim.
How Do You Fine-Tune Side-to-Side Trim on a Steadicam?
With drop time set and the monitor bracket locked, loosen the side-trim control, sometimes labeled yaw trim, and shift it slightly. Re-tighten it and test whether the rig stays level without drifting left or right. Make each change in small increments and retest after every adjustment.
With drop time set and the monitor bracket locked, fine-tune side-to-side trim in small increments. Loosen the side-trim control (sometimes labeled yaw trim), shift it slightly, then re-tighten the control and test whether the rig remains level without drifting left or right.
After each change, hold the rig at operating height in the same stance and arm posture. Use a one- to two-step hover, then watch whether the gimbal’s vertical axis stays centered.
A repeatable left or right walk means trim remains off; don’t chase a momentary settle. Use an external reference to confirm repeatable bias. Once aligned, make a final fine tweak while observing correction rate: slow drift versus quick self-correction can reveal dynamic balance issues rather than simple trim bias.
How Do You Tighten Camera Mount Screws on a Steadicam?
Snug the screws in a cross pattern and tighten in stages so the plate seats evenly without twisting or disturbing dynamic balance. Follow the correct torque spec or the Steadicam manual’s recommended tightness, and confirm each screw engages through the mount without bottoming against a spacer or shim.
At the camera mount, snug the screws in a cross pattern, tightening them in stages so the plate seats evenly without twisting and disturbing dynamic balance. Use the correct torque spec for your mount hardware or follow the Steadicam manual’s recommended tightness. Check that each screw engages through the mount; it must not bottom against a spacer or shim. If you feel a hard stop, pause and verify the stack-up.
Confirm screw length and thread type match the mount inserts; incorrect threads can strip under vibration and loosen over time. After tightening, apply a hand shake test to the platform. If you feel micro-movement, stop and retighten before setting drop time or trim. Recheck fasteners after the first minutes of operation, as mounts can settle.
How Do You Verify Horizon Stability on a Steadicam?
Level the rig with a bubble level or recorded footage, then watch the horizon as you raise the rig from rest to full operating height. Do this check before changing trim, and note any drift you see so you can correct it with small trim adjustments afterward.
Check horizon stability before changing trim: level the rig with a bubble level or recorded footage, then watch the horizon as you raise the rig from rest to full operating height.
With operator and camera in ready balanced position, make slow fore-aft and side-to-side adjustments. If the horizon rocks without intentional movement, check pitch or roll imbalance and mounting angle before revisiting balance time.
After any gimbal, arm, or trim adjustment, repeat the pattern. Watch for gradual horizon creep over seconds or immediate tilt; gradual rotation can indicate dynamic balance or horizon alignment issues that drop time alone won’t correct.
Compare the horizon at the start and later in a take. A consistent reference throughout steady movement confirms stable gimbal level and vest/center-post alignment.
How Do You Diagnose Pendulum Oscillation on a Steadicam?
If the head bobs fore and aft as the arm starts moving, suspect a dynamic-balance error. Count the seconds between successive peaks, since true pendulum motion often cycles once per settling interval. Use the trim dials to reduce the amplitude until the head returns to level without repeated overshoot.
If the head bobs fore and aft as the arm starts moving, suspect a dynamic-balance error. Use trim dials to reduce the amplitude until the head returns to level without repeated overshoot. Count seconds between successive peaks; true pendulum motion often cycles once per settling interval, which may last several seconds. Adjust dynamic balance until the cycle damps quickly.
| Observation | Check |
|---|---|
| Frequency shifts | Move load fore/aft in small increments. |
| Persistent bobbing | Check pivot alignment; seat plate flat, tighten clamps. |
| Uneven motion | Confirm pitch/roll axes and linkages move freely. |
You can test whether gear-induced imbalance drives the motion: shift camera setup fore and aft and note whether frequency changes predictably. If trim toward neutral reduces each swing, you’ve isolated dynamic balance; persistent oscillation warrants checking alignment and freedom of movement.
How Do You Lubricate Steadicam Gimbal Bearings?
Clean old residue from the bearings with a lint-free wipe and, if compatible, isopropyl alcohol. Apply only a light film-style lubricant of the type your manufacturer recommends, and avoid over-greasing, since excess grease attracts dust and adds drag that can upset balance. Then rotate the gimbal through its working range to confirm smooth motion.
Before applying lubricant, clean old residue from the gimbal bearings with a lint-free wipe and, if compatible with the bearing material, isopropyl alcohol. You should apply only a light film-style lubricant to the bearings and any interfaces your manufacturer specifies. Avoid over-greasing: excess grease attracts dust and adds drag, which can upset balance. Use the recommended lubricant type and viscosity for your model; bearing grease and oil aren’t interchangeable, and the wrong fluid may migrate and change resistance over time.
After lubrication, rotate the gimbal manually through its working range. Confirm motion feels uniform and free, without notchy spots. Bearing friction directly affects drop-time behavior, so recheck the gimbal’s feel before balancing.
Then perform a brief balance and drop-time check to verify tracking; lubrication can subtly alter dynamic balance requirements. If resistance feels uneven, inspect the bearing before continuing your setup before filming again.
Conclusion
Once you set dynamic balance, check the gimbal bearings and mark the camera’s centerline before measuring drop time. Adjust fore-aft trim in small increments, then tighten the camera mount screws.
Verify horizon stability through controlled starts and stops. If pendulum oscillation persists, recheck balance rather than masking it with damping. Lubricate bearings only when inspection indicates drag, using the manufacturer’s specified lubricant. Record settings so you can repeat a stable setup on your next build.