How to Balance a Camera Gimbal Axis by Axis for Mirrorless and DSLR
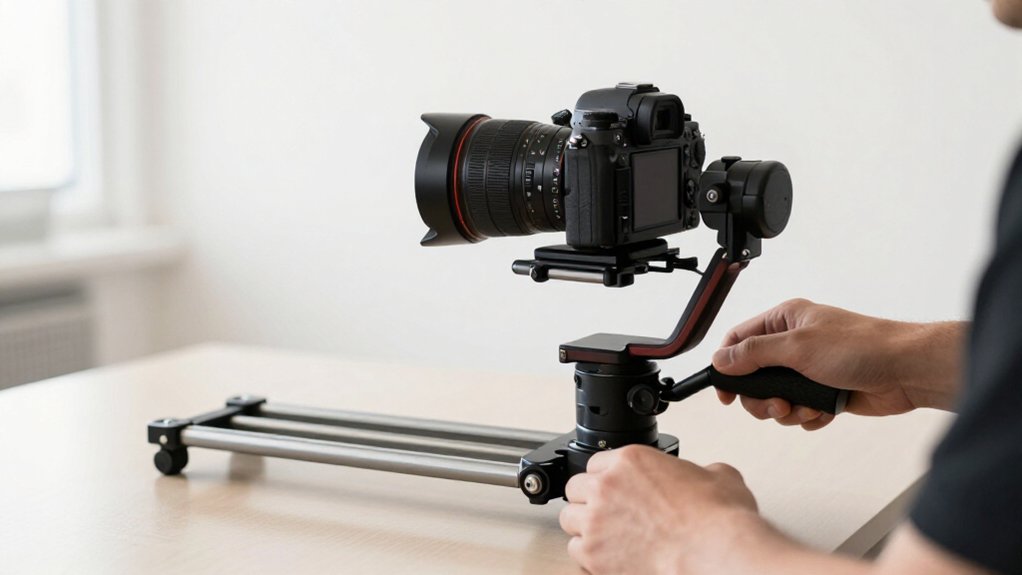
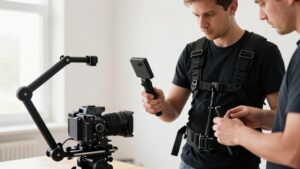
Mount the loaded camera on the quick-release plate, lock it, remove the lens cap, and power the gimbal off.
Lock focus and keep the focus ring fixed.
Balance one axis at a time in tilt, roll, then pan order, keeping the other two locked.
Slide the camera until axes float without drifting; check tilt at ±45 degrees.
After balancing, wait 3–5 seconds, verify horizon and clearance, then check cable drag during left-right pan sweeps.
Further checks can help diagnose instability.
Tilt-Roll-Pan Balance Order
Balance the axes in this order: tilt (pitch), roll, then pan (yaw), using each stable axis as a reference for the next.
For tilt, release only the tilt axis. Move the camera forward or backward until it floats in space without drifting. Tilt it ±45° up and down; it shouldn’t slide.
Once tilt holds position, release only roll. Shift the camera left or right until it stays level. Hold it horizontal and release the handle; the camera shouldn’t roll.
Release only pan. Level the gimbal and release your hand. Adjust pan until the camera remains pointed straight ahead without rotating. Recheck every axis after securing it, since small shifts can affect the next adjustment. Keep the motor locks released, and don’t power on until all three axes balance.
Lock Camera Controls
Before balancing, set the camera to video mode and disable IS/IBIS if the gimbal requires it, or select the manufacturer’s tripod/video gimbal mode. Set manual focus or lock autofocus, then keep the focus ring fixed; any lens movement can shift the balance point. Power the gimbal off, and don’t trigger zoom, motorized focus, or aperture controls until balancing is complete. Secure the camera fully in its quick-release plate and lock the plate lever before adjusting an axis.
Use this sequence to prevent unintended movement:
- Release only the axis you’re adjusting; keep the other two locked.
- Slide that axis arm, then relock it.
- Repeat for each remaining axis.
Confirm every lock before proceeding, so the camera’s center of gravity stays consistent throughout setup.
Step 1: Remove the Lens Cap
Remove the lens cap after mounting the camera and installing all accessories, but before you begin balancing.
You need the uncapped lens to reproduce the front-end weight and center of gravity you’ll use during a shoot. If you balance with the cap on, removing it later shifts the camera’s balance point. That change can cause drift and make the motors work harder, increasing the risk of strain or jitter when they engage.
Keep the gimbal powered off throughout this process. After removing the cap, leave it off as you check pitch, then roll, then pan. Each axis test must reflect the same final loaded condition; otherwise, a later weight change can invalidate your adjustments. Confirm that no cap or accessory remains on the camera before you assess any axis. This check helps produce balance without adding load to the motors.
Step 2: Attach the Quick-Release Plate
Attach the quick-release plate to the camera first, and tighten its mounting screw so the plate can’t shift under load. Use the gimbal’s sliding quick-release interface to mount the camera and plate, keeping the camera centered on the plate for predictable balance.
Before balancing, install accessories that change weight distribution, such as a battery, ND filter, or cage-mounted microphone. Even a small change can force rebalancing, so configure the camera as you’ll use it.
Seat the plate fully in the gimbal mechanism, then engage its lock and verify that it’s secure before balancing; an unlocked plate can cause drift or jerky stabilization when the motors engage. Keep the gimbal powered off. Lock the motor locks when you’re ready to balance, after the camera and plate are firmly attached.
Step 3: Slide Camera Until Tilt-Stable
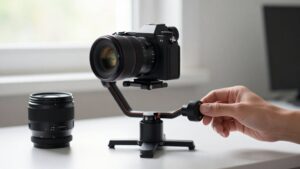
With the gimbal powered off, keep the roll and pan axes locked and release only the pitch axis. Point the lens straight up, then slide the camera forward or backward until it floats in place without toppling under gravity. Relock the pitch arm.
Tilt the camera about 45° upward and 45° downward. It should stay steady at both angles, without drifting toward either end. Then point the lens straight forward.
Release your hand and slide the camera until it remains level and still; relock securely. If it drops forward or backward after relocking, repeat the pitch adjustment until the camera holds position.
This balance matters before you power on: an unbalanced tilt forces motors to work harder, which can increase jitter and motor strain.
Step 4: Check Lens Clearance at Full Tilt
Before finalizing the balance, power off the gimbal and move the camera through its full forward and backward tilt range. Check whether the lens or camera touches the frame, handle, or cables at either stop. A camera that clears when level may still collide at maximum tilt.
If contact occurs, adjust the mounting plate position or rebalance, then repeat the check at both extremes. Recheck after fitting each geometry-changing accessory, including an ND filter holder, matte box, or battery and microphone leads. Compare configurations with wide-angle and telephoto lenses, since their clearance differs.
Also test roll and pan limits: tilt the camera up and down, then rotate it fully left and right. A lens may clear on tilt yet clip during rotation there too.
Step 5: Set Motor Strength for Payload
Once all axes balance, set the motor strength to suit the camera-and-lens payload so the gimbal can correct smoothly without overworking its motors. Select the load or motor setting recommended for your setup; don’t leave a heavier rig on a low default. For a roughly 890 g DJI RS 4 Mini class setup, use the setting specified for that payload.
Test the response at rest. If the camera jitters or buzzes, raise motor strength slightly. If it drifts or oscillates, lower it; excessive strength can destabilize a properly balanced rig. Recheck and adjust whenever you change the lens, add an ND filter, swap a battery, or move a microphone, since weight and leverage affect motor effort.
After a major payload change, run the gimbal app’s calibration or motor tuning, if available. Then hold the camera horizontal, facing down, and upright. Listen for near-silent operation and check for drift or strain.
Step 6: Record Your Camera Settings
To make test clips repeatable, record your frame rate and shutter speed, such as 24 fps at about 1/50 s or 30 fps at about 1/60 s. Note whether you’ve enabled IBIS or lens OIS, and select the camera’s video tripod or gimbal mode when available.
Record the lens, focal length, focus mode, and focus setting. For a zoom lens, note the focal length you’ll use, because zooming can shift weight and balance. Confirm that your ND filter, battery, and microphone are attached in their shooting positions before balancing; adding or moving them changes the center of gravity. Write down whether the battery is installed and the memory card is ready. Keep this setup consistent across axis tests to reproduce stabilization behavior in clips.
Verify Horizon After Settling
After locking an axis, let go and wait 3–5 seconds to check for drift or slow rotation.
Set the camera level, with the lens pointing straight forward. Keep the horizon in view, then rotate only the axis you just balanced. The horizon shouldn’t shift visibly. If the camera tilts or swings gradually, slide the camera plate slightly opposite the drift. Lock the axis and repeat the test.
After balancing each axis, power on the gimbal and allow its motors a couple seconds to settle. Check the horizon again; active motor hold can reveal a minor imbalance missed while unpowered.
Test horizontal, downward, and upright orientations. At rest, a correctly balanced axis should stay nearly silent, maintain a level horizon, and avoid motor strain.
Cable Tension During Panning
Cable tension can bias a balanced pan axis, making the camera rotate toward one side. Secure loose cables along the arm so they don’t pull during yaw.
Keep other axes locked and unfasten only pan, following your gimbal’s procedure. Level the camera; release it and watch for stillness.
Slack that snaps the gimbal around signals uneven tension. If it drifts slowly, relieve cable drag with tighter wraps or shorter runs before adjusting the pan arm.
| Check | Test | Correction |
|---|---|---|
| Cable path | Yaw swing | Route along arm |
| Release | Snap-back | Remove slack pull |
| Motor sweep | Left/right | Check drift |
After locking the pan arm, run motors and sweep left, then right. Check for delayed drift or oscillation; either can mimic panning jitter. Correct cable routing before changing balance, and repeat the pan-axis test.
Wipe Down Gimbal Contacts
Power off the gimbal, then wipe the camera mounting plate and contact surfaces with a clean microfiber cloth, dry or lightly dampened with 70% isopropyl alcohol. Check the quick-release interface for residual film; even slight dirt can shift the center of gravity by a few millimeters, causing axis drift or increasing motor load.
If your gimbal uses electrical contacts or communication pins, gently wipe them with a dry microfiber cloth to remove oxidation. Don’t spray cleaner into the contact area.
After wiping, reseat the plate firmly and lock it. Before balancing, lightly press the camera during a hold test; it shouldn’t slip.
Clean contacts whenever you swap lenses or accessories, and after dusty or windy shoots. Grime can make mounting inconsistent and stabilization unreliable.
Conclusion
Balance each axis in order: tilt, roll, then pan, and lock controls before adjusting. Remove the lens cap, attach the quick-release plate, and slide the camera until it stays tilt-stable. Record your camera settings so you can repeat setup.
After the gimbal settles, verify the horizon and check cable tension through a pan. Wipe the gimbal contacts before storage. If any axis drifts, correct it before powering on; don’t rely on motor strength to mask imbalance.