How to Use a Camera Slider: Setup, Leveling and Smooth Movement
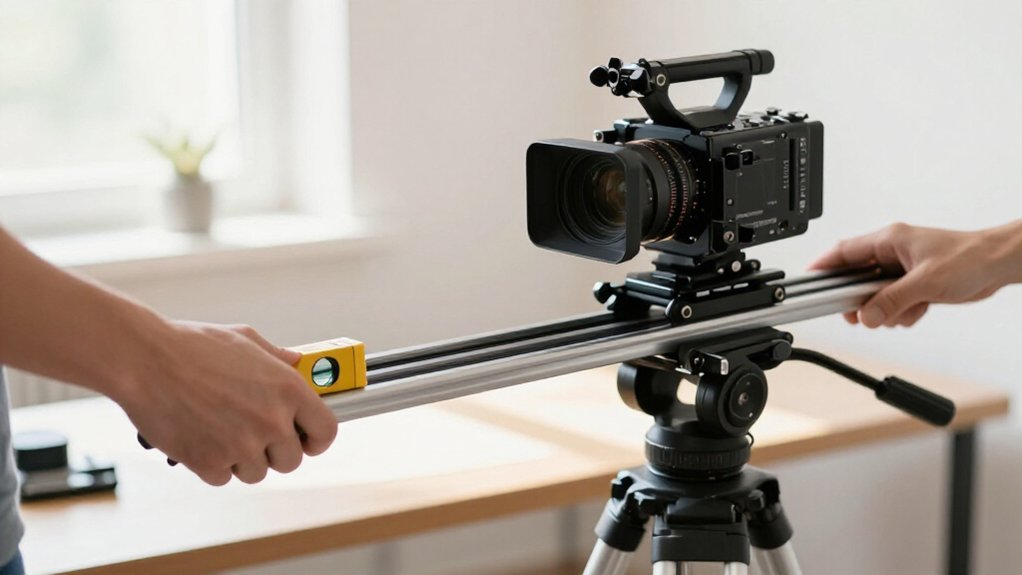
Level your slider on firm ground, adjust its feet until the rail sits true, and mark your start, slowdown, and end points.
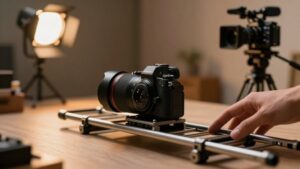
Secure the camera low on a rated head, route cables clear of the carriage, and lock focus and exposure before moving.
Match travel speed to the shot: slower glides feel deliberate, while short moves can reveal a subject.
Test the run, then check sharpness, horizon, and jitters; the next steps refine each move.
Shot Duration and Travel
A slider move should fit the shot’s duration: slow, dramatic travel needs more time to cover the same distance than a fast, energetic move. Match your travel length to the frame and pace. A short move of about one meter can reveal a subject from behind a wall or door; a two-meter move can open into a wider establishing view, but demands steadier support.
Mark your start and end points on the floor to define the framing precisely. For a clean landing, add a “begin slowdown” mark just before the endpoint.
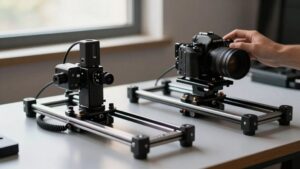
Feather the move across its full length: build speed early, hold a steady mid-slide, then ease out to stop on the mark. With a motorized slider, set speed and acceleration for the shot’s duration, and program repeatable endpoints for consistent takes.
Pre-Set Camera Exposure
Before the slider moves, compose the shot and set focus and exposure, then lock them so the image won’t shift mid-glide. With a motorized slider, check both endpoints: changing light can turn a graceful pass into a visible brightness pulse.
- Choose manual exposure or AE/AF lock to prevent metering from hunting as the camera feathers in and out.
- Set shutter speed high enough to preserve crisp detail through the glide and avoid blur.
- Enable image stabilization if your camera needs it for consistent sharpness during movement.
- Compare start- and end exposure; select settings that keep brightness visually steady.
- Rehearse a short move, check exposure stability and audio levels, then adjust before recording the final take.
Your take should glide through light without a flicker.
Step 1: Clear Loose Cables
Loose cables can turn a smooth slider move into a snag or a sudden jolt. Before your first take, gather HDMI, USB, and power leads, then tie them to the rail or a tripod leg. Route cables outside the carriage footprint, low enough to clear parts and feet. Near the camera mount, leave a service loop and secure it; extra slack keeps the line from pulling taut at either end of travel.
Motorized sliders need a full-travel check: with power on and camera off, run the carriage from start to stop and watch leads. After any setup change, repeat the check, then make a silent dry run. Watch for cable movement. Stop if a lead brushes the rail, feet, or microphone or recorder lines.
Step 2: Level the Slider Rails
With the cables secured, set the slider on its designed supports and a solid tripod foundation, then adjust its feet until the rail reads level. Use a bubble level to level the rail before filming, so your camera’s path won’t climb or dip through the move. Check the bubble whenever you reposition; even a few feet on an uneven floor can twist the setup off-level.
Keep every support planted and stable as you adjust; designed stands or rods and a firm tripod base prevent wobble from creeping into the rail.
After tightening leg locks or settling the foundation, recheck level: a loosened lock can leave the tripod subtly crooked. At final position, make a dry run, watching the rail travel to confirm alignment holds.
Step 3: Mount and Balance Camera
Secure the camera to the carriage with a tripod head rated for the full rig, camera, monitor, microphone, and accessories, and align its plate with the slider rail, not across it. Choose a stiffer head if your setup carries a heavy lens or top-heavy body; a light head can flex or bounce as you guide the carriage. Keep the camera low over the rail to lower the rig’s center of gravity and steady it.
Before filming, level the rail with its adjustable feet; even a slight tilt can make the camera drift or appear to float. Anchor the tripod legs with sandbags or weights, so the supports won’t creep or lift. Recheck, then move the carriage to confirm the assembly stays firm and tracks without wobble.
Step 4: Record a Parallax Reveal
Once the camera and rail are steady, compose your strongest frame and mark the slider’s start, finish, and any pause points with tape.
Level the rail with adjustable feet; recheck its bubble after moving a few feet, since slight tilt can distort perceived depth. Mount the camera on a carriage and fluid head for a smooth glide.
Plan your path past a near object, such as a wall or doorway: it should cross frame faster than the background. Move slowly with controlled timing for drama or faster for energy. Avoid micro-jitters that fracture layered movement.
If the shot needs pan or tilt, rehearse once. Feather the slider: ease in, hold speed through the reveal, then ease out to a precise stop at your taped finish mark.
Step 5: Check Focus at Both Ends
At the start mark, set focus on your subject, then move the camera to the end mark and check again; a slider can change the camera-to-subject distance enough to leave the final frame soft.
If your shot reveals a foreground layer or separates subject from background, check focus at both rail endpoints, not one reference point. Set repeatable start and end marks, then feather into the move; an abrupt stop can exaggerate a focus miss.
For a critical take, record a short test slide and scrub the footage, confirming sharp focus at both marks. Lock focus when distance stays constant; when it changes, use a controlled autofocus approach or another method suited to the path, and test the exact move before your final take.
Step 6: Pack Slider in Padded Case
After filming, remove the carriage and accessories, wipe dust and grit from the rail, and let it dry fully before packing.
Use the padded case to cradle the rail and supports; strap or block them against transit shifts. Set stands and brackets at the bottom, keeping heavy parts clear of the rail. On carbon-fiber or aluminum rails, pad hard contact points to protect the track and preserve alignment.
Store silicone rail grease separately, sealed away from components, so a leak can’t reach the track or wheels. Arrange feet and support rods in labeled pockets. Mark the case with the rail length and model parts, then count contents before you close the lid.
You’ll arrive ready to build, with no missing feet or rods.
Review a Test Playback
Review the playback after each take, watching the horizon for drift and the slide for jerks or micro-jitters, especially through the middle of a slow move. Then check the framing: your camera should begin on the marked start position and land on the end mark without overshooting.
Watch the first and last seconds closely. The move should ease into motion, then decelerate gradually to a clean stop, with no abrupt change in speed. If playback reveals a flaw, change one variable at a time: re-level the rail with its adjustable feet, then check tripod-head tightness. Repeat the same short test before you commit to the full shot. Compare the pass with the previous one; a horizon and even travel should read across the frame.
Footstep Vibration Troubleshooting
If the frame shivers during a slider move, check the rail’s level first: uneven floors can amplify footstep vibration, so recheck the bubble after shifting the rig.
Step onto the track area from a safe stance, or ask a helper to mark your start and stop; keep your weight off the tripod’s surface while the camera travels. Sandbag and lock tripod legs; don’t cross or drag over them, since leg lift can create crooked framing that reads as shake.
| Symptom | Check | Correction |
|---|---|---|
| Jitter | Speed | Start, maintain, feather stop |
| Persistent | Test | Plant feet; use stable, heavier rig |
Keep pressure even: abrupt steps transmit high-frequency jitter. If shake remains, repeat a slide with planted feet and your largest tripod; added mass damps movement, revealing whether your stance caused the tremor.
Lubricate Carriage Bearings
When the carriage rolls with a gritty feel or uneven resistance, clean and lightly lubricate its bearings; most slider rails need little maintenance.
Before adding your camera, inspect track and wheel contact points, wiping away dust and grit with a clean cloth. Apply only a small amount of silicone lubricant, such as Pro-Power, to the carriage bearings or rollers.
Work it in by sliding the carriage gently, then wipe away every excess; residue can collect debris and smear your rig or the floor.
Run the carriage through its full travel before mounting your camera. Watch and feel for steady rolling, uneven resistance, or a sticky-then-free release. Too much lubricant can amplify micro-jitters instead of smoothing the move. Check that the carriage tracks straight along the rail.
Once motion feels consistent, leave the bearings alone; routine oiling can make a precise slider less predictable during a slow cinematic push.
Conclusion
With your slider level, camera balanced, and exposure set, rehearse the move before recording. Match travel distance to shot duration, then glide the carriage with an even hand. Watch playback for footstep tremors or cable snags, and adjust your path before the take.
If motion still stutters, inspect and lubricate the bearings. When you’re done, secure the camera and pack the slider in its padded case. A smooth, controlled pass turns a simple setup into a cinematic reveal.