Can a Camera Tripod Hold a Projector? Weight Limits and Mount Options
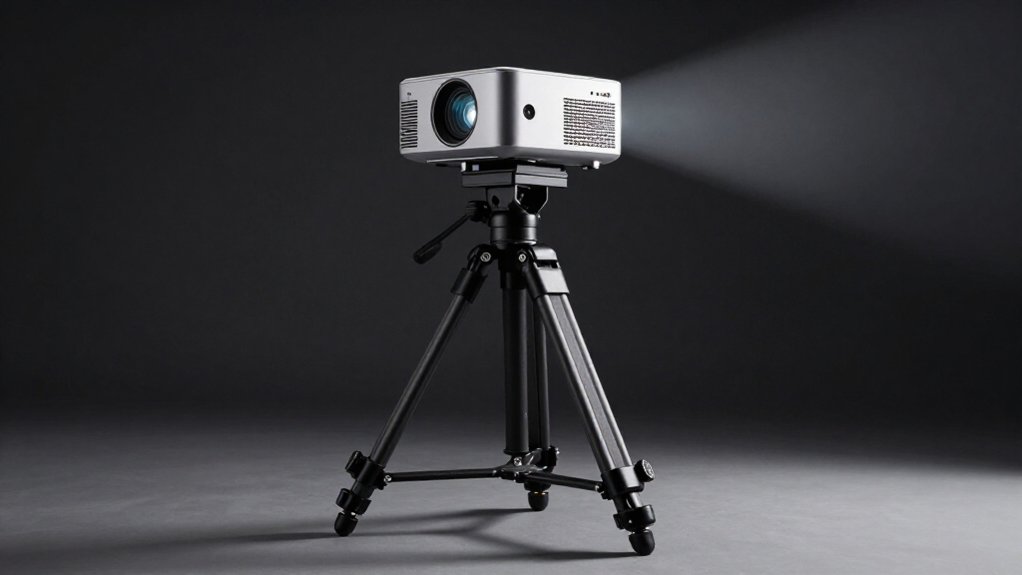
You can mount a projector on a camera tripod if its underside has a standard 1/4-inch socket and the tripod head locks securely. Check the projector, plate, and head weights against their load limits; keep the total load well below capacity, especially outdoors.
Center the projector over the head, secure the plate, and keep vents and cables clear.
If there’s no compatible socket, use a stable, load-rated tray mount. The setup details below can help you reduce wobble and tipping risks.
Verify Projector Thread
Before mounting a projector, check its underside for a metal tripod socket with a standard 1/4-inch (6.35 mm) thread. Many miniature and pico projectors, along with some digital models, include this insert. Confirm the thread by comparing the socket with a 1/4-inch (6.35 mm) screw; don’t force a different size into it.
With the correct thread, you can generally attach the projector to a standard photography tripod for height adjustment and stable placement.
If you can’t find the socket, don’t assume the projector will fit. Check its mounting requirements; some units need a specific tray-style mount or stand instead. For NexiGo models, the PJ40 series and PJ20 support tray-style mounts, while the Aurora Pro and Aurora Lite aren’t compatible with any tripod at all.
Projector-and-Tripod Weight Check
Check the projector’s weight against the tripod’s stated load rating, but don’t treat the maximum as a safe target. Compare the complete mounted load with the rating; many tripods are rated from 2 to 50 lb (0.9, 18.1 kg). For outdoor use, aim for roughly 50 to 70% of capacity to limit wind-induced wobble.
| Check | Action |
|---|---|
| Rating | Compare projector-and-mount weight with stated limit. |
| Margin | Stay near 50 to 70% outdoors. |
Use a compatible interface: a standard 1/4-inch camera thread suits many projectors; models without one need a secure tray or desktop riser. During setup, stop if the tripod wobbles, its legs or center column resist locking, or it remains unstable on flat ground alone. Those signs mean the load may exceed what the support can safely handle. Don’t use it until you’ve chosen a stronger, properly rated tripod.
Checking Center-of-Gravity Balance
For stable balance, position the projector’s center of gravity as close to the tripod head and center column as possible; a large offset can lever the legs outward and increase tip risk. If your projector is bottom-heavy, as long-throw models often are, adjust its position until the stand feels stable in every direction.
Keep the center of gravity low, especially outdoors; wind can amplify sway. Don’t extend the center column farther than necessary, because added height makes the setup less steady even with light equipment. If the column has a hook, hang a secured tote containing books or sandbags to add stabilizing weight and lower the effective center of gravity.
After positioning, check for wobble and confirm the tripod stays firmly locked. If it rocks or resists locking, stop and reposition the projector; these signs suggest its mass sits outside the tripod’s safe supporting geometry. Don’t operate it until balance is stable before projecting any image.
Tripod Head Compatibility
Check that your tripod head and plate match your projector’s mounting point; many use a standard 1/4-inch thread, while others need a tray mount or desktop riser. Confirm the plate locks securely and the head can hold the projector’s full weight without flexing.
Check the head’s rated load and lock the tilt and rotation before projecting.
Head Mounting Compatibility
Although a camera tripod can support a projector, its head must match the projector’s base thread—usually 1/4 inch. If your head carries a 3/8-inch screw, use a properly rated 1/4-inch-to-3/8-inch adapter so the projector seats securely. Before mounting, check the head’s maximum load rating against the projector’s weight; compatibility alone doesn’t make the setup safe.
For better stability, aim to keep the total load around 50–70% of that limit when extending the tripod. A ball head or pan-tilt head can help you adjust the image, but lock it firmly and confirm it doesn’t creep. If your projector lacks a tripod thread, choose a tray-style or riser-style mount that attaches to the head. Test the assembly before powering on, and keep it clear of people.
Plate and Thread Types
At the tripod head, a standard 1/4-inch screw usually lets you attach a projector directly if its base has a matching thread. Most cameras and many projectors use this industry-standard thread, so a photography tripod with a matching plate is often the simplest option. It places your projector at the head’s intended mounting point and height.
However, some projectors use a tray-style or other non-threaded mount. You’ll need a compatible tray or dedicated stand rather than forcing that design onto a 1/4-inch screw. Match the head or plate to your projector’s mounting type; a universal threaded plate won’t substitute for a device-specific tray.
Also, consider the plate-and-thread interface, load-rated mounting pattern, and projector weight. Thread fit alone doesn’t establish safe support for your setup.
Secure Attachment Checks
Once the thread and plate match, confirm the tripod head and mounting hardware can accept a 1/4-inch screw and lock the projector securely. Check that the projector or its plate has a standard 1/4-inch bottom thread, then tighten the connection and verify the head’s lock engages without slipping. Keep the projector’s weight at 50–70% of rated capacity or less; don’t rely on the full rating.
If you extend a center column overhead, test for wobble before positioning the projector above people or equipment. If the projector won’t thread on or the head can’t clamp it firmly, don’t force an adapter or improvise a lock. Use a compatible tray or desktop riser instead, then confirm stability before operation.
Projector Shape and Dimensions
Check your projector’s size and footprint against the tripod plate or tray to ensure it sits firmly. Its shape and mounting surface matter: a front-heavy or unthreaded model may require a level, supportive tray.
Keep ports and vents unobstructed, and confirm the mount can handle the projector’s weight without tipping.
Projector Size and Fit
Before mounting a projector, measure its base, especially the underside, and confirm whether it has a centered 1/4-inch tripod thread; models without one or with a recessed thread may need a tray-style stand. Check the footprint and weight distribution: a wide, flat base is generally steadier on a tripod plate than a narrow or uneven one. Compare projector height and lens position with the stand’s working height to achieve throw alignment without overextending the center column.
Follow manufacturer attachment points, keeping vents, ports, and cable routes clear. For a recessed or absent thread, use a load-rated tray that supports the chassis and permits needed tilt. Tighten connections securely, then check for rocking with the projector off. Never force a screw into a mismatched thread.
Shape and Mounting Surface
Thread compatibility matters, but the projector’s shape and footprint determine how securely it sits on the tripod. Check for a standard 1/4-inch socket; most camera tripods use it, but a matching thread doesn’t guarantee stable support. Measure your projector’s width and length, then compare them with the head plate or tray. Keep its footprint fully supported and its center of mass over the tripod carefully.
| Base shape | Practical support |
|---|---|
| Flat bottom | Clamp or screw it down securely. |
| Rounded base | Use a tray-style tripod or matching riser. |
| Any shape | Check weight and center-of-gravity height. |
A higher center of gravity can increase wobble and tip-over risk, even when the mount fits. Confirm weight capacity and test the setup on a level surface before operation.
Clearance for Ports and Vents
A secure fit must also leave the projector’s ports and airflow paths unobstructed. Check the projector’s actual height and width, then compare its lens and vent locations with the tripod head plate or bracket. Keep rear vents and side intake or exhaust ports clear during operation.
Allow room for the power socket, HDMI and USB plugs, and cable strain relief. When you rotate the projector, cables shouldn’t bend sharply or press against the mount. If cooling grilles sit on top or near the front, make sure a tray or flat plate doesn’t cover them.
Leave space for focus and zoom rings, which may protrude or shift as you adjust the image. Keep the mounting point near the 1/4-inch thread or tray surface for balance, without covering underside vents or raised features.
Outdoor Movie Night Setup
For an outdoor movie night, use a camera tripod only if your projector fits its 1/4-inch screw mount and the tripod’s rated capacity comfortably exceeds the projector’s weight, including the head or plate.
Set the legs fully spread and locked on level ground; wind and uneven surfaces can make a setup sway. If the center column has a hook, hang a sandbag or tote bag to improve stability and reduce tip-over risk. Keep the tripod low, especially with a UST projector, and don’t extend the center column unnecessarily.
Confirm the projector sits securely on its plate before use, and keep people from bumping the legs. If your projector lacks a tripod thread, use a tray-style mount or desktop riser designed to support it instead.
Heat and Ventilation Clearance
Even with a stable tripod, leave open space around the projector’s vents so heat can escape during long viewing sessions. You should allow clearance from the tripod head or tray; don’t press the projector against either. Don’t fully enclose it on a stand: restricted airflow can cause heat buildup, regardless of tripod strength.
If your model draws or exhausts air through side or bottom vents, keep the 1/4-inch adapter, screws, and tripod column clear of those paths. In warm weather or during extended use, adjust tripod height to preserve the manufacturer’s recommended free-air stance. Don’t lower the unit close to a table or floor, where heat may collect.
Check for hot exhaust vents, fan strain, or thermal warnings. If you notice these signs, raise the projector or choose a mount that leaves airflow unobstructed.
Accidental Quick-Release Plate Release
Before you lift or adjust the projector, confirm the quick-release plate has clicked into its lock and give it a gentle pull to check that it can’t slide out. An unlatched lever can let the plate and projector drop without warning. Treat the lock as a load-bearing connection, especially when you’ve added weight below the head.
- Check the lever’s fully engaged position; don’t rely on appearance alone.
- Pull gently in the direction the plate could slide.
- Keep hands clear of the projector’s fall path.
- A center-column hook or weighted tote increases leverage and fall risk.
- If a 1/4-inch screw connection is used, check both clamp and latch.
Clean locking surfaces and replace worn parts; dirt can prevent full engagement before you lift.
Secure the Mounting Plate
Once the quick-release plate is locked, tighten its 1/4-inch screw firmly into the projector’s tripod thread. Most small projectors and cameras use this standard mount size, but confirm the thread matches before installation. Place the plate squarely on the tripod head so the projector sits level. A flat fit reduces wobble and avoids uneven stress while you adjust the angle.
If the plate has rubber pads or grip surfaces, use them to increase friction and resist sliding during rotation or tilt. After you align the image with the screen, retighten the plate’s clamp and locking knobs; positioning can loosen them slightly. Before raising the tripod, check the plate’s rated capacity against the projector’s weight plus accessories. Some lightweight stands may support only four pounds.
Conclusion
You can mount a projector on a camera tripod only if its threaded socket, weight, balance, and dimensions suit the setup. Check the tripod’s rated capacity, confirm the head and plate lock securely, and keep the projector’s center of gravity over the legs.
Leave ventilation clear, especially outdoors, and protect cables from trips or snags. If any connection feels unstable or the projector lacks a compatible mount, use a purpose-built stand instead. Don’t risk equipment, or anyone nearby, for a quick setup.