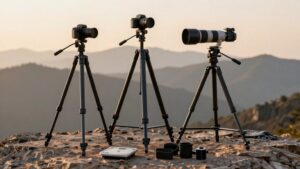
Can You Use a Camera Tripod for a Laser Level? Thread Fit and Accuracy
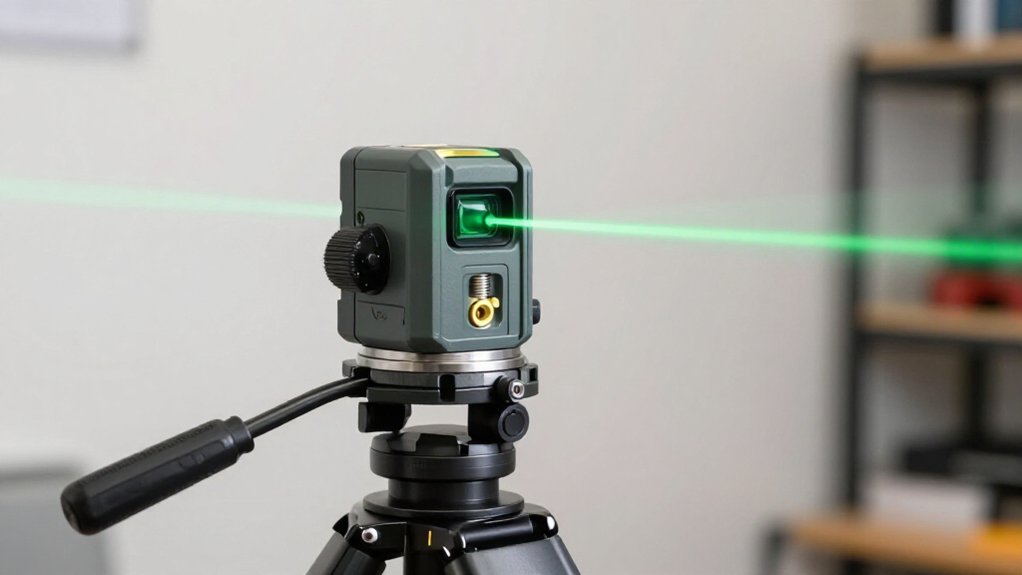
You can use a camera tripod for a laser level when its mounting thread matches and the support stays rigid.
Many camera tripods use a 1/4-inch UNC screw, while rotary lasers commonly use a 5/8-inch, 11-TPI survey mount; these aren’t interchangeable.
Use a correctly fitted adapter if needed, and check for wobble, load limits, and leg slippage.
After mounting, verify the bubble and laser against marks at two distances.
The details below explain reliable setup.
Tripod Thread Compatibility
Before choosing a camera tripod for your laser level, check the tool’s built-in mounting thread. Match the tripod or bracket to that connection before purchase; camera-style legs don’t guarantee compatibility. Rotating laser levels often use a survey mount, while line and dot models vary by design.
Some accept either mounting option, but you should confirm your model’s specifications rather than assume. Wall brackets can also have different thread versions, so check the bracket if you’re mounting through it. When the tripod and tool don’t match, choose a suitable adapter for the connection; never force the parts together.
A loose or unstable mount can shift the level and introduce alignment errors. Verify fit before setup, then secure the instrument and test that it’s steady.
1/4-Inch Thread Standards
Although camera tripods commonly use a 1/4-inch UNC thread, many rotary laser levels use a different 5/8-inch, 11-TPI survey thread. These standards aren’t interchangeable, so check your laser’s mounting specification before you buy or swap a tripod. Don’t assume that a screw will fit because it looks close; mismatched threads can fail to seat securely or damage the mount.
If your laser accepts a 1/4-inch mount, you can use a camera tripod for indoor, low-height work on a stable surface. Confirm that the tripod’s screw fully engages and holds the instrument firmly. Check wall-mount brackets, too: some use a 1/4-inch thread, but the bracket must match your laser.
For accurate, stable mounting, use the correct thread directly when possible. Adapters can introduce looseness or slight positioning errors.
Checking Bubble-Level Alignment
Once you’ve confirmed the tripod head has the correct 1/4-inch thread, check that the mounted laser sits firmly without wobbling.
If your tripod has a bubble level, verify its reading on both axes: side-to-side and front-to-back. Don’t trust a bubble position. Place the tripod on a flat surface, note the bubble’s position, then rotate the tripod 180°. If it shifts off center, the bubble isn’t calibrated for repeatable alignment.
After mounting the laser, mark its line on a wall at two distances. Check that it remains level within stated accuracy; line lasers often claim ±1–3 mm at 10 m. If the bubble check fails, or tightening the clamp makes the line drift, don’t rely on that bubble. Use the laser’s self-levelling function or manual bubble for alignment.
Laser Level Mounting Adapters
Check your laser level’s manual to confirm its mounting thread; camera tripods typically use 1/4″-20, while many laser levels use 5/8″-11.
Choose an adapter that converts the threads correctly and fits your equipment. Tighten the mount firmly and check for play, which can affect alignment and accuracy.
Thread Compatibility
Before attaching a laser level to a camera tripod, confirm their mounting threads match: camera tripods typically use a 1/4-inch thread, while laser levels may use either 1/4 inch or 5/8-inch 11-tpi survey thread.
Check your level’s manual or specifications to identify its supported mount before buying a tripod or mounting hardware. A camera tripod fits directly only if your level or included mount supports 1/4 inch.
If it requires 5/8-inch 11-tpi, an unsupported 1/4-inch connection may loosen or shift alignment. Even threads that seem to fit can have play or wobble when their diameter or pitch differs. Movement can displace the laser platform and reduce accuracy. Confirm the connection is secure before measuring. Use a rated mounting system designed for your laser level.
Adapter Types
Choose an adapter based on your laser’s thread and the camera tripod head: a 5/8-to-1/4 reducer or a threaded mounting stud can connect the two when their mounts differ. Laser levels use either a 5/8-inch, 11-TPI survey thread or a 1/4-inch camera thread; verify both interfaces before buying. If your head accepts only 1/4 inch and your laser uses the survey thread, use a 1/4-to-5/8 adapter; choose the reverse reducer for the opposite arrangement.
A threaded stud can also let your laser clamp to a standard camera head. Choose minimal play, because looseness at the interface can shift the laser’s pointing. Check added stack height, too: it can change beam elevation and affect alignment with window checks or floor-height lines in your intended layout.
Secure Mounting
For secure mounting, use a laser level adapter that matches the tripod and laser threads, seats with a tight, concentric fit, and is rated for the laser’s weight.
Most camera tripods use a 1/4-inch stud, while many laser levels use a 5/8-inch, 11-TPI mount. Choose a 1/4-to-5/8 adapter, or an adapter that matches both interfaces. Secure it to a fixed, rigid point on the tripod head; avoid a flexing quick-release plate, which can shift under load and move the line over distance.
Attach the laser directly to the adapter thread, not through loose spacers. Lock each connection and check for play before you begin auto-leveling or taking measurements. Movement at the mount can create height or line errors, so retighten the adapter if you detect rocking.
Indoor Versus Outdoor Conditions
Indoors, stable floors and walls usually let you use a camera tripod for short-range leveling, though daylight can reduce line visibility. Outdoors, direct sun may obscure the beam, so use a compatible laser receiver when needed.
Wind and uneven ground can shift the tripod and cause line errors, so secure it firmly and consider a spiked survey tripod.
Indoor Visibility Conditions
Indoor conditions usually make a laser line easier to see than outdoor conditions, especially in dim light or against a light-colored wall. Bright rooms near windows or under strong LEDs may still wash it out. Use a detector when you need a height reading and can’t distinguish the beam clearly.
For layout work, a camera tripod can be adequate if the line remains visible; steadiness also reduces auto-level re-setup. On long indoor runs, such as across a room, a suspended ceiling, or multiple bays, visibility can fade with distance. Pair a detector with a rigid tripod for more reliable readings instead of relying on sight alone.
Check the feet on smooth tile or finished flooring, too: slipping can undermine accuracy even when the beam looks clear.
Outdoor Light Interference
Moving a camera tripod-mounted laser level outdoors changes the main visibility problem: direct sunlight can wash out the beam, even though indoor lighting rarely interferes much. Indoors, you can usually see the line without a detector. Outside, bright ambient light reduces contrast, so don’t judge alignment by a faint or disappearing line.
Use a compatible receiver to find the beam; check that your level supports detector mode. Also watch for reflections from bright walls, metal roofing, or wet concrete. These can create secondary lines and mislead alignment decisions. Confirm the intended line at the target, using the receiver’s indication rather than an apparent reflection. The tripod may support the tool, but strong sunlight, not thread fit, sets the practical visibility limit for consistent read accuracy outdoors.
Weather and Stability
On solid indoor floors such as concrete or tile, a camera tripod can keep a laser level steady if you spread the legs fully and seat the rubber feet firmly. That tight stance helps limit vibration, but rocking from foot traffic or normal HVAC airflow can still shift laser dots or lines.
Indoors, check the beam after anyone moves nearby.
Outdoors, wind gusts, uneven ground, and temperature swings make lightweight tripods harder to stabilize; recheck the auto-level height or level the unit again periodically. On calm, level ground, a tripod may suffice, but you’ll see movement create height error over line distances.
Sun-to-shade changes can shift accuracy. With airflow, movement, or soft soil, choose a heavier survey-style support; stability matters more than camera-height range.
Aligning Cabinet Shelves
For aligning cabinet shelves, set the laser level on a stable tripod at the desired reference height, then fine-tune the line before marking bracket positions. Check that the laser’s mounting thread matches the tripod socket; many camera tripods use 1/4-inch threads, while laser brackets often use 5/8-inch, 11-TPI threads. If they differ, fit the correct adapter rather than forcing the connection, which can introduce wobble and shift your reference line.
Extend the tripod legs fully and seat them firmly on solid, non-slip flooring to limit movement as you measure and mark. Use the levelling head or telescoping center column, if available, to make small height and alignment corrections. Once the line is level, mark each bracket position from the line and recheck it before fastening.
Tripod Load Capacity Limits
Although a tripod may physically hold a laser level, verify its rated load capacity and keep the combined weight of the level, clamp, and adapter comfortably under that limit. A low-rated camera tripod may support your level yet lack stiffness for precise work. Excess load can allow the head or legs to flex, causing wobble, line drift, or inconsistent readings.
Construction and survey tripods often account for vibration and uneven outdoor conditions; many camera models target lighter photo gear instead. Review the manufacturer’s total load rating, including accessories, and any limits for center-column or leg extension. Raising the laser increases leverage and stress, so leave an even wider safety margin when you extend the column or mount the instrument high. Holding it doesn’t ensure accurate readings.
Preventing Tripod Leg Slippage
Even a tripod within its load rating can creep if its feet lose grip. Keep feet clean and dry; dust, saw-cut slurry, and moisture sharply reduce friction. On smooth concrete or tile, add rubber or other suitable non-slip pads.
- On uneven ground, place two legs downhill and one uphill to resist sideways creep while the laser auto-levels.
- Extend only as far as needed; lock every leg section firmly, especially twist-lock or clamp joints that can slip under load.
- Before setup, wipe the tripod base and feet; don’t set them on damp or dusty surfaces.
- If you use adjustable legs, inspect their joints periodically and apply a light silicone-based lubricant, not oily grime, for reliable locking. Recheck locks after repositioning the stand during a job.
Checking Bubble-Level Alignment
Check the tripod head’s built-in bubble level before relying on the laser; camera tripods may not be calibrated to the precision your laser requires. After mounting the laser, tighten its mount firmly, then check the bubble again. Mount slippage can shift the level and compromise alignment.
If your laser offers a manual calibration or bubble mode, use its own spirit level to verify the tripod bubble; don’t assume the two indicators match. Set the feet on stable, non-slip material, particularly on tile or concrete, where a slight shift can move the bubble off center. Recheck after positioning the tripod, and repeat the check at a known reference height or point.
If the bubble drifts or disagrees with the laser’s indicator, correct the setup before taking measurements. A centered tripod bubble isn’t proof that the beam itself is calibrated at your intended measurement point and height.
Conclusion
You can use a camera tripod for a laser level if the mounting thread matches, usually 1/4-20, or you add the correct adapter. Check that the head locks securely, the tripod can support the tool, and the setup stays stable. Level the tripod or laser as its instructions require; don’t assume a bubble vial guarantees accurate projection.
Indoors or outdoors, verify alignment against a known reference before marking. If the legs slip or the mount shifts, reposition or use a sturdier tripod.