How to Use a GorillaPod: Wrap, Balance and Shoot From Anywhere
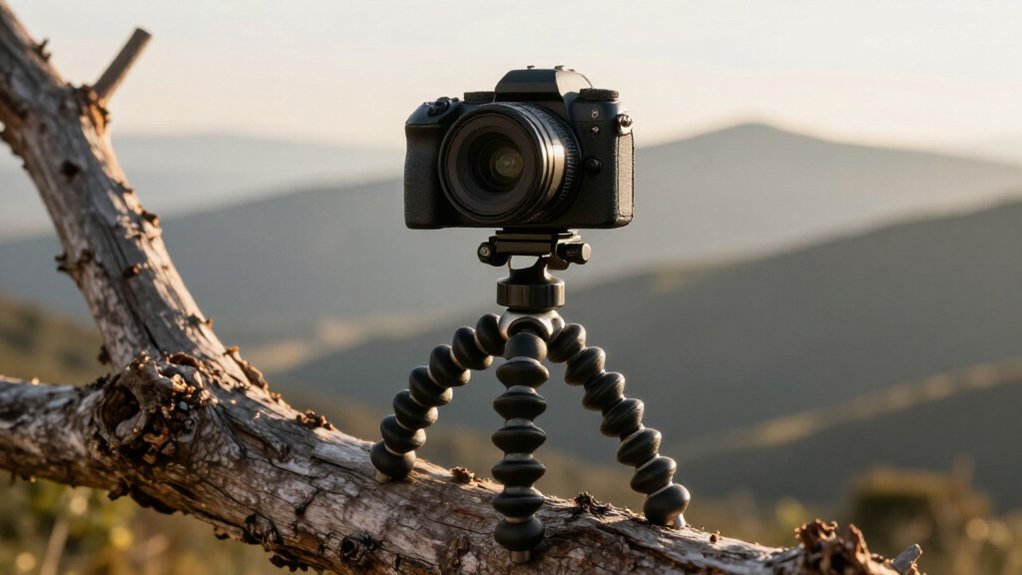
Choose a sturdy railing, thick branch, or stable pole, and check each GorillaPod joint holds position before mounting your camera. Wrap its flexible legs across broad contact areas, keeping them close to the anchor and snugging every bend.
Center the camera’s weight above the firmest grips, then tighten the joints.
Tug in several directions and reset any slipping foot. Set a two-second timer, use a remote if available, and keep these techniques in mind for steadier shots.
GorillaPod Wrapping Techniques
Wrap a GorillaPod’s flexible legs around a stable railing, branch, or pole, snugging each foot against the surface so the tripod won’t rotate under your camera or phone’s weight. For a railing, position the legs on opposite sides and angle them so the camera’s center of gravity sits above the rail. This balanced placement helps keep hands-free shots steady.
On a branch, wrap the legs higher along the limb, pressing several sections—not only the tips—against the wood to limit sway. That broader contact matters on thin branches or in wind. Around a pole, spiral the legs at different points around its diameter; this gives the tripod support from several directions rather than one side.
Once engaged, gently push and rotate the setup to check its hold. Use the ball head to refine your composition. Maintain full wrap engagement during final framing adjustments.
Check GorillaPod Joint Tension
Before mounting your GorillaPod on a railing, branch, or pole, check that each joint holds its position. Gently bend each segment, then release it; it should stay put instead of drooping. Loose joints can let gravity pull your camera or phone off balance, even after the legs look neatly wrapped.
- Adjust the segment’s knob or lock until the joint remains firm as you reposition a leg.
- After wrapping and balancing, nudge the setup lightly from several angles; watch for slipping or creeping.
- Inspect the two bends nearest the device closely, since movement there can shift framing.
- Recheck tension whenever you change orientation, including upright, upside-down, or mini-steadicam positions; each direction loads joints differently. A brief test helps keep your shot steady during the take.
Step 1: Choose a Sturdy Anchor
Choose a rigid anchor, such as a solid railing, thick tree branch, or stable pole that can support your camera or phone and the GorillaPod.
Wrap the legs across a broad contact area, gripping the railing’s full thickness or trunk. A narrow hold can slip as you pan. Avoid thin branches, hollow metal tubing, and shaky fence slats; loose coverings and unstable shapes can shift under leg pressure and magnify vibration.
Before you trust the mount, tug upward, downward, and sideways. Watch for rotation, movement at the anchor, or legs beginning to loosen, and choose another support if anything shifts.
Outdoors, in wind, favor a heavier, fixed anchor. A support gives the GorillaPod a base and helps keep your equipment secure while you shoot.
Step 2: Position the Camera for Balance
Position the camera’s center of gravity over the GorillaPod’s contact points—for example, keep a heavy lens or phone centered between the wrapped legs—to reduce wobble. When you wrap the legs around a pole or railing, tighten the grip and adjust the rig until it hangs level. Use the head and knobs to tilt the camera without loosening the wrap.
Keep the camera angle close to the wrap’s axis; extreme off-angle tilts add side load and can make flexible legs creep. Turn the nearest knob to fine-tune roll and keep the horizon level, especially for controlled, jib-like product shots. Before shooting, give the rig a gentle push in the direction you’ll move, about a foot. If it shifts or vibrates, readjust the camera angle or head.
Step 3: Set a Two-Second Timer
Once the GorillaPod’s legs are locked at the desired angle and firmly wrapped around a railing, branch, or pole, frame your shot on the live view and set a two-second timer.
The countdown gives vibrations from your button press time to fade before capture, especially when flexible legs rest on an uneven surface. Keep the camera’s framing fixed as the seconds pass.
For a talking-head shot, start the timer, step into position, and hold still as it reaches zero. This pause helps prevent the press from transmitting wobble through the legs.
When you shoot several takes, keep the same wrap point, leg angles, framing, and timer interval. This helps you match takes consistently, while the braced mount keeps the scene steady from the moment capture begins.
Step 4: Release the Shutter Remotely
With the GorillaPod secured around a railing, pole, or branch, use its included remote shutter, or a paired Bluetooth remote, to start or stop recording without touching the camera. First, tighten each flexible leg against its support, checking that the mount won’t slip under the camera’s weight. If your model relies on a phone app, pair it before setup and test the connection; a prepared link responds more reliably when you step away.
Press the remote from a few steps back, keeping your hands clear of the rig. The camera can begin recording without the vibration a direct tap may introduce, while your hands stay free to manage the scene. After triggering it, let the camera settle for a moment before moving into position for a continuous take. If footage appears rotated or tilted, correct its orientation in editing with a rotation tool or warp stabilizer rather than handling the camera during recording.
Step 5: Frame Against the Horizon
After triggering the camera remotely, check the horizon before filming: align the phone or camera’s level edge parallel to the horizon, then tighten the GorillaPod joints to lock the angle. Wrap the GorillaPod around a railing, pole, or branch at roughly chest height; this keeps the horizon steady while you adjust composition with only the ball head or camera mount.
Use small, controlled leg movements to roll the setup until the horizon runs level across the frame. Micro-adjustments usually hold pitch more reliably than re-wrapping the legs, which can shift the camera’s tilt. If the line still drifts, spread the legs for a wider grip and more contact with the support surface.
Once you’ve locked your composition, record a quick 10–15-second test take; check that the horizon doesn’t bounce when you touch the legs or press record. Keep the scene’s strongest horizontal features visually balanced without sacrificing subject placement in the final camera frame.
Step 6: Protect the Lens Cap
Before mounting your camera or phone on a GorillaPod, remove the lens cap or protective cover so it won’t block the lens while you shoot. Keep the cap in a pocket while you wrap the flexible legs around a railing, branch or pole; quick repositioning can otherwise leave it on the camera. If your GorillaPod supports a tether or cap holder, secure it before changing the setup angle.
As the legs bend and the camera tilts, a loose cap can slip off and drop.
After shooting in dusty spots, reattach the cap before packing your gear; grit clinging to the tripod’s legs can scratch exposed glass. For a phone mount, remove its cover before recording, then replace it afterward to limit smudges and scratches.
Inspect for Motion Blur
Check for motion blur with a quick test take at your usual walking or handheld pace, then review it at full zoom. If you’ve wrapped your GorillaPod around a railing, branch, or pole, gently shake the setup before filming. Confirm it doesn’t slip and that the head doesn’t wiggle; even slight movement can soften detail and leave edges visibly smeared.
Use slow pans and rolls, keeping each adjustment smooth and deliberate. A quick jerk can blur footage despite a secure wrap.
In dim light, your camera or phone may choose a longer exposure, making tiny movements more apparent. Raise ISO or use Night Mode carefully; check that brighter settings don’t add distracting noise or unwanted processing. If you have a remote shutter or timer, use it to avoid shake from touching the device just before you start recording. Review a clip after adjusting settings.
Uneven Leg Pressure Troubleshooting
If your GorillaPod wobbles on uneven ground, tighten the leg joints and reposition the feet so all three contact points press down at once. Then gently push the setup sideways. If it shifts, rewrap each bend so it bites evenly and increases friction; don’t leave one segment carrying the load. For a wrap, keep the legs close to the rail or branch and center the weight over the strongest grips.
| Symptom | Fix | Check |
|---|---|---|
| One foot lifts | Reposition feet | Three points touch |
| One segment yields | Rotate and rebend | Pressure spans bends |
| Wrap slips | Move closer | Grip feels firm |
Adjust the nearest knob until the center of gravity sits above the firmest contact points. Before shooting, make a 2–3 cm bounce test. If the rig moves, reset the feet and test again; vibrations can become blur.
Rinse Saltwater From Joints
After filming near the sea, rinse the bendy leg joints with clean, lukewarm water to remove salt from the ball-socket hinges. Hold the tripod as you rinse, and rotate each joint slowly through its full range. This movement opens narrow creases where salt crystals collect, flushing residue from the hinges. Don’t force a stiff joint; let water reach it while you flex the leg gently.
After heavy exposure to sea spray, repeat the rinse, then dry the GorillaPod with a microfiber cloth. Leave it in a well-ventilated place until moisture has evaporated inside the joints. Check that each hinge bends smoothly, without crunchiness or stiffness. Don’t store it wet in a closed bag; trapped moisture can accelerate corrosion at moving parts.
Conclusion
Wrap each GorillaPod leg firmly around a sturdy anchor, then balance your camera before framing the shot. Check joint tension, protect the lens cap, and use a two-second timer to limit shake.
After exposure, inspect the image for motion blur; adjust uneven leg pressure if the frame looks soft. Shooting near the sea? Rinse saltwater from the joints with fresh water and let them dry. With these checks, you’ll capture sharper images from unusual angles.