How to Use a Monopod: Stance, Height and Sharper Shots
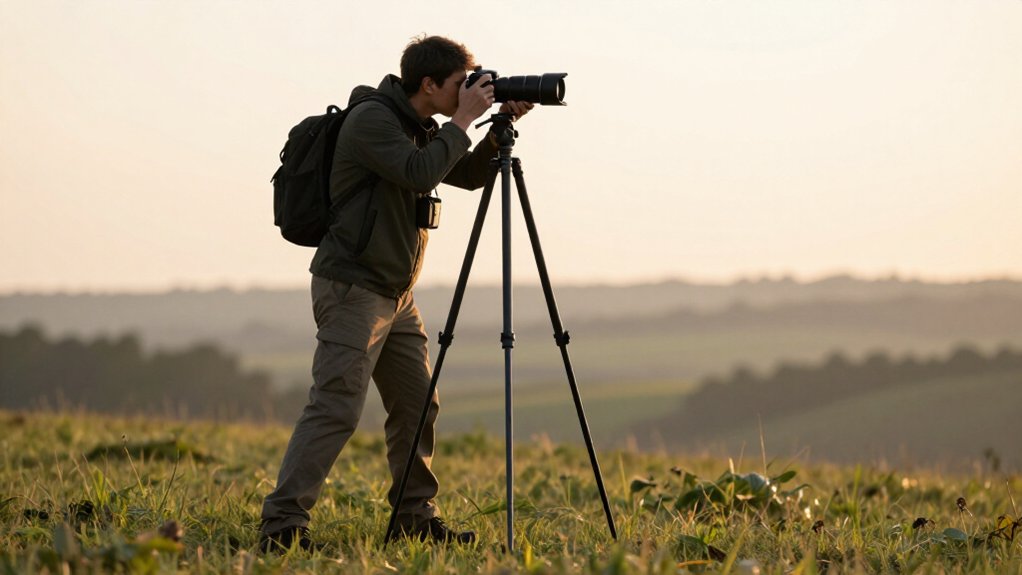
For sharper shots, set your feet shoulder-width apart and place the monopod tip between them, slightly forward. Angle the shaft toward your body, brace it against your inner thigh, and tuck your elbows in.
Extend the monopod until the camera reaches eye level, then lock each section and check for slippage.
Confirm its load rating covers your camera, lens, and head.
Mount the camera, press the shutter smoothly, and keep your stance.
More practical checks follow.
Choose a Stable Stance
To steady your monopod, stand with your feet shoulder-width to about two feet apart and place its tip between them, forming a supportive triangle. Keep the pole slightly tilted toward your body rather than perfectly vertical, and tuck your elbows against your torso to limit lateral camera movement.
After locking the height, touch the tip to the inside of one foot, near the instep, then press down gently with moderate force to reduce slipping. For greater rigidity, brace the pole against your body or inner thigh instead of relying on your arms alone.
Thread your hand through the wrist strap and use it to anchor your firm, consistent grip. Maintain that contact and posture through each burst, making adjustments without shifting your feet.
Check Monopod Weight Rating
Before mounting your camera, check that the monopod’s maximum load exceeds the combined weight of your camera, lens, and any head or gimbal by a safe margin.
Use the manufacturer’s rating for the complete load path; a tube can still fail at an undersized mount.
- For a heavy telephoto, verify the stated load at the head and maximum extension, not merely the basic height specification.
- Confirm the rated extended length reaches your intended shooting height; extending beyond its supported range can reduce stability.
- Check that the rating covers your attachment—ball head or gimbal—and its quick-release interface.
If your kit approaches the limit, shorten extension and brace the monopod against your body or a solid support to reduce stress and help preserve sharpness.
Step 1: Clear the Background and Subject
Position the monopod directly in front of you, with its base about 3 feet ahead, then shift your stance to separate the subject from distracting background elements. Keep the camera aimed at your subject as you widen your stance to shoulder width or place one foot forward.
This human-tripod stance lets you reframe, moving clutter from behind the subject so it fills more of the frame. Lock every monopod section and brace the pole against your body or tuck your elbows to prevent bounce. During bursts, use its support to stay steady as you adjust framing.
For moving subjects, pan or tilt smoothly from the same position, keeping the subject sharp as unwanted background details slide away. Check edges before you press the shutter.
Step 2: Set the Shooting Height
For portraits, extend the monopod until the camera sits around eye level; for landscapes, lower it to suit the horizon and composition. Treat that as a starting point, not a fixed rule: raise or lower the camera whenever the framing calls for it.
For a quick setup, extend the sections until the camera sits a few inches above your head. Then lower it to a height that gives you a stable view and keeps your stance comfortable. Stand with your feet about shoulder-width apart; don’t reach or hunch to look through the viewfinder, since those positions can introduce movement.
Once you’ve chosen the height, lock each adjustable segment firmly and give the monopod a tug. If any section slips, reset its lock before shooting. Recheck your framing after changing height, because even small adjustments can shift the horizon or subject placement.
Step 3: Attach the Camera Securely
Once you’ve set the monopod’s height, attach the camera securely to prevent wobble. With a small camera and light lens, screw the mounting plate directly into the camera’s tripod socket, then tighten it firmly. For a heavy telephoto lens, connect the monopod to the lens’s tripod collar instead. This shifts support beneath the lens, improving balance and reducing stress on the camera body.
If your monopod uses a quick-release plate, seat it until it clicks into place. Give the camera a gentle tug to verify the lock holds. Use a ball head or suitable monopod head when you need a level camera angle, particularly if you’re tilting the monopod slightly for stability. Before shooting, check both connections: monopod-to-head and head-to-camera, for a rigid setup.
Step 4: Press the Shutter Smoothly
Press the shutter smoothly rather than jabbing it, and aim to release it at the end of a slow exhale to minimize camera shake. Keep a firm stance with your feet about shoulder-width apart and your elbows tucked. This lets the monopod and camera move together with minimal motion as you press.
Before firing, push the monopod gently but firmly into the ground or against a supportive surface, and maintain that pressure through the exposure. Let the monopod support the lens weight, especially with longer focal lengths, when small movements appear more pronounced. An abrupt finger movement can undo the support and soften detail, so apply steady pressure to the release until the shutter fires. Check your grip before each exposure, keeping contact light.
Step 5: Track Moving Subjects
When tracking a moving subject, set the monopod so the camera sits at eye level or slightly above, then lock each section and tug gently to check for slippage.
Stand with your feet shoulder-width apart, tuck your elbows in, and tilt the monopod slightly toward you. This limits wobble during controlled pans and tilts. Practice until movement feels natural; pivot your torso to follow action instead of yanking the support.
For a firmer anchor, place the monopod’s end against your inner thigh or rest it lightly on a tree, wall, or fence. Choose a shutter speed of at least 1 divided by your lens’s focal length. The monopod won’t freeze motion, but it reduces camera shake during bursts, especially with long lenses such as 300mm or longer.
Step 6: Collapse the Monopod for Transport
After tracking the action, collapse the monopod before carrying it. Use the wrist or carry strap to control the monopod during changes. Unfasten every section, then retract segments in reverse setup order, starting with the upper section when applicable and continuing downward. This shortens handling length and avoids stressing locks.
Guide each tube and collar inward. Don’t let sections snap together or trap your fingers, and keep force off twist or lever mechanisms. Once folded, check every segment has locked in its transport position so it can’t creep outward while you walk or travel. Store it with the head and camera mount protected.
Don’t place weight on the tip or locks; pressure can misalign them and allow later extension while it’s packed for transport.
Check Histogram for Clipping
Check the histogram after each shot to confirm that exposure isn’t clipping: values pressed against the left edge indicate underexposure, while values pressed against the right indicate overexposure. If spikes touch the far right, reduce exposure to recover highlights; choose a slower shutter speed, a narrower aperture, or an ISO adjustment for your mode.
If the graph bunches at the far left, increase exposure with a slower shutter, wider aperture, or higher exposure value to lift shadow detail. Aim to keep the histogram within its bounds, separated from edges rather than piled against them. Recheck after you change focal length or lighting, since that can alter exposure. Your monopod can’t prevent clipped highlights or crushed shadows, and sharpening won’t restore detail that clipping has erased.
Fix Monopod Leg Creep
If a monopod section slips under load, fully engage its lock before shooting. After setting your height, lock the segment you extended, twist or lever, and leave no gap. Give it a gentle tug; if it moves, retighten until moderate downward pressure won’t slide it.
| Cue | Action |
|---|---|
| Lock | Close fully; test with a tug. |
| Angle | Tilt slightly to reduce shifting force. |
| Stance | Set feet shoulder-width apart. |
| Brace | Press shaft gently against thigh. |
If creep persists, inspect the locking surfaces and operate smoothly. Dirt or wear can prevent secure contact; clean the surfaces or replace worn locking parts. Keep your feet about two feet apart, hold a stance, and brace consistently against your body or inner thigh. A loose grip invites micro-movements that can loosen locks.
Clean the Monopod Foot
Once the leg locks hold, clean the monopod foot to maintain traction. Wipe the rubber tip or metal end at every setup, removing sand, mud, ice, and grit that could cause slipping or uneven contact. If you’re using a rubber foot, clean it with a damp cloth or mild brush, then dry it completely.
A wet tip can slide on debris instead of gripping the ground.
On rock, concrete, or deck boards, inspect the foot for a smooth, worn surface. A clean, textured tip helps resist skids. Before mounting your camera, gently press the monopod forward and backward to confirm the foot bites without sliding. Clean it again whenever you change locations or surfaces; grass and dirt carried to another area can reduce grip. Don’t assume the foot remains clean between setups.
Conclusion
Use your monopod as a support, not a substitute for technique. Choose a stable stance, set the shooting height, and confirm the load rating before attaching your camera securely. Clear backgrounds, then check the histogram for clipped highlights or shadows.
If the leg creeps, lock its sections and inspect the clamps; clean the foot to preserve traction. Collapse the monopod before transport. These checks help you protect your camera gear, and you’ll reduce movement and capture sharper images.