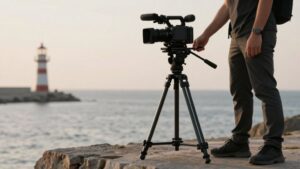
How to Use Shooting Sticks for Hunting: Setup and Steady-Shot Tips
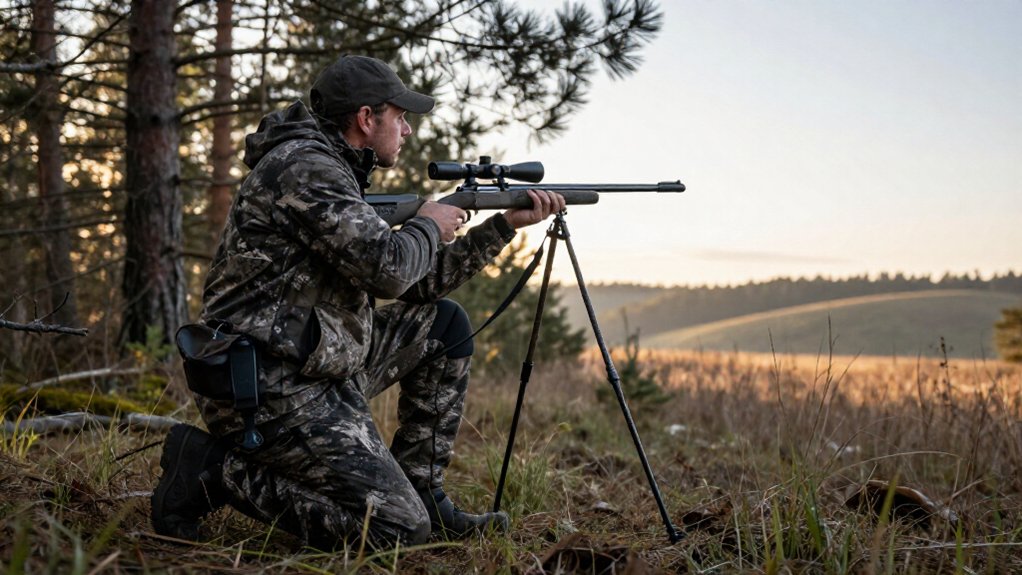
Set your sticks on firm ground, spread the legs fully, and place the rifle’s fore-end in the same cradle each time.
Clear brush from the muzzle’s path, then settle your sights on the exact impact point.
Keep your body aligned, apply steady forward pressure, and squeeze the trigger smoothly.
Test for bounce or drift with safe dry-fire practice; don’t shoot until the rifle settles and the target and backstop are clear.
More practical tips follow.
Shooting-Stick Stability Benefits
When you settle your rifle on shooting sticks, the added contact point beneath the fore-end or your hand helps tame bounce and control movement between shots. That support gives you a steadier aim and helps you return to the same sight picture after recoil.
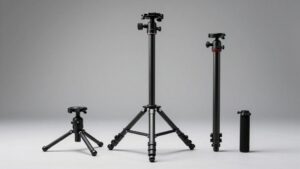
A bipod usually cuts side-to-side movement better than a monopod, while a three-leg tripod generally offers the steadiest platform for precise aiming. For more control, place stick contact slightly forward of the rifle’s balance point; that reduces its tendency to pivot vertically.
During dry-fire practice, try resting the back of your hand or the forend on the sticks while keeping normal forend support; this can limit both up-and-down and side-to-side wobble. Keep the muzzle pointed safely; follow firearm-handling rules always.
Choose Terrain and Shooting Position
Let cover and sight lines guide your position and stick choice. In tall grass or brush, choose a low or forward rest; awkward kneeling or sitting angles may make prone steadier when visibility allows.
In open ground, standing from sticks is common, but practice controlling left-to-right rifle movement before relying on it.
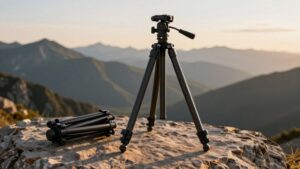
- For three-legged sticks, set two legs toward you and the third toward the target.
- Plant the forward leg slightly beyond the rifle rest to limit vertical pivot.
- Keep your feet nearly perpendicular to the rifle’s direction; don’t blade your body sideways.
- Match weight to country: carry a light monopod on long western hikes; consider a heavier bipod or tripod in thick eastern cover for steady shots around 50 yards.
Maintain safe control.
Step 1: Clear Brush From Muzzle Path
Before settling in, push aside brush and tall grass so nothing can touch or snag the muzzle between the shooting-stick rest and your point of aim. Clear the lane from your firing position, not just along the bullet’s path; a stem beside the muzzle can still catch it as you settle or move. Make room for the fore-end to travel while you adjust the rest’s height and press forward for stability.
If you use a three-leg stick, test a small up-and-down and side-to-side pivot; nearby stems shouldn’t brush the rifle or deflect its muzzle. Clear foliage early, especially in tall grass or brush, so you’re not forced into an awkward position that compromises steadiness or clearance. Recheck after settling; stance changes can swing it.
Step 2: Spread the Legs Fully
Spread the legs fully and set each one on firm ground at a stable angle to limit up-and-down pivoting as you settle.
For three-legged sticks, place two legs toward you and spread them wide; position the third away from you, aligned with your target. This layout distributes pressure without letting the rest rock.
Set each foot slightly forward of the point where the rifle will rest, so forward pressure toward the supported side helps resist vertical movement. On uneven ground, adjust the spread until each foot has firm contact. In grass or brush, find solid patches rather than planting legs halfway into soft cover, where they may sink or shift.
Before settling in, check that the stance feels stable and won’t slide if you move.
Step 3: Nest Rifle in Cradle
Once the legs feel stable, nest the rifle in the yoke’s V- or U-shaped cradle, seating the fore-end firmly at the same contact point each time. Keep the action area clear and your hands positioned consistently; don’t let the rifle balance on a surface that shifts as you settle in.
The cradle should reduce vertical and side-to-side movement, but it won’t compensate for setup. Adjust the head or stick height until the legs meet the ground slightly forward of the rifle’s resting point. That geometry helps prevent the muzzle from pivoting up or down when you adjust your hold.
Check that the rifle sits and the action remains unobstructed. Then practice mounting and dry-firing in a safe direction, repeating the same seating pressure each time.
Step 4: Squeeze the Trigger Smoothly
Keep your firing-hand pressure steady and let the sticks settle the rifle as you press the trigger in one smooth, uninterrupted motion. Don’t snatch the trigger when the animal enters your sights; begin a deliberate squeeze before it’s perfectly centered, then keep adding pressure until the shot breaks. This “squeeze through” helps prevent a jerk that can knock the rifle off the yoke.
Hold the forend naturally on the support area. With a three-leg setup, keep the forward leg in contact slightly ahead of the rifle’s resting point to limit pivot as you press. Practice dry-fire safely, following your firearm’s manual in a controlled direction. Watch for up-and-down or side-to-side movement; abrupt pressure often causes it. When ready, focus on a smooth, deliberate press.
Step 5: Test Stability Before Firing
Before you fire, settle into your shooting stance and dry-fire safely with the same hand placement you’ll use in the field.
Set your sticks at armpit height or slightly lower, then watch the muzzle as you test the position. It shouldn’t bounce up or down, nor wander right or left.
Take a few seconds to confirm the legs touch ground slightly forward of the rifle’s resting point; that geometry helps resist vertical pivot. With a tripod, place two legs toward you and the third away, aligned with the target, then apply gentle forward pressure.
Rest your forend naturally in the yoke, keeping your usual hand on the support area. Notice whether your first movement swings the muzzle. If it swings, adjust and retest safely.
Step 6: Collapse Legs Before Moving
After confirming your rifle rests steadily, collapse or retract the shooting-stick legs before changing positions. Use the quick-adjust lever or knob; keep your muzzle pointed in a safe direction and your finger off the trigger.
Collapsed legs are less likely to snag brush or tall grass and pull you out of balance. They also let you move quietly and under control when you’re hunting predators or hogs at night, when movements can spook game. Don’t drag the sticks between spots; carrying them collapsed helps preserve the yoke or head alignment, so your rifle settles at the next lane.
With tripod-style sticks, collapse each leg to save setup time. Once settled, extend them to armpit height or slightly lower before taking your position.
Inspect the Target’s Impact Point
Settle the rifle on the sticks, then confirm your sights hold on the exact point you intend to hit, such as the critical area, not just the target’s outline. At hunting distances, small vertical or sideways movement can shift impact, so use the sticks to keep the muzzle controlled. With the rifle unloaded, dry-fire and watch the front sight or reticle settle back on that same spot after you apply pressure.
If you adjust stick height or tilt, check alignment again; changing leg contact or forward pressure can move your aim. After a safe check, confirm the point once more before firing, especially if you’ve changed stance or hand placement. Keep the muzzle pointed safely throughout, and follow your range and hunting safety rules.
Swaying Shooting Stick Solutions
If your sight picture drifts, adjust how the sticks support the rifle rather than forcing the shot. Place the forward legs slightly ahead of the rifle’s rest; they bear its weight and limit vertical pivoting. For side-to-side wiggle, choose a tripod, with two legs toward you and one aligned downrange. Apply gentle forward pressure without locking your posture, keeping the head planted on soft or uneven ground.
| Sway | Adjustment | Check |
|---|---|---|
| Vertical | Set legs forward | Reduce bounce |
| Lateral | Splay tripod legs | Center target |
When range changes, use a quick-adjust yoke to realign without shifting your position. At practice, dry-fire safely in a direction, checking both axes; control vertical sway before live shots.
Don’t fire until the rifle settles and your target and backstop remain clear.
Lubricate Telescoping Leg Locks
When telescoping legs start sticking, clean and dry them before applying a light coat of dry-film lubricant, or a thin silicone or PTFE spray, to the sections the locks clamp. Wipe away grit and let the tubes dry fully; particles trapped in lock sleeves can score the legs and worsen sticking. Apply only a small amount, then extend and retract each leg several times to spread it evenly.
Skip heavy oil or grease: they collect dust and may weaken clamping force, causing wobble. If locks include rubberized or plastic parts, check compatibility first; afterward, watch for swelling or tackiness. Then tighten every lock and tug each leg firmly before loading the sticks. If a leg slips, don’t trust it for a shot; clean clamp surfaces and retest carefully.
Conclusion
Steady shots start with sound setup, not last-second adjustments. Choose firm ground, clear your muzzle path, spread the legs fully, and settle your rifle into the cradle before aiming. If the sticks sway, reset your stance; inspect and maintain leg locks when you’re back home.
Keep the muzzle pointed in a safe direction, confirm your target and what lies beyond it, and collapse the legs before moving. Practice these steps until they’re routine, then hunt with greater control and confidence.