Can You Use a Monopod for Video? Fluid Bases and Smooth-Shot Tips
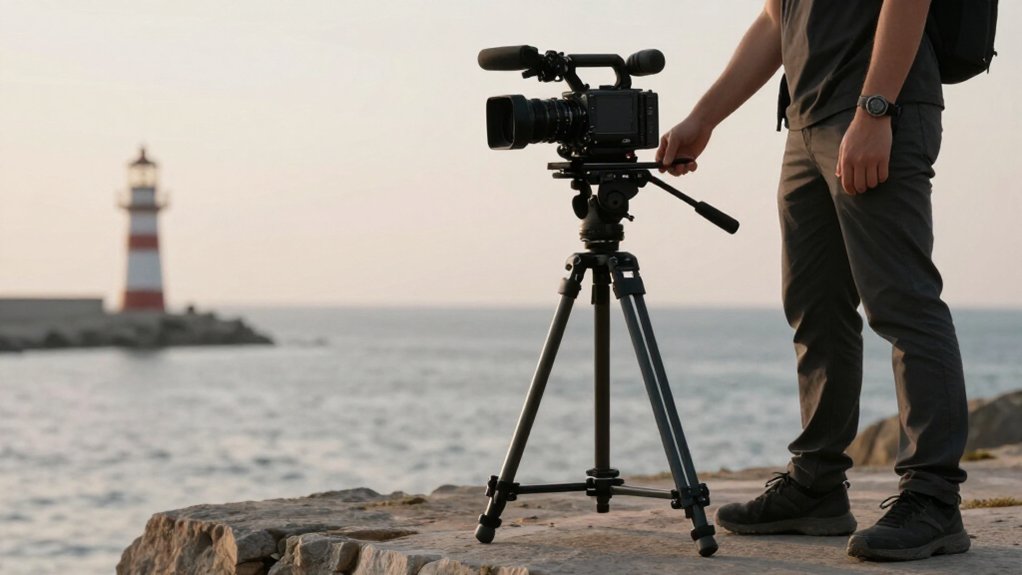
Yes, you can use a monopod for smooth video when its fluid base and head support your camera-and-lens weight. Set the drag so pans and tilts move steadily without free-sliding, and lock the quick-release plate to prevent sag. Plant the feet firmly, angle the monopod slightly, and let the rig settle before recording.
Keep vertical edges straight as you track, using the head, not a whole-body lean, to steer. The setup details ahead can help you refine each move.
Fluid-Base Video Compatibility
When you mount a fluid head on a video monopod, its controlled drag can turn pans and tilts into smooth, deliberate moves, even with the rig balanced on one leg. Instead of letting the camera free-slide, dial in drag so resistance guides each move and keeps a slow pan from looking abrupt. That control matters with long lenses, where tiny corrections can swell across the frame. Match the head’s capacity to your lens and camera, then lock the rig to a secure plate; oversized glass needs a head that won’t sag as you tilt.
For a reveal or tracking shot, a fluid or ball-joint mount lets you lean or step into the move, while the head smooths the camera’s response and softens abrupt starts.
Monopod Base Foot Placement
Place the monopod feet on firm ground with consistent spacing, such as a shoulder-width stance, to limit side-to-side sway during a pan. If your model has three snap-out video feet, step on one as you shift; pressure keeps it from sliding and locks the base for smoother motion. For a controlled pan, angle the monopod slightly toward or away from your body instead of holding it perfectly vertical, creating a tripod-like pivot.
Press the base against your body or tuck an elbow in to add another contact point and keep small foot-placement changes from shaking the camera. On sand, rocks, or grass, don’t trust a free-standing setup. Reposition until the feet sit firmly; a planted base resists bounce and jitter as you track a subject.
Keeping Horizons Level
With a fluid or drag head, pan smoothly to keep vertical lines and the horizon from drifting. Set your feet shoulder-width apart, then tilt the monopod slightly toward or away from you; this counters body sway before it rolls the frame. Track with controlled head pans and tilts, not a whole-body lean, so your subject moves while the skyline stays put.
For a sideways reveal, adjust the head or arm angle to cancel camera roll. Make small horizon corrections as you move, then let the rig settle before recording; less bounce means less wander. Check doorway edges; straight verticals expose subtle roll before the skyline does, clearly in frame.
| Shot cue | Camera control | Horizon check |
|---|---|---|
| Pan | Move head smoothly | Watch verticals |
| Track | Pan and tilt | Keep skyline level |
| Reveal | Adjust head angle | Cancel camera roll |
| Before recording | Let rig settle | Make micro-corrections |
Fixed vs. Folding Feet
Fixed feet stay planted for consistent support as you pan, while folding feet snap out to steady your shot and tuck away for carry. On sand, rocks, or slopes, folding feet can offer more control over where the base makes contact.
Choose the setup that fits your shooting ground and pace, then give the locked monopod a gentle tug before you roll.
Fixed Feet Stability
When you settle into a shot, fixed feet meet the ground at the same height and angle each time, making your monopod’s stability more predictable during video.
That repeatable contact gives you a dependable base as you frame or track a subject. You can plant the monopod and start rolling without resetting hinges. With a fluid head, fixed feet keep base wobble from fighting drag during a controlled pan or tilt.
Folding feet can add support, but each section must lock fully and sit flat; a loose joint or uneven landing can create tiny movements that show as shake. Before moving, press a foot lightly and watch the frame. If it shifts, correct the footing before recording as the camera moves through the shot.
Folding Feet Portability
For a travel shot, folding feet snap out to give your monopod a wider, steadier base, then fold away for packing. Weight one foot. At location, deploy them before rolling; each foot should land firmly, because a slight shift can register as visible tremor.
For a long setup, extend the sections carefully: at roughly 6’5”, extra reach makes base wobble more obvious. A ball-joint foot lets you lean or slide the monopod with less resistance, while a fluid-drag head controls pan and tilt. Fixed feet remain ready for a quick shot; folding feet need a brief deployment, then lock into support.
| Feature | On-camera effect |
|---|---|
| Fixed feet | Ready for quick placement |
| Folding feet | Fold away; deploy and lock |
| Ball joint | Easier lean or slide |
Choosing Between Foot Types
On a slow pan, foot rigidity matters: fixed feet give you predictable support without snap-open movement, while folding feet offer a compact, flexible stance for travel and uneven ground.
Choose fixed feet when you expect repeated long takes and want to minimize mechanical play. Their rigid contact keeps a fluid drag head tracking cleanly through pans and tilts.
With folding feet, deploy each leg and listen for its click; a partly latched foot can introduce micro-wobble as you move.
For reveal shots, where you lean laterally, steady footing matters even more. Before rolling, lock the legs and gently shift the monopod side-to-side. If a folding foot moves, press down on it before panning. You’ll get easier packing and a tripod-like stance on uneven ground.
Panning With Heavy Lenses
With a heavy zoom mounted, use a quick-release plate to balance the lens while keeping the monopod’s pan axis steady. Set your fluid head’s pan drag so you can sweep smoothly without jitters or uneven resistance.
Plant your feet shoulder-width apart and angle the monopod slightly as you track the subject.
Balance the Lens
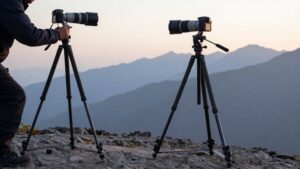
As a 400mm f/2.8 and 2.0x teleconverter swing across the frame, tilt the monopod slightly rather than planting it perfectly vertical; your body’s natural sway can damp the lens’s movement and help keep the pan level. Grip the monopod below the camera and tuck your elbow against your torso. That contact steadies the system’s center of mass as the lens swings, while a fluid drag head or monopod fluid base supports the load.
Keep the head level against the horizon; vertical edges reveal any dutch-tilt drift. If they begin to lean, correct the head and rebalance your hold before continuing. Check that the head and plate are rated for the camera-lens combination, then let your torso carry the support rather than your wrists.
Pan With Control
A level head and steady grip set you up to pan a heavy lens without letting the rig wobble.
With a 400mm f/2.8 and 2.0x teleconverter, brace the monopod with your lower hand gripping below the camera rig. Keep your feet shoulder-width apart and lean the pole slightly; that tripod-like angle cuts side-to-side sway. Let the fluid head handle the pan, using its drag to keep horizontal movement low-jitter as the support shifts.
| Move | Picture |
|---|---|
| Brace | Your hand anchors the rig |
| Sweep | The lens crosses the frame |
Practice a smooth arc, keeping the subject near the pan’s center; don’t stop and restart. In testing, ISO 1600 at 1/160s with zebra checks kept brightness dead-solid perfect, so you can watch the pan instead of chasing exposure.
Track Smoothly
When a 400mm f/2.8 and 2.0× teleconverter magnify every twitch, let a fluid-drag head guide the pan. Choose a video head with adjustable drag; its 360-degree pan and, if supported, roughly -60° to +90° tilt keep movement controlled.
With the long lens mounted, angle the monopod slightly rather than planting it dead vertical, then turn from your torso, not your arms. Support the pole below the camera, set your feet shoulder-width apart, and let your body sway consistently as you track.
Practice rock-and-pan tracking in one broad arc, guiding the subject through the viewfinder instead of snapping into left-right corrections. For slower, cinematic motion, lower shutter speed slightly while holding that arc steady; use zebra exposure aids, if available, to keep takes consistent across sequences.
Tracking Wildlife in Flight
Follow the bird before it takes off, then let a monopod’s fluid drag head guide a smooth, controlled pan instead of shaky handheld motion. Start tracking while its path is predictable; a steady stance and gentle monopod tilt keep the bird framed as it crosses the sky. Grip low on the shaft, and press it against your body or tuck an elbow close to limit vertical bounce.
When the bird banks sharply, use a rock-and-pan: sweep in a wide arc, keeping the camera moving so you don’t lose it while your pan catches up. At long focal lengths, choose a shutter speed fast enough to freeze wing beats; around 1/160s worked in a setup. Raise ISO to hold exposure without slowing the shutter.
Battery-Powered Fluid-Base Compatibility
Before a slow pan across the sky, match the battery-powered fluid head to your rig’s weight and center of gravity: a 400mm f/2.8 GM with a 2.0x teleconverter puts several pounds on the monopod, and an under-rated head won’t deliver smooth tilt or pan. Check whether powered features need a battery; its runtime can shift balance or make movement feel heavy or drift.
Confirm the head covers your move range: monopod video heads offer 360-degree pans and -60° to +90° tilt, without binding when you lean the rig for a reveal. Keep the quick-release plate and screw interface snug and rigid to prevent micro-wobble. Practice with the same battery-loaded setup you’ll shoot; a changed battery level can subtly alter balance and fluid feel during tracking shots.
Avoiding Excessive Handle Pressure
As your subject moves through the frame, use a light, steady grip on the monopod handle; pressing down too hard can add high-frequency shake that shows up in the video, even during a smooth pan. Let the support carry the camera, not your arms; with a foot or stance base, plant your feet and keep the monopod slightly tilted toward your body. This tripod-like angle steadies the shaft without rigid, tense hands.
- After locking extensions, check stability with a gentle touch; force can flex the tubes and amplify play.
- As you track, breathe and pan at the end of a slow exhale, before your fingers tighten.
- Guide the fluid head with minimal handle pressure, watching the image for jitter rather than forcing a correction.
Practice on Passing Cyclists
Passing cyclists give you a clear target for practicing smooth tracking. Keep your fluid video monopod slightly tilted, not perfectly vertical, and brace your elbow against your body to limit side-to-side sway.
Set the fluid-drag head, then start your pan before the rider reaches you; the cyclist should glide across the frame from your chosen reveal point.
Practice a sideways shift reveal or simple pan reveal, moving left-to-right, then returning to center. Match pan speed to the cyclist’s pace instead of chasing late. For walking-to-jogging tracking, grip the monopod below the camera and take controlled steps to reduce bounce.
If riders change direction often, use a wide rock-and-pan arc; keep the movement flowing rather than stopping abruptly, which can shake your shot noticeably.
Conclusion
Yes, you can use a monopod for video when its fluid base lets you pan smoothly while keeping the rig upright. Plant the feet wide, level your horizon, and choose fixed or folding supports to match your terrain.
With a heavy lens, guide the handle lightly; don’t muscle the move. Track a bird across the sky, check battery-powered head compatibility, then practice on passing cyclists. Each sweep builds control, so your next shot feels deliberate.