How to Choose the Right Tripod Leg Lock System for the Way You Shoot
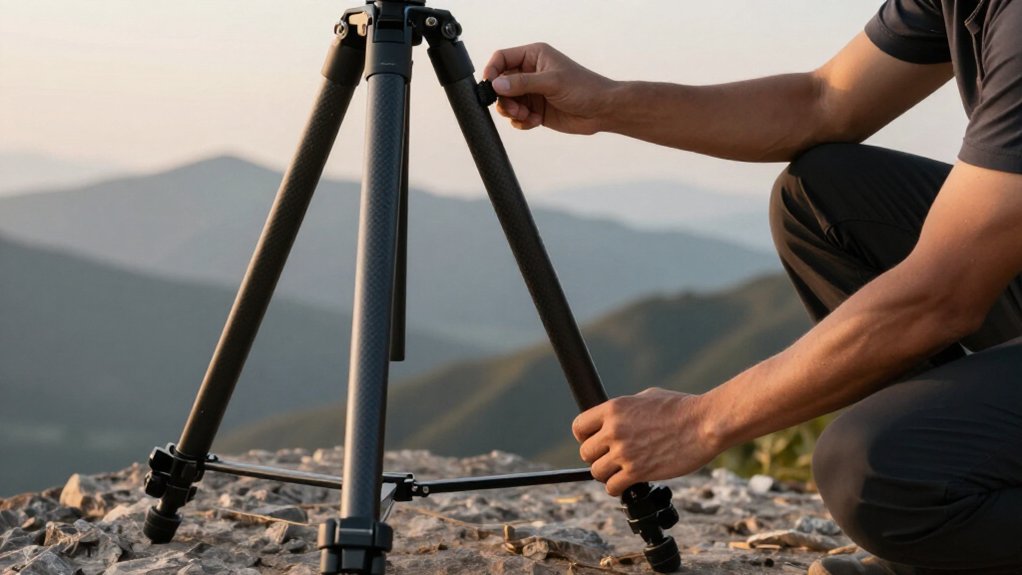
Choose a tripod leg lock by matching its mechanism to your shooting pace and field conditions.
Flip locks speed frequent height changes, while twist or screw locks tighten progressively and can resist grit or loosening.
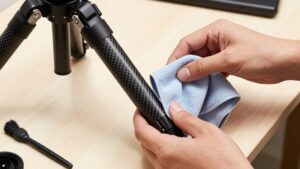
In mud or ice, wipe and cycle each lock before use.
Test operation with gloves and verify a firm hold under load.
For wildlife, favor quieter locks; check tube compatibility and replacement-part availability before buying.
Next, compare these trade-offs.
Mud, Ice, and Lock Reliability
Mud and ice expose differences between tripod locks. In gritty conditions, lever locks open and close quickly, but sand or mud can keep a lever from clamping. After adjustment, verify the section holds before mounting your camera.
Screw locks take longer to adjust, yet they handle debris forgivingly: you can feel resistance and tighten in increments until the clamp holds against mud or slushy ice.
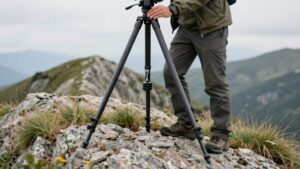
After shooting in mud or through melt-freeze cycles, wipe the legs and locks, then cycle the lock before relying on it. Grit in the joints can reduce clamp reliability. On unstable ground, leave sections unextended and keep the tripod below maximum height. In wind or freezing conditions, the setup vibrates less, reducing the chance that locked legs will work loose.
Glove-Friendly Lock Operation
Choose a leg lock you can operate decisively with the gloves you’ll wear in the field. If you often shoot in cold conditions, test the mechanism. A single flip lever with leverage gives your gloved fingers a more positive purchase than several small adjustments or a tiny knob. Check that thick fingertips can fully engage and release the lock without shifting the leg or searching by touch.
This matters when insulation reduces tactile feedback and fine finger control.
Compare lock types against your terrain and load: screw locks may hold more securely in wind or rough ground, while flip locks suit frequent height changes. Evaluate lock positions while wearing your gloves; the lever should close firmly and keep its tension without requiring bare fingers.
Leg Locking Speed
When you change height often, a single flip lock usually lets you adjust legs faster than multi-turn screw locks. That advantage compounds when you move repeatedly between low and standing shots; practice the sequence before relying on it in the field.
| Priority | Better fit |
|---|---|
| Fast height changes | Single flip locks |
| Repeatable firm tightening | Screw locks |
Fewer leg sections also mean fewer locking actions, though they make the folded tripod less compact. If you re-level often, screw locks can be easier to tighten firmly and consistently after each adjustment. In wind, speed matters less than full engagement: a partly tightened lock can permit micro-slip and soften sharp detail. Check each lock before shooting; a rushed adjustment isn’t faster if movement costs you a frame.
Leg Lock Noise in Wildlife Photography
In quiet habitats, you’ll often find screw locks quieter than flip locks during small adjustments, which can produce audible metal-on-metal clicks.
If you use flip locks, set their tension before approaching and avoid re-locking while tracking to limit noise and vibration. Practice both systems on-site and choose one with repeatable tension so you won’t need to adjust it in the field.
Noise in Quiet Habitats
In a quiet habitat, a tripod lock’s snap can carry farther than you expect: flip locks often make a sharper clack than screw locks as they close. When you’re waiting near wary wildlife, choose screw locks if their lower noise matters more than adjustments. Set each leg down gently, then tighten gradually; a metal-on-metal tap can travel through still air.
Test the setup in the field, adjusting at the volume you expect an animal to hear. Even a change in clack can keep a subject calm—or send it bolting. During waits, select the quietest locks that still support your camera, lens, and plate securely, without repeated tightening. In wind or active scenes, favor locks that hold firmly; repeated corrections can expose you to more noise.
Twist Versus Flip Locks
Beyond choosing a quiet lock, consider how its action sounds: twist locks apply tension gradually, so slow leg adjustments usually make less of a sudden click than flip locks. Flip locks still win when you need rapid release and relocking, but repeated lever movements can produce sharper clicks that may alert skittish wildlife.
If you reposition often, change pans quickly, or cross uneven ground, count each lock action; cumulative noise and vibration may outweigh the difference between mechanisms. Wind and rough footing can prompt extra tension checks, especially if you extend legs too far or rely heavily on the center column.
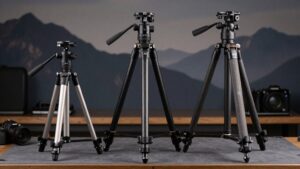
Compare actual tripods rather than assuming one design stays quieter: test with your camera and lens, repeating your normal extension and locking sequence.
Silent Locking Techniques
For wildlife in noise-sensitive environments, flip locks can reduce repeated hand movements compared with screw locks, limiting opportunities for clacks and metal-on-metal noise. Set the leg spread and extension for uneven ground before locking; don’t balance with a leg partly extended, since partial-tight adjustments can tick or creak.
Preset your framing and use the center column last, reducing the need to loosen sections during a wildlife session. After tightening each lock fully, gently pull down on every leg, then wriggle-check the camera without reopening clamps. After a noise-critical reposition, repoint once and make a final bump check for wobble. If the rig shifts, diagnose the source before touching a lock; stability checks that don’t loosen clamps preserve silence and prevent another noisy adjustment cycle.
Practice Before the Field
Before a wildlife session, rehearse unlocking and locking each tripod leg in your yard so you can work without hunting for the latch. Time flip-lock and screw-lock actions; note which you can operate by touch, without scraping or searching. Then tighten each leg, pull down and bump the tripod after repointing; any movement signals a lock that needs adjustment.
For screw collars, use repeatable pressure—snug, then a set fraction of a turn—so loose joints don’t rattle.
Rehearse in your field clothes with your audio gear or pack; fabric, straps, and equipment can amplify clicks in quiet habitat. Record a setup video with a phone at chest height. Compare your pace with slower, deliberate movements, then adopt the quietest method you can repeat.
Twist vs. Flip Locks
When you reframe often, flip locks usually save time; with gloves, check whether you can operate their levers cleanly. Twist locks have fewer protrusions, but grit can affect their threads, so consider how easily you can clean them.
Compare both designs folded: lever clearance can affect packability and snagging, while twist locks may sit closer to the legs.
Speed in the Field
How quickly you can reposition a tripod depends on the lock design and the terrain. Flip locks let you release and secure leg sections faster, useful when you’re changing height across uneven ground. Twist locks tighten progressively and can feel more secure under load, particularly with a front-heavy telephoto setup.
But the label alone won’t predict field performance: fewer leg sections and a solid locking interface improve stability, so judge how each lock clamps. On slopes, set leg angles to keep the base level and the center column vertical, if you use one; a fast adjustment is wasted if the tripod shifts after clamping. In wind, fully engage every lock, then pull down on each leg or bump the setup to check for movement.
Grip With Gloves
Gloves can change which tripod lock feels faster and more reliable. With thick gloves, twist locks may be harder to grip, start, and tighten evenly; allow time to secure each collar. Their screw action usually clamps firmly and resists loosening, which helps when a long exposure makes movement visible.
Flip locks open and close quickly for height changes, but gloves can make lever position harder to judge. Press each one fully into its locked position; a lever left slightly open can let a leg slip. Neither design wins in every condition.
Choose the system you can operate smoothly and consistently with the gloves you wear. Test with your thickest pair: check hand purchase, confirm full closure, then apply pressure and look for leg wobble. Speed matters only when every section is locked solid.
Dirt and Maintenance
If you often shoot in dust or mud, twist locks can offer an advantage: their collars generally seal better against grit and resist loosening from minor vibration. Flip locks work quickly in clean conditions, but grit can slow operation; wipe and inspect their contact surfaces to prevent slip.
After field use, wipe mud and dust from joints and locks, then confirm each lock clamps fully before trusting stability. Keep your center column retracted when unused; extension adds gritty contact points and complicates cleaning.
Test each lock with mild grit before purchase; confirm smooth engagement and firm hold without wobble under load. Repeat the check after several locking cycles outdoors.
Packability and Clearance
Packability depends on more than folded length: flip locks open and close in one motion, while twist locks may take several turns but offer finer grip control. Flip locks can speed deployment in use. Twist locks give you more incremental adjustment and a secure feel, but rotate each section enough to confirm engagement.
Compare tripods by section count too: three to five sections can fold shorter, yet each added joint changes how legs stack in your pack.
For clearance, check whether collapsed lock heads protrude; bulky hardware can snag undergrowth, catch on tight compartments, or waste valuable space.
If you hike, choose locks that set sections quickly within your usual height range. Avoid overextending; it limits pack size and readjustments in constrained spots.
Tripod Leg Diameter Compatibility
Check that your tripod’s leg diameter matches the locking hardware’s specifications; a mismatch can prevent the clamp from gripping securely.
Confirm compatibility with the exact tube size listed in your model’s specifications, usually in millimeters or by tube series. Don’t assume one lock fits every leg. A thicker or thinner tube changes how the clamp seats and can reduce holding force.
For most tripods, larger-diameter legs resist flex and wobble better when you fully engage the lock, though diameter alone doesn’t guarantee stability.
If you’re mixing brands or upgrading components, verify that the manufacturer supports the leg-lock and tube combination. Otherwise, the clamp may only partly close or slip under load.
Test the lock on the legs you plan to use. Secure your camera or an equivalent expected load, engage the lock, then check each section for movement before shooting in the field.
Replacement-Part Availability
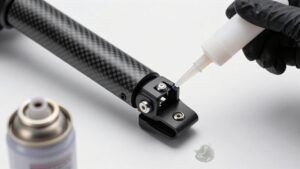
A secure leg lock matters, but so does being able to replace it when it wears or fails. Before you buy, check parts availability for the exact lock design, flip lever or rotating clamp, and tripod generation. Brands rarely make components interchangeable, across models that look similar.
Choose a system whose manufacturer lists replacement locks or lock plates; then you can replace failed hardware without buying a leg. Confirm whether the parts use standard screw sizes and bolt patterns or proprietary fittings. Proprietary designs may require factory-supplied parts to preserve fit and clamping force.
If you mix legs and heads, verify that the replacement services your leg-section format, not merely the head interface. Finally, check warranty terms and support channels for access to spares.
Lock Collar Slippage
When a leg section slips, first make sure its tube is fully seated at the chosen stop before tightening the collar; clamping a partly extended section can leave it prone to creep.
With flip locks, grit on mating surfaces can weaken grip, so wipe them after mud or sand. A direct clamp resists heavier camera-lens leverage. Test the lock before trusting your framing.
- Don’t add extra leg sections or height when slippage appears; fully extended legs magnify tiny collar movement into camera wobble.
- After locking, pull down gently on each leg, then bump the setup lightly; any movement warns you before a long exposure.
- Take that check seriously: wind or a long exposure can turn subtle creep into a blurred frame you can’t recover.
Lock Thread Cleaning
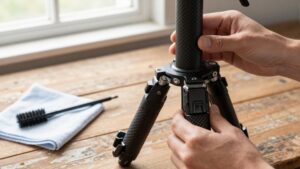
Because dust, mud, and grit can grind inside screw-lock threads, clean them after windy, dusty, or muddy outings to keep the locks tightening smoothly and holding securely. Before you clean, fully loosen each lock and wipe away surface debris. Use a dry cloth or soft brush on the threads; this removes particles before they grind during tightening.
- If threads still feel gritty, rinse or degrease only when your tripod’s materials allow it.
- Dry every part completely; trapped moisture can corrode the mechanism and compromise a day’s confidence.
- Reassemble, then tighten until the section’s secure, not forced. Contaminated or damaged threads weaken grip and invite wobble.
Make this check routine after dusty shoots; screw locks can lose tension faster when grit stays packed in threads.
Conclusion
Choose a leg-lock system that suits your shooting conditions, not just your preferred design. Test it with gloves, check how it handles mud and ice, and listen for noise if you photograph wildlife.
Confirm the locks match your leg diameter, hold securely without collar slippage, and let you clean the threads and find replacement parts. Then compare how quickly you can deploy and secure each leg. The right system keeps your tripod stable and ready when the shot arrives.