How to Balance a Phone Gimbal (and Fix a Motor That Keeps Straining)
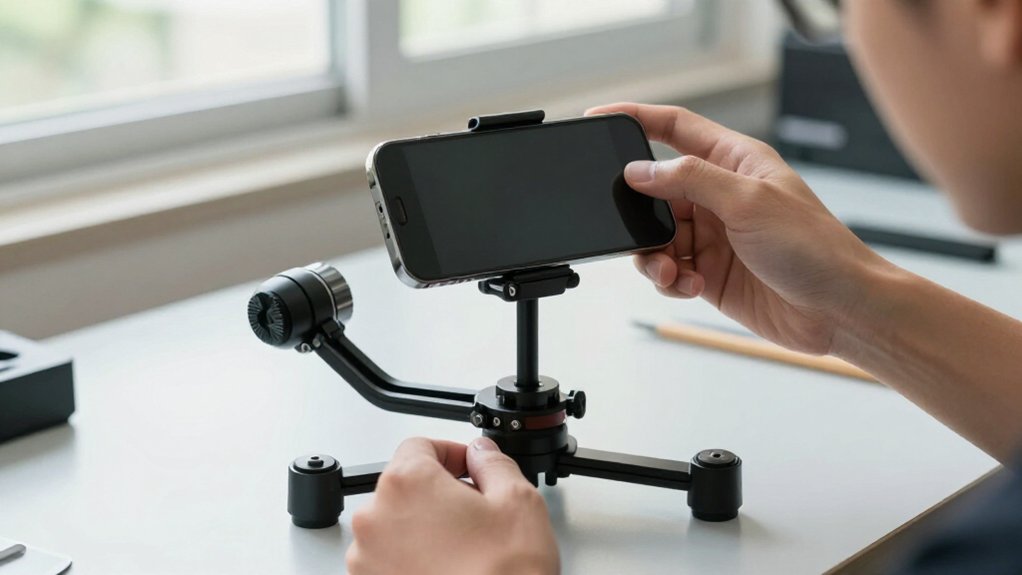
Power off the gimbal and place it on a flat surface.
Remove cables, lock the clamp, and center your phone so its camera sits over the tilt and yaw lines.
Slide the plate forward or back until the phone stays level, then shift it sideways until it stops rolling.
Check arm clearance, then power on.
Buzzing, drift, or tiny wiggles mean imbalance; rebalance before filming.
If pairing drops, restart and update the app.
Next, check for lingering strain.
Phone Gimbal Motor Strain Limits
How much weight can a phone gimbal handle? Typically, phone gimbals support only about 250–400 grams. Add-ons such as a thick case, MagSafe battery, or bulky lens can push the motors beyond their strain limit. Listen and watch: constant pitch or roll buzzing, drift while the phone rests, or tiny frame wiggles mean the motors are fighting an imbalance instead of holding level.
Even a few tens of grams off-center can make a motor work continuously, especially when you add weight to one side. Portrait and landscape positions shift the balance point, so rebalance after rotating your phone. Remove heavy accessories, then shift the cradle until the phone stays level without motor effort.
If it still strains at rest after balancing, stop using it.
Gather a USB-C Charging Cable
Before balancing, grab a USB‑C charging cable that fits the gimbal’s charging port, not a USB‑A, micro‑USB, or Lightning cable, and connect it to a reliable 5V/1A charger or USB port. Charge until the manual’s LED or battery indicator shows full, then unplug before balancing. Use this quick check:
- If the gimbal won’t power up or its LEDs don’t change, swap in another USB‑C cable; a faulty lead can mimic motor strain.
- Keep the cable nearby for top-ups between attempts, so low battery doesn’t leave motors sluggish or stabilization inconsistent.
- Choose a snug connector, and avoid forcing it; the correct fit protects the port and keeps charging while you prepare the gimbal.
Step 1: Clear a Flat Balancing Surface
On a flat, level tabletop or floor, power off the gimbal and set it in its neutral center position with the arms level. Clear away cables, clutter, and anything that could rock or tilt the base; gravity needs a consistent reference. Keep the phone in the exact shooting orientation, landscape or portrait, because rotation shifts its balance point.
Add its case, lens attachments, and external microphone before testing; even slight extra weight can make a motor strain. Watch which side drops, then move the phone along its sliding rails or adjust the counterweight in small increments. Recheck after each change. On the level surface, the balanced gimbal should stay roughly motionless, without drifting or needing constant correction. If it tips or creeps, recheck carefully.
Step 2: Install the Phone Clamp
Power off the gimbal, then slide the clamp arms to fit your phone and tighten them until the rubber grips hold both edges securely without squeezing too hard.
Keep the gimbal powered off while you work; its motors shouldn’t fight the adjustment. Mount the clamp on the tilt arm’s axis plate, aligning its scale with the specified position mark to limit pitch and roll drift.
Engage the quick-release or pivot latch fully, then tug the clamp gently to confirm it’s locked. A loose connection can cause jitter and motor strain, even when other adjustments seem correct. If the latch won’t close cleanly, reseat the clamp rather than forcing it. Use the same case and accessories you’ll carry, so the clamp grips your actual setup.
Step 3: Center the Phone’s Camera
With the clamp locked, slide the phone along the gimbal’s rails until its camera lens sits over the tilt and yaw center line, not toward either side. Keep the screen facing you at a viewing angle as you adjust the phone’s position. Watch the lens in relation to the motor axis; even a small shift toward one edge can make the yaw and pitch motors correct constantly.
Tighten the rail lock screws, then power on the gimbal in neutral or standby. Release the phone and watch it. If it slowly turns or drifts toward one side, the lens still sits off-center; reposition it and retest. Accessories such as a case, clip, or microphone can shift the phone’s effective center, so keep their weight symmetric.
Step 4: Balance Tilt, Roll, Pan
Start with tilt: power the gimbal off, loosen the tilt mechanism, and slide the phone plate forward or back until the phone stays level when you release it. Add your usual case, microphone, or receiver cradle before balancing; each shifts the phone’s center of mass. Rebalance after any accessory change.
Next, point the lens straight down and slide the plate left or right until the phone doesn’t roll when released. Test brief releases horizontally, slightly down, then slightly up. The phone should hold each attitude without creeping or hunting. If tilt vibrates, correct forward-back balance; if roll strains, correct side-to-side balance with the phone pointing down. Make small plate adjustments and repeat the tests until the frame stays still and both axes move smoothly without motor strain.
Step 5: Check Motor Arm Clearance
Once tilt, roll, and pan balance smoothly, check that each motor arm can swing freely around your phone. Keep a few millimeters between the arm and your phone, case, lens attachments, and cables. With the phone mounted, power on the gimbal and slowly move the handle by hand through pitch, roll, and turns.
If your gimbal offers an axis test, use it to check the travel extremes where contact strains motors. Repeat in upright, landscape, and slightly upward or downward shooting postures; a level setup can still collide when an arm swings. Remove or reposition thick cases, clip-on mounts, and MagSafe or battery add-ons until the path stays clear. If scraping or whining changes near an axis limit, suspect contact and remount before recalibration.
Step 6: Lock the Gimbal Axes
Power off the gimbal, set it on a flat surface, and center the pitch and roll axes before unfastening them. Use axis levers to stop pitch and roll drifting, preventing motors from correcting a crooked load. With locks engaged, slide the phone mount forward, back, left, or right until the phone balances.
Tighten the mount, then unfasten the axes and check that the phone stays level without drifting.
If your gimbal lacks locks, hold the phone precisely level and don’t release it until you’ve secured the mount. An unlocked axis can swing as soon as you power on and strain its motor. Power on and hold the gimbal still in landscape and portrait. If an axis moves, re-unfasten, rebalance, and repeat until it stays nearly silent at rest.
Test With a Walking Shot
After the phone stays level at rest, test it in motion using your target frame rate and matching shutter speed—for example, 24 fps at 1/50s, 30 fps at 1/60s, or 60 fps at 1/125s. Power on the gimbal and hold it steady for one or two seconds. Walk forward in a straight line, landing heel-to-toe, and watch the horizon for slow drift or hunting oscillations.
Repeat the pass, then add a few segments as you turn your body left and right; the horizon should remain level without jerky corrections. Record a 10–20-second clip at your pace and review it full-screen, where gait-only jitter can reveal imbalance. If you hear motor noise or see micro-wobbles, stop immediately and rebalance before attempting longer takes.
Bluetooth Pairing Drops
If the gimbal app keeps losing its Bluetooth connection, keep your phone within about 1–3 meters of the gimbal and maintain a clear line of sight to its antenna. Toggle phone Bluetooth off and on, quit the control app, then reopen it. Disconnect the gimbal in Bluetooth settings before pairing again. Turn off earbuds or watches, and briefly disable Wi‑Fi hotspots or VPNs to reduce radio conflicts.
| Check | Action | Cue |
|---|---|---|
| Distance | Stay within 1–3 m | Strong signal |
| Stale link | Disconnect, re-pair | Fresh connection |
| Interference | Disable nearby radios | Fewer retries |
| Startup | Wait 10 seconds | Pair while still |
| Updates | Install app/firmware | Compatibility |
Power-cycle the gimbal: switch it off, wait 10 seconds, then restart it. Keep it still while pairing so sensor startup stays stable. Install firmware and app versions; compatibility updates can stop reconnection attempts. Watch the app’s status indicator before you resume filming.
Clean the Clamp’s Rubber Pads
Dust or oil on the clamp’s rubber pads can let your phone creep during balancing. Power off the gimbal and remove phone. Wipe the pads with a microfiber cloth to lift dust that blocks grip. If they feel oily or glazed, dampen a cloth with 70% isopropyl alcohol; don’t soak the pads.
Let them air-dry before remounting.
Check for nicks, flattening, or peeling. Compressed or damaged rubber loses friction, so the motor may work harder to correct shifts. Re-seat your phone centered and against the clamp, then tighten clamps evenly. The pads should touch the phone across its width, not along an edge.
Set the gimbal level and run a balance test. If the phone creeps or drifts, check for contamination or poor pad contact.
Conclusion
Before you shoot, balance the phone on a flat surface, center its camera, and lock each axis. A level setup keeps the motors from fighting the phone’s weight.
If a motor still strains, check the clamp and clean its rubber pads; then charge the gimbal with a USB-C cable. Pair Bluetooth again if the connection drops.
Finally, test a walking shot and watch for drift or vibration. Make small adjustments before recording your final take.