How to Use a Phone Gimbal: A Beginner’s Walkthrough to Your First Shot
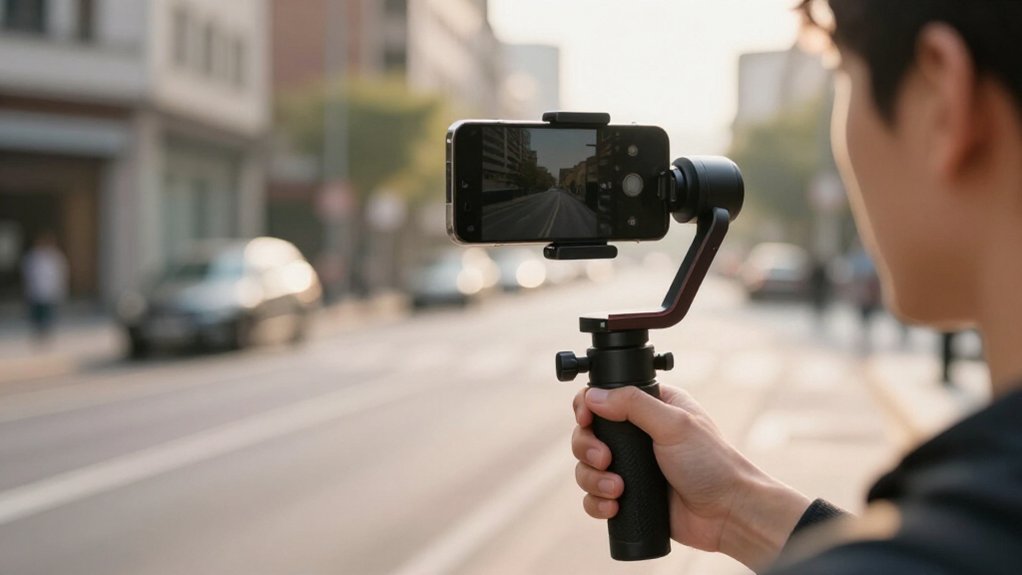
To get your first smooth shot, check that your phone fits the clamp with its case and stays within the gimbal’s weight limit.
Visually inspect the arms, balance the phone, then power on and wait for leveling.
Choose Pan Follow for steady side-to-side tracking, or Lock for fixed framing.
Walk at an even pace and ease into motion.
Check the horizon, correct drift if needed, and clean arms gently.
Keep going to learn each step.
Expected Phone Gimbal Shot Result
Once you’ve balanced your phone and powered on the gimbal, take a short test shot to see how it handles.
Walk at your normal pace in Pan Follow (PF) mode. Your shot should move smoothly from side to side while tilt and roll stay level. Switch to Lock mode, and your framing should stay fixed as you move forward or sideways; the background will slide behind a steady subject.
In FPV mode, the camera mirrors your hand movements across all axes, producing a dynamic look but with less locked-in stability.
A gimbal should reduce micro-jitter compared with handheld footage, making your clip easier to watch. If you see wobble or drifting angles, check your balance and mode selection. Record a test before your take.
Phone Mount Compatibility
Before mounting your phone, check that the gimbal’s clamps support its width and thickness, including any case. Check your model’s stated width range and weight limit; a phone that’s too heavy can make motors stutter or drift.
If you’re using a clamp or quick-release plate, make sure your case fits snugly and doesn’t tilt the phone. Then inspect the mount around your camera and controls. Use this quick checklist:
- Match your phone’s width and thickness to the mount’s specifications.
- Confirm your case allows a secure fit and leaves buttons and ports accessible.
- Check your phone’s weight against the gimbal’s rating, then seat it evenly.
If your gimbal uses an app, pair your phone and confirm it’s seated properly before balancing. A careful fit helps.
Step 1: Plan a Smooth Walking Route
Choose a simple route with smooth pavement and few abrupt turns; steady ground and direction help your gimbal keep the shot stable.
Plan your pace before you begin. Walk steadily rather than sprinting or stopping often; quick steps add vibration and ask the gimbal to correct more movement.
Check the route for crowds, strong wind, and obstacles such as branches or flags, since nearby motion can shake your phone and complicate tracking.
Pick a clear background line, such as a sidewalk edge or distant horizon, to help you keep the camera level without constant re-aiming. Mark your start and end points, and choose a spot to pause for one or two seconds.
That brief break lets the gimbal settle before you continue walking forward.
Step 2: Balance Phone Before Powering
With the gimbal powered off, mount your phone in the clamp and slide the balance controls or tripod plate until the camera stays level without your support. Check that the phone sits level across the tilt and roll axes, and center it between the gimbal arms. Release the handle briefly: the phone should hold its position instead of tipping or drifting. If it moves, adjust the sliding controls in small steps and test again.
Keep the gimbal powered off while you make these changes; an unbalanced phone can strain the motor when you turn it on and weaken stabilization.
Once balanced, tighten every screw firmly, since even a slight shift can create wobble in your first take. Follow your model’s automatic balance prompts exactly.
Step 3: Select Follow Mode
Try PF when you want the background to drift sideways, such as while walking past a storefront, but need your subject’s vertical framing to stay steady. First, make a test pan: slowly rotate your wrist or arm left, then right, and check that the gimbal tracks only that movement.
If the motion feels too restricted, choose another mode. PF won’t follow tilt or roll, so choose it for side-to-side tracking.
Step 4: Record a Slow Reveal
Once the gimbal has leveled, use Lock mode to keep your framing steady as you walk forward or backward, gradually revealing the scene.
Before you begin, balance your phone securely, power on the gimbal, and wait until it levels. Hold it with both hands and keep your elbows relaxed. Start from stillness, then take about one to two seconds to ease into your walk.
Let your legs carry you forward or backward instead of swinging your arms; this helps limit unwanted framing changes.
Keep your movement slow and even so the scene emerges gradually. Record a take, then review it right away. If it feels rushed, adjust your walking speed and try again. With practice, you’ll find a steady pace that suits the scene.
Step 5: Avoid Abrupt Wrist Turns
As you move through your shot, keep both hands steady on the gimbal and avoid sudden wrist twists. Abrupt turns can make the pan and tilt axes overshoot, creating jitter. Instead, guide the gimbal at a pace; think “slow sweep,” not “quick snap.” This gives the motors time to track your movement without hunting.
When you need to reframe, turn with your feet and torso rather than whipping your wrists. That reduces acceleration and helps keep your footage smooth. In FPV or Pan Follow mode, a sudden wrist turn can exaggerate motion, so use controlled, gradual movements.
Before filming, make a test recording while walking. Rehearse turning with slow hand and arm movements, then review the clip to confirm it looks steady.
Step 6: Lock Axes Before Storage
Before packing your gimbal, switch to Lock mode and power it off so the pan and tilt axes stay fixed during transport. Keep your phone properly balanced even when locked; an uneven load can strain the motors when you set the gimbal down. Once the axes are fixed, fold or collapse the arm and grip supports. This order helps prevent parts from moving and triggering calibration issues.
If your gimbal has a transport-lock or axis-lock control, engage it, then check that the motors aren’t buzzing. Place the gimbal upright, or keep its axes secured, inside its case. Store it at a stable temperature and protect it from bumps. These steps help safeguard the bearings and make your setup easier next time.
Verify Horizon Alignment
With your phone balanced and the gimbal powered on, wait for its stabilization sensors to finish calibrating. Check app or on-screen status indicators and confirm the roll axis shows near-zero tilt, with no noticeable left/right lean, before you record. Hold the gimbal steadily; jerky movement during setup can make a correctly calibrated horizon look crooked.
Make a quick test pan, then walk forward a few steps. Watch a horizon reference, such as building edges, trees, or the road, and check that it stays level. If it looks crooked, use the roll reset or auto-level control, if available, to re-center the gimbal. Repeat the short test to confirm alignment. Once the horizon remains level through these movements, you’re ready to frame your shot with confidence.
Fixing Phone Gimbal Drift
If your phone gimbal keeps panning or tilting on its own, check the balance first. Before you power on, center your phone on every axis; even a slight tilt can make motors overcorrect. Secure the phone, case, and adapter so nothing shifts. Then calibrate in the gimbal app or settings, and restart it.
| Symptom | Try |
|---|---|
| It follows nothing | Turn off tracking |
| Drift remains | Update firmware; re-pair |
Test a shot with auto-follow or tracking disabled; when no target appears, tracking can mimic drift. If movement continues after balancing and calibration, update the firmware and re-pair the gimbal through its app if required. Make a change at a time, then test again. You’re close: framing returns once the gimbal stops compensating for sensor errors.
Wipe Motor Arms
Once drift is under control, give the motor arms a quick clean.
Before you power on the gimbal, use a clean, dry microfiber cloth to wipe the arms. This removes dust and grit, helping movement stay smooth. Check that no moisture or residue remains; liquid can interfere with sensors and motor operation.
If lint or debris clings near a joint, wipe gently along the arm’s length and around pivot areas. Don’t press hard. For smudges, apply a screen-safe cleaner to the cloth, never directly to an arm, then wipe dry.
Before balancing, visually check the arms. Make sure each arm sits correctly and moves freely while the gimbal’s off. When they look clean, balance your phone, then power on and capture your first shot.
Conclusion
You’re ready to capture smoother phone footage. Check that your phone fits securely, balance it before powering on, and choose Follow mode for a natural walking shot. Start on a clear, steady route, then verify your horizon and correct any drift before filming.
When you’re done, lock the axes and wipe the motor arms before storage. With a little practice, you’ll get steadier results, so take your gimbal out and try your first shot.