How to Use a Binocular Tripod Adapter: L-Mount Setup Made Simple
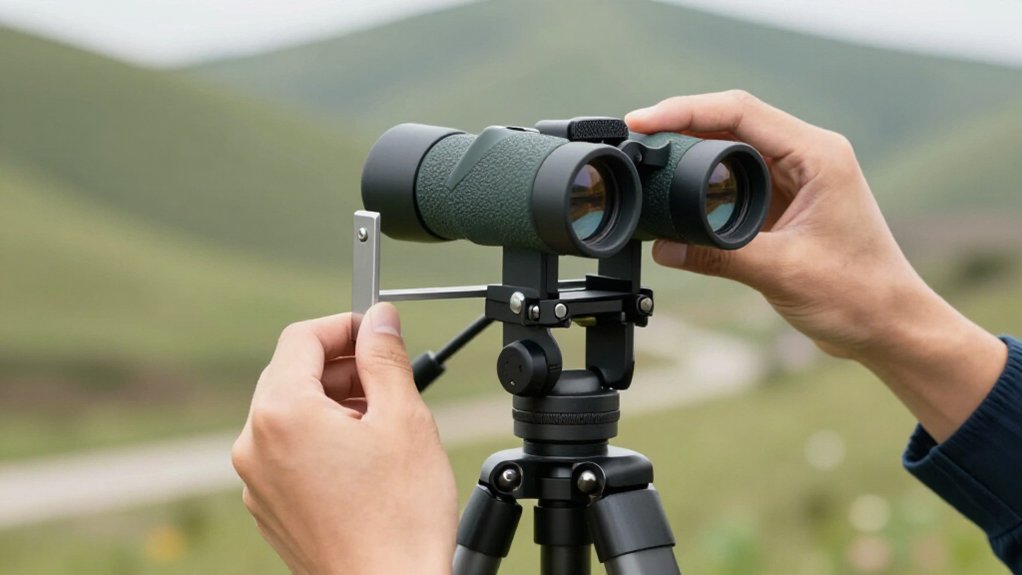
To use an L-mount binocular adapter, inspect the hinge for an exposed thread. Confirm the correct screw thread and keep the O-ring seated.
Align the adapter squarely, start threading by hand, then snug it with a flathead screwdriver; don’t force or overtighten.
Seat the binocular on the L-mount, engage the quick release fully, level the hinge, and lock both joints before panning.
If it slips, check clamp seating; checks help keep your view steady and secure.
L-Mount Thread Alignment
Align the L-mount adapter’s L-shaped features flush with the binocular’s threaded mounting point to prevent cross-threading. Keep the adapter square to the mounting surface, and match its orientation before applying pressure. Start the adapter by hand, turning it a few turns so it seats without resistance.
Once seated, use a flathead screwdriver to tighten the adapter until it holds firmly; avoid excessive torque. The rubber O-ring should seat evenly to support a waterproof-tight fit, without compressing it by force or pulling the adapter out of alignment. After installation, slide the quick-release plate or connector into the L-mount interface and press with firm pressure until it locks securely.
In cold weather, test alignment and lock engagement before critical viewing, since metal contraction can change how threading and locking feel.
Inspect the L-Mount Thread
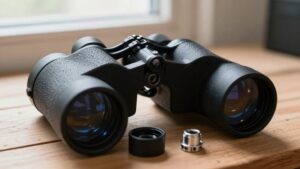
Before mounting the adapter, inspect the binocular’s hinge or pivot area and confirm the L-mount thread is present, exposed, and undamaged. Find the correct cap or cover, then turn it counterclockwise to expose the full interface. Check for grit, dents, or damaged threads; even small flaws can prevent a secure fit. Align the adapter’s threaded portion with the mount and verify it starts smoothly, without resistance. Use the supplied rubber O-ring, if included, to help maintain a snug, weather-resistant seal.
- A clean interface protects the connection you’ll trust in the field.
- Smooth thread engagement helps prevent costly cross-threading and frustrating delays.
- A snug O-ring seal helps keep moisture away from your optics.
- Careful inspection gives you confidence before your binoculars leave solid ground.
Step 1: Set Out Adapter Screws
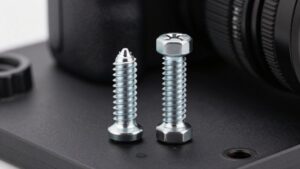
With the mounting point inspected, remove its hinge cap by turning it counterclockwise and keep the cap for later. Confirm you have the correct screw-thread adapter, commonly 1/4-20, and check that its orientation matches the binocular’s mounting axis before tightening. Start the adapter by hand, threading it into the mount. This helps prevent cross-threading.
If it won’t turn smoothly, stop; check the binocular’s threads for debris or damage, then clean them with a soft brush before trying again. Once it threads freely, tighten it snugly with a medium flathead screwdriver. Keep the O-ring seated correctly to preserve waterproofing. Finally, slide the adapter into its quick-release or tripod interface. Confirm it locks securely without forcing it; excessive resistance may indicate misalignment or poor fit.
Step 2: Level the Binocular Hinge
Mount the hinge adapter on the binoculars, making sure its quick-release interface sits correctly, then attach the assembly to the tripod. Use the hinge as your reference and level the binoculars until the optical axis sits horizontal or at your elevation. This alignment helps prevent the view from drifting upward or downward.
Tighten the tripod head once you’ve set the angle. Even looseness can let hinge misalignment produce wobble at higher magnifications, 12x to 18x.
After leveling, test the quick-release by sliding and locking the adapter, then check the level to confirm the hinge and adapter orientation hasn’t shifted. In cold weather, complete this test before leveling and locking. Metal contraction can change how alignment feels, so verify the setup during your field session.
Step 3: Seat Binocular on L-Mount
Attach the L-mount plate to the tripod using the correct interface, such as a 1/4-20 thread or Arca-style clamp, and lock it securely. Align the binocular adapter’s hinge or pivot with the L-mount, then lower the binocular housing onto the plate. Keep the housing centered and level, with its weight supported evenly.
If the adapter threads into the binocular, fit the supplied rubber O-ring where specified. It helps provide proper tightness and maintain a waterproof seal. Turn the adapter until it seats correctly, but don’t force the threads or overtighten the connection. Check that the binocular sits flat and stable on the mount before viewing.
Correct alignment gives the setup a solid support point and helps reduce shake while you glass. You’ll get steadier views when the housing stays balanced.
Step 4: Engage the Quick-Release Latch
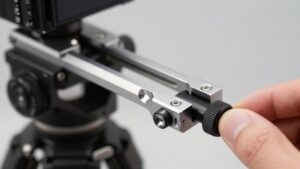
Slide the Field Optics Research quick-release adapter onto the tripod mount and press it in until the latch clicks into its locked position. The latch is built for field use, so you should feel it seat securely rather than rely on friction alone.
Before a long glassing session, gently try to slide the latch briefly. If it doesn’t move and feels firmly seated, you’re ready to use the setup. Keep your fingers and gear clear of the release button during handling; deliberate pressure is required to disengage the adapter, but a bump could still trigger it.
In cold weather, test the latch action before heading out. Metal contraction can make its movement feel slightly different, so confirm you can engage and release it smoothly.
Step 5: Check Eye-Cup Clearance
Before tightening the binoculars, check that the eyecups clear the adapter, mounting plate, and quick-release hardware. Extend or fold down the cups to your normal eye-relief position, then confirm they don’t touch any hardware. Check clearance with the binoculars fully seated and slightly forward; adapter fit can change the eyecup angle.
For a dry test, slide the binoculars into the locked position and look through them. The cups should seal comfortably around your eyes without rubbing or catching. If you find interference, don’t force the fit. Reorient the adapter or choose another mounting interface, such as 1/4-20, a shoe, or Arca, to create more space around the eyecups. Repeat the clearance check before tightening the binoculars, and verify that the cups remain unobstructed through your usual viewing position.
Step 6: Wipe Adapter Contact Surfaces
Once the eyecups clear the hardware, wipe the hinge or pivot mount and the adapter’s mating face with a dry, lint-free cloth to remove dust, sand, and moisture. Use a soft brush to clear debris from the threaded area if grit remains. Keep the rubber O-ring and both mating surfaces clean; particles can prevent tightening and compromise the intended waterproof seal.
Don’t force the threads, since debris can cause cross-threading. After wiping, slide or lock the adapter on and off once as a dry fit. Check that the faces meet smoothly and the quick-release engages securely. In cold weather, repeat the wipe and test after temperature changes; contraction or trapped moisture may affect contact and make release feel looser. Ensure surfaces are dry before mounting.
Verify Hinge Stays Level
Keep the binocular hinge level as you thread in the adapter so it seats squarely and the binoculars’ weight stays balanced. Confirm the hinge is level. Seat the rubber O-ring correctly; it helps preserve the waterproof seal and provides a tight fit as you tighten the adapter.
Slide the quick-release binoculars onto the tripod and lock them in place. Check the eyepieces and verify they remain at the intended height, without a left-right tilt. If the hinge appears off-level or the setup wobbles, check that the tripod head is fully tightened and that the mount interface matches your adapter: 1/4-20, Manfrotto shoe, or Arca Swiss. In cold weather, recheck level before a critical viewing session; metal contraction can slightly alter the fit or lock alignment.
Adapter Slips During Panning
Even with the hinge level, a slightly loose adapter or tripod head can slip as you pan at 12x–18x magnification. Tighten both joints to lock-down torque before panning. Slide and lock the quick release; it should feel secure, not free. Recheck adapter orientation.
Confirm your 1/4-20 or Arca Swiss interface, and fully engage the clamp or rail to prevent micro-movement. In cold weather, contraction can loosen tolerances, so test before your first critical glassing session. If slipping persists, remove the adapter, gently brush debris from the binocular threads, reinstall, and retighten.
Use this check to locate the moving connection:
| Symptom | Check | Action |
|---|---|---|
| Left-right drift | Clamp engagement | Seat rail fully |
| Mount shifts | Lock-down torque | Tighten both joints |
| Cold-weather slip | Quick release | Test before use |
Store Adapter in Padded Case
After use, store the adapter in a padded case to protect its locking mechanism and threads from dents and debris.
Wipe the rubber O-ring surfaces clean and dry before packing the adapter; dirt can compromise the waterproof-tight fit, while moisture can affect proper tightness when you reassemble it. If you use a quick-release system, confirm it locks fully into the case or sits securely in its insert, so it can’t disengage during transport. Place removed caps, including the hinged-mount cap from threaded installation, in the same case to keep small parts together.
On cold-weather hunts, test the quick-release lock before use; afterward, return the adapter to its padded case to limit exposure to cold and reduce contraction-related sticking. Keep the case closed during travel.
Conclusion
Seat your binoculars securely, align the L-mount thread, and tighten the adapter screws evenly. Keep the hinge level so the view stays steady, then pan gently and check for slipping before extended use.
If the adapter shifts, stop, reseat it, and confirm the connection is snug. Wipe contact surfaces after use to remove grit, and store the adapter in a padded case. These simple checks help protect your gear and keep setup reliable in the field.