How to Put a Ring Light on a Tripod (and Keep It From Tipping Over)
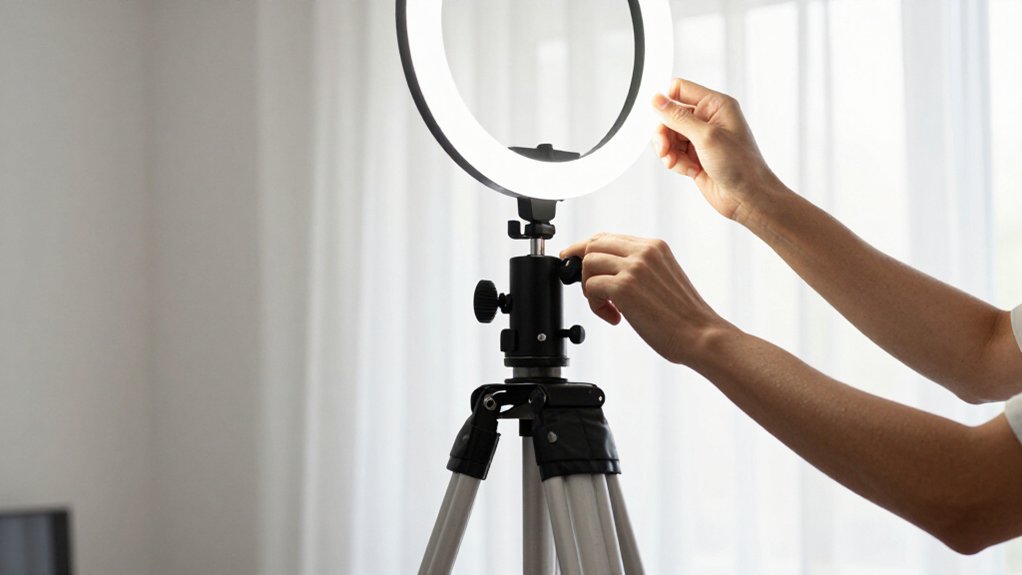
Set the tripod on firm, level ground, spread its legs wide, and lock each joint until it clicks. Keep the pole low and centered; check for wobble.
Seat the bracket fully, tighten its knob, then attach the ring snugly.
Raise the pole only as needed and retighten its lock.
Route the cable down one leg, clear of feet.
Adjust tilt, tighten the knob, then gently push the stand.
For extra confidence, check each lock and connection before switching the light on.
Tripod Stability Check
Before using the ring light, gently press it and the stand from side to side; if they wobble, spread the tripod legs farther and make sure each leg lock is fully engaged.
Keep the center pole at or near eye level for your first check; extending it higher raises tipping risk even when the locks feel tight. Tighten the center pole clamp, mounting bracket knobs, and ring light screw mount or quick-release until snug. Loose connections can create tiny movements that look like camera wobble.
For a large or heavy setup, such as an 18-inch ring light, keep the stand as low as your shot allows. Check that the light sits centered on its bracket without drifting or tilting. Attach the device holder and phone or camera, then gently test the assembly again; that added weight reveals movement your empty stand won’t show. If it shifts, readjust the height and tighten the connections before you begin.
Tripod Feet and Floor Type
Set the tripod on a firm, level spot, then spread its legs wide and lock them so the ring light’s weight stays over the base.
Check the floor beneath each foot before tightening the center pole; one lifted or rocking foot can tip the stand even when the light is mounted correctly.
- On carpet, extend each leg evenly to its widest stance. Check that no foot sinks lower; uneven contact can make the frame wobble.
- On hardwood, tile, or laminate, set feet fully flat. A non-slip mat can stop creep as the ring light vibrates or turns.
- If feet adjust, choose rubber or wide feet on hard floors; replace worn ones before they slip.
Keep each foot planted in place.
Step 1: Clear the Tripod’s Load Path
To keep the ring light’s weight traveling straight down into the tripod legs, tighten the center-column and leg locks while the stand is still empty. Set the center pole low to mid-height, then raise it only as far as you need to reach eye level. A shorter column keeps the load closer to the legs instead of creating a tall, top-heavy lever.
Spread the legs as wide as your filming space allows; their feet form a broader base that resists the forward pull of the light. Before you add weight, look down the pole: it should sit over the tripod’s center, with each leg lock fully engaged and the column clamp snug. A gentle push toward your filming position should leave the stand steady.
Step 2: Attach the Ring-Light Bracket
With the tripod locks snug and the pole centered, secure the bracket before adding the ring light. Seat it fully on the top of the center pole, keeping it level; a half-seated bracket can leave the screw hole misaligned and the ring off-center. Tighten the bracket lock so it can’t slide, and hold the bracket steady as you work.
Align the ring light’s mounting screw or quick-release slot with the bracket. Turn the light clockwise until it feels snug, but don’t force it. Keep the built-in tilt knob untouched for now; you can use it later to change the angle.
Once the light is attached, press lightly at its outer edge. If it wobbles, check the connection and secure it again before proceeding there.
Step 3: Tighten the Mounting Knob
Before raising the center pole, tighten the mounting knob or bracket lock until the ring light feels secure, but stop before forcing it and stripping the threads. Keep the pole low while you work, so the ring’s weight doesn’t shift the assembly as you turn the knob. If your mount has a tilt knob, set the light’s angle, then tighten it so the ring won’t drift.
Gently push and twist the ring by hand; watch the mount for wobble, rotation, or sag. If it moves, realign the screw hole and mount, then tighten again without forcing the threads. Check the knob whenever you change height or angle; a loose mount can contribute to tipping, even with tripod legs fully spread. Do this before powering the ring light.
Step 4: Lock the Center Column Securely
Once the ring mount is secure, adjust the center column. Loosen the height lock near the stand’s middle and raise the pole until the ring’s center sits around eye level. Set it higher if you need to manage reflections, but keep the column as low as practical.
An 18-inch ring catches more leverage, and extra height can make the stand top-heavy.
Before you let go, tighten the lock clockwise or press it until it clicks firmly. Check that it’s fully engaged, with no gap or half-closed clasp; the pole shouldn’t slide inside the stand. A loose center column can add wobble and increase tipping risk. If the setup looks unsteady, lower the pole and secure the lock again, rather than relying on extra height.
Step 5: Test Stability With a Gentle Nudge
Give the stand a gentle sideways push at the center pole and watch for wobble or flex before you start recording. If the pole sways or the feet shift, widen the tripod’s leg spread and lower the center column slightly. Repeat the same light push; the stand should settle without rocking or creeping across the floor. For an 18-inch ring light, keep the legs fully spread throughout this check, since its higher center of mass makes tipping more likely.
Next, keep the stand still and nudge near the ring’s housing. The bracket should hold the light without slipping; tighten it until snug, but don’t force it. After you change the height or tilt, loosen and relock the bracket as needed, then repeat both checks. A setup that feels firm at one angle may wobble after a small adjustment, so test the final position before you record.
Step 6: Route the Power Cable
To keep the cable from catching or pulling the stand, plug the adapter into the ring light first, then run the cord down one side of the tripod. Keep the cord close to the center pole or built-in cable path, where it’ll stay contained instead of crossing beneath the light. Guide it alongside a tripod leg, leaving only enough slack for height adjustments.
Don’t loop it around the swivel knob or bracket joints; those moving connections can pinch the insulation or strain the plug. If your stand has a leg, secure the cord loosely with a small Velcro strap so it lies flat without swinging. Before you finish, gently raise and lower the stand, watching the cable for snags or tension. Reroute if necessary.
Verify the Ring-Light Tilt
With the cable routed, aim the ring light directly at your face, keeping the camera aligned through its center.
After mounting it on the tripod bracket, adjust the tilt until light falls evenly across your face. If the ring sits too high, shadows may gather beneath your eyes and nose. Lower it a little at a time and check your preview; you’ll want soft, balanced illumination without squinting.
If you’re wearing glasses, raise the light slightly above eye level, then angle it down just enough to move the bright ring reflection outside the frames in the camera view.
Tighten the tilt knob after each small change so the light won’t drift during recording. Test on camera; confirm even brightness and reflections across your face.
Cable Snagging a Tripod Leg
Keep cords from snagging a tripod leg by routing the ring light’s power cable and any remote or adapter cords down the legs, tucked along their channels rather than trailing across the floor. Spread the legs fully, lock the center pole, then trace each cable past the feet as you change height. On a desk edge, rug, or uneven floor, clip the cord to one leg; keep slack small, behind the stand, toward the wall or outlet.
| Moment | Risk |
|---|---|
| Loose cord | A sudden tug, and a wobble. |
| Leg channel | Clear feet, calmer setup. |
| Clip attached | No brush-by snag. |
| Small loop | Stand stays steady. |
Nudge each leg gently and move the cable by hand; confirm it clears during height and tilt adjustments before you film.
Inspect Tripod Leg Locks
Before mounting the ring light, spread the tripod legs wide and pull each one outward until its lock clicks into place; check that every lock is fully engaged, not partly extended. Listen for a firm click at each joint; a leg that slides or folds under light pressure isn’t secure. If your tripod uses twist collars or clasp locks, turn or press each one until it sits snugly in its locked position. Don’t accept a half-extended leg: even a small gap can let the stand wobble.
Keep the center pole low while you inspect, since added height makes loose locks more likely to tilt. Gently shake the center pole; if it moves, reseat and tighten the locks before you attach or raise the light.
Conclusion
Before you switch on the light, check that all three tripod feet sit flat and the legs are locked. Make sure the bracket and mounting knob are snug, the ring tilts without pulling the stand off balance, and the power cable runs clear of every leg.
If the cable catches or the tripod wobbles, reposition it on a firm, level floor. Give the stand a gentle nudge; if it stays steady, you’re ready to film.