How to Set Up a Selfie Stick Tripod in Under a Minute
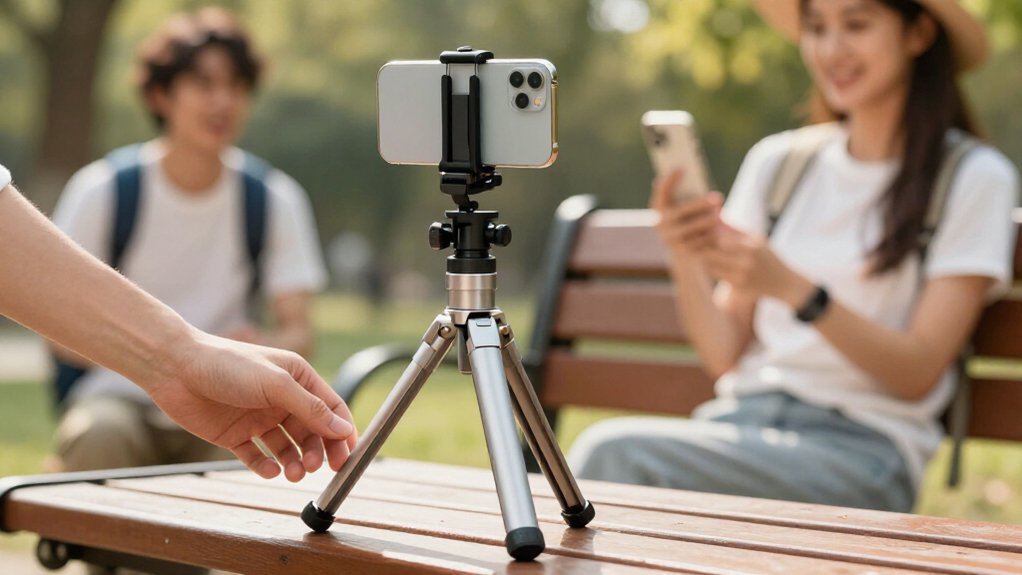
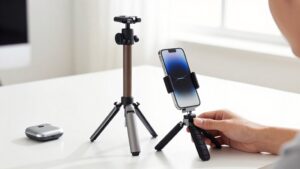
To set up your selfie stick tripod, keep the phone case on and clamp the phone firmly; check for wobble.
Spread the legs, press each foot down, and clear a two-foot radius.
Extend the pole, then hand-tighten its collar.
Pair the remote in Bluetooth settings, open Photo mode, and tuck the wrist strap behind the pole.
Take a test shot; if timing is off, re-pair and try a five-second timer.
More drying tips follow.
Phone Clamp Compatibility
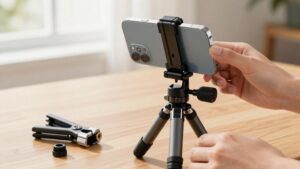
Before setting up the tripod, check that the adjustable clamp fits your phone securely, including its case. First, test the holder indoors. Open the clamp and place your phone between its top and bottom sections, leaving the case on. Adjust the holder until sections grip the phone; it shouldn’t wobble or slide.
Check the fit before extending the stick, especially if your phone feels heavier than average. Keep the clamp aligned with the phone’s center, then close it securely so the phone won’t shift as you position it above eye level. If the grip feels loose, use the holder’s size adjustment. Don’t force your phone into a clamp that’s too narrow. Choose a selfie stick with a wider or narrower clamp range if needed.
Stabilize Tripod Feet
Spread the tripod legs fully until they lock into a wide stance, then press each foot firmly into the surface. If your model has leg screws or flip locks, tighten them now so the feet won’t slide. On uneven ground, adjust one leg at a time until the tripod head sits level. Lightly tap the head; if it wobbles, make another small adjustment.
- Press each foot down and check its contact with the ground.
- Push the feet gently back and forth with your hand.
- Readjust any foot that moves, then test again.
Don’t extend the pole until the base stays steady. A raised camera puts more leverage on the feet, so even slight movement can become noticeable in your shot clearly. Take this stability check before lifting your phone.
Step 1: Clear a Two-Foot Radius
Around your tripod, clear a two-foot radius so the legs or extended pole won’t hit people or objects.
Start by setting the tripod feet about 12–24 inches from where you’ll stand. Keep the full area around the stand clear of people, bags, furniture, and other obstacles. As you spread the legs and extend or rotate the pole, keep every part within that same two-foot boundary. Don’t let the device swing beyond it.
Next, do a quick check: extend the stick fully, then move it gently from side to side. Watch the legs and phone mount throughout the motion. If anything enters the circle, shift the tripod and check again. Once the radius stays clear, secure the legs and tighten the clamp so the setup won’t creep toward an obstacle when you press the shutter. This helps you frame safely without bumping nearby items.
Step 2: Lock the Extension Collar
Once the main pole is open, twist or slide the extension collar firmly into a marked locking position, not halfway, and tighten it by hand until you feel resistance. Before clamping your phone or extending the last segment, make sure the collar has seated securely. Give the pole a quick shake near the joint. It should remain steady without slipping or wobbling.
If it moves, loosen the collar, align it with a secure notch or position mark, and lock it again. Tighten by hand until you feel resistance; don’t force it further. If your tripod has multiple joints, lock this collar first. Once the rod stays stable, secure the other joints. This order helps prevent added weight from loosening the mechanism during the next steps.
Step 3: Pair the Bluetooth Remote
Charge the Bluetooth remote fully, usually for 1–2 hours, until its LED shows it’s ready. Then press the remote’s power button to enter pairing mode.
Next, open Bluetooth settings on your smartphone and search for available devices. When your selfie stick remote’s name appears, tap it to connect. If your phone asks for a passcode, try 0000 or 1234.
If neither works, check the selfie stick manual for the correct code. Give the connection a moment to finish before you move on.
If pairing fails, switch Bluetooth off and back on, then search again. Still stuck? Power off both your phone and remote for about five minutes, turn them on, and retry pairing. Keep your remote close to your phone while pairing for reliability.
Step 4: Open Your Camera App
Before attaching the selfie stick, turn on your phone and open the Camera app or your preferred camera app. If you plan to take a selfie, switch to the front-facing camera. Select Photo mode, not Video, so the shutter trigger captures a still image.
If you’re using a remote or timer, open the app’s settings. Look for a five-second timer or a remote or shutter option, then enable the feature that matches your setup. Return to the camera preview and check how your face looks on screen.
If the lighting seems uneven, shift your position slightly until your face appears evenly lit. Keep your phone steady as you make selections, and confirm the preview shows your intended framing before you attach the stick.
Step 5: Level the Horizon Grid
Turn on your phone’s camera and enable its grid or horizon-level display, then adjust the tripod legs or center column until the horizon line looks straight. Check the screen from your usual shooting angle. If your tripod has a bubble level, center its bubble by moving the legs or center column. Otherwise, use the grid to correct any left or right tilt.
Rotate the mounted phone carefully while watching the lines, keeping the horizon straight and centered. Tighten the mount and adjustment locks without shifting the phone. Extend the stick slightly if you need extra height, then take a quick test frame. Check that the horizon still looks straight; make a small correction and test again if needed before you start shooting your photos.
Step 6: Tuck Away the Wrist Strap
Tuck the wrist strap behind the pole and secure it flat against the handle before extending the tripod. Keep the strap out of the way so it can’t snag the phone holder or catch in the joints. Loop it behind the pole, then smooth it against the handle.
Make sure no part hangs near the clamp; a loose strap can interfere as you tighten the phone holder and secure your phone.
Now raise the stick and extend the rod and legs. Watch the strap as sections move; stop if anything catches or pulls it. Reposition it until it stays flat and clear.
Lightly adjust the angle to check stability. The strap won’t snag or add wobble during each movement while you use the tripod.
Take a Test Shot
Take a test shot before your full session to catch setup problems early. Set the tripod on its widest stable stance, then clamp your phone securely around its case. Position the stick so the camera sits slightly above eye level. Clean the lens. For higher resolution, choose the back camera; it has more megapixels than the front camera.
Next, turn on even lighting. Avoid harsh shadows, and don’t stand with a bright window directly behind you. Open your camera app and take a photo from your intended angle.
Review the image for sharpness and framing. Check whether your chin looks distorted or shadows fall across your face. If anything looks off, adjust the stick’s height or angle and improve the lighting before taking photos.
Remote Shutter Delay Fix
If your remote fires too early or late, start by fully charging it, which usually takes about one to two hours. Turn on the remote and wait for its LED to blink or pulse; that confirms pairing mode. Open your phone’s Bluetooth settings, select the exact selfie stick remote name, and enter 0000 or 1234 if prompted. Then open your camera app and set a five-second timer or enable remote shutter delay. Press the shutter once and check timing.
| Symptom | Fix |
|---|---|
| Fires early/late | Reset pairing |
| Steps | Unpair, re-pair, test |
If timing still seems off, remove the remote from Bluetooth, pair it again, and repeat the test. A connection often clears persistent delay problems; use one press per shot to avoid repeats.
Dry Tripod After Rain
After the rain, extend the tripod fully and wipe the metal rod and phone holder with a dry microfiber cloth. Shake off water from the joints and locks, then leave the tripod standing in a dry, ventilated area for 15 to 30 minutes so trapped moisture can evaporate.
If the phone clamp got wet, remove your phone and dry the clamp pads thoroughly; wet pads can slip and make your setup wobble. Don’t retract the tripod while it’s damp. Keep it extended until it feels completely dry to the touch.
Before packing, inspect the screw and locking mechanisms and the remote area, if included, for droplets. Wipe them dry to reduce rust risk. Keep airflow around the grip and each exposed connection before storage.
Conclusion
Before you start, check that your phone fits the clamp, then spread the tripod feet on a level surface. Clear a two-foot radius, lock the extension collar, and pair the Bluetooth remote. Tuck the wrist strap out of the way and take a test shot.
If the shutter lags, adjust the remote delay before shooting. After using your selfie stick in the rain, dry the tripod thoroughly. You’ll be ready to capture a steady photo in under a minute.