How to Use a GoPro Tripod Mount: Adapters, Angles and Setup Tips
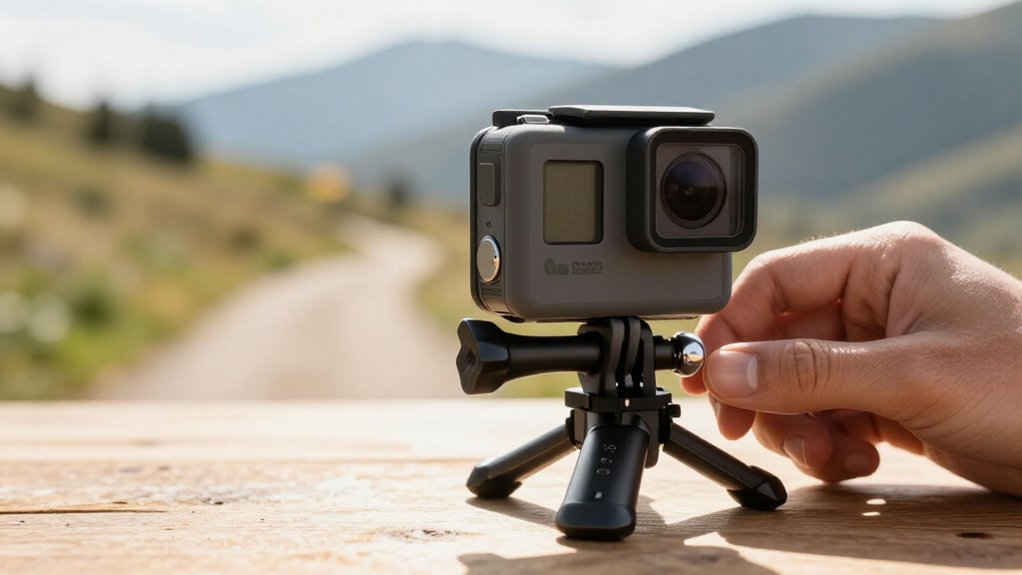
Match your tripod head to the GoPro mount: most adapters use 1/4-20 UNC, while larger heads may use 3/8-16 UNC and require a converter. Start the screw by hand; stop if it binds, then seat the adapter squarely and tighten without forcing it.
Set the tripod on firm, level ground, lock the buckle or clamp, and aim the camera. Check the horizon on-screen and record a test clip. More tips can steady your footage.
Tripod Adapter Compatibility
Check the tripod thread before mounting your GoPro: most GoPro tripod adapters use a standard 1/4-20 UNC screw, while some tripod supports use a larger 3/8-16 UNC thread. Match your tripod head to the adapter, or use a kit that supplies the needed conversion.
If your GoPro lacks built-in tripod threading, use an adapter that attaches to its mounting fingers. Older models may also need a compatible frame or housing before you attach a screw-on GoPro-style adapter. Models such as HERO12 Black, HERO13 Black, MAX2, LIT HERO, and MISSION 1 can often connect directly when they include built-in 1/4-20 threading.
Choose the connection that suits your camera and support, and confirm that the adapter seats squarely on the tripod head before positioning your camera.
Inspect Tripod Screw Compatibility
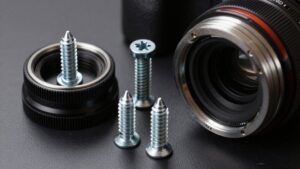
Start with the tripod’s thread size: most camera supports use a 1/4-20 UNC screw, while larger pro-grade heads may use 3/8-16 UNC and need a 1/4-20 adapter to fit your GoPro mount. Check the adapter against ISO 1222:2010 so the mating threads engage correctly; don’t force a mismatched screw.
- Verify the head’s marking or measure its screw: 1/4-20 UNC is the usual camera standard.
- For a 3/8-16 UNC head, fit a correctly threaded 1/4-20 adapter.
- On older equipment, 3/16-24 BSW can seem similar; test engagement before tightening.
- Turn the connection by hand first; stop if it binds or rocks.
- Once mounted, gently shake the setup; retighten if you feel play. Keep the adapter seated squarely, and avoid overtightening, which can damage threads or stress the mount.
Step 1: Choose a Stable Mounting Surface
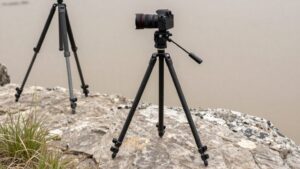
After confirming the tripod screw fits, set the legs on firm, level ground so they won’t shift and disturb your GoPro’s framing. Choose a spot that supports every foot; avoid loose sand, gravel, and wet slopes. On hard ground, check that each foot sits flat and fully contacts the surface. Don’t use slick surfaces; the tripod could slide as you extend or adjust it.
Outdoors or in wind, add weight, such as sandbags, to stabilize the base. Extend the legs evenly and keep the center of mass over the feet; don’t extend one leg much farther than the others.
On uneven ground, reposition the tripod before mounting your camera. Correcting the angle afterward can cause tipping and shake. Test stability before you begin filming.
Step 2: Attach GoPro Adapter
With the tripod stable, confirm its head has a standard 1/4-20 UNC thread, or use a 1/4-20 adapter if it has a 3/8-16 UNC thread. Line up the GoPro adapter’s mount with the tripod head, then tighten it with the thumbscrew or clasp. Recheck alignment before recording.
If you’re using a screw-on action-camera adapter, its stud helps align the mount, but vibration can loosen it. A rotation or ball head can help fine-tune the angle.
GoPros such as the HERO12 Black, HERO13 Black, MAX2, LIT HERO, and MISSION 1 series include built-in 1/4-20 threading. You can skip the adapter and screw the camera onto the tripod thread.
After attachment, shake the tripod. Check the tripod-thread connection and camera mount for play, then tighten loose connections.
Step 3: Use a Quick-Release Buckle
To use a quick-release buckle, align the GoPro’s mounting fingers with the adapter’s GoPro-compatible mount and press until the buckle seats fully. Secure the connection with the provided thumb screw or latch so the camera can’t slip. If your tripod head uses a 1/4-20 thread, first screw the tripod adapter into its standard 1/4-20 UNC socket, then attach the GoPro.
After locking the buckle, gently shake the tripod; any movement means you should reseat the buckle and tighten the fastener. To change framing quickly, release the buckle’s latch, reposition or swap the camera, and press it back into place without dismantling the tripod. Finish with a short test recording or quick photo. Check alignment and confirm the camera won’t rotate under vibration during filming.
Step 4: Hot-Shoe Mounting
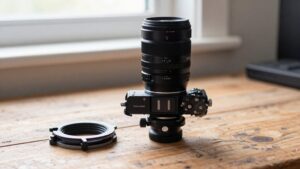
For hot-shoe mounting, check that your GoPro model works with a cold-shoe-to-GoPro adapter, then slide the shoe receiver fully onto the accessory’s rails and tighten its locking screw or collar.
Confirm the adapter matches your camera and accessory. Set the tripod legs evenly, then lock the ball head before you make adjustments. If your setup includes a cable or adapter, route it clear of the mount fingers, housing, and lens area so it won’t catch as you change the angle.
Use the ball head to position the camera, then avoid movements that could loosen the shoe connection. Gently shake the rig before recording. If you detect play, reseat the receiver and retighten the screw or collar. Recheck the connection after repositioning the setup.
Step 5: Adjust Framing for Lens Mode
After selecting a lens mode, re-level and aim your GoPro because stabilization can change the effective field of view, typically cropping about 10% in the widest modes.
Before recording, mount your GoPro, then adjust tripod leg height and pan direction until your subject stays centered and fills the frame in your chosen view, whether you’re using Wide or Linear. Use the ball head, if included, to refine tilt and rotation; keep the horizon level and vertical lines straight with narrower framing.
Position the tripod to control perspective: move closer with a wider view to enlarge nearby objects, or step back and select a narrower view to tighten composition. Take a test clip or photo. Check the crop and angle before you commit to a timelapse or recording.
Step 6: Lock the Clamp Lever
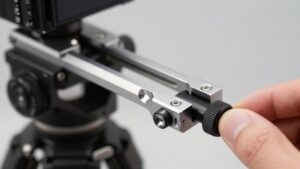
Once your framing looks right, secure the camera before recording. Open the clamp and align the GoPro’s mounting fingers with the clamp’s slot. Push the clamp firmly onto the base, then pull the lever fully into its locked position. Listen for a click and check that the lever seats completely; a partially latched clamp can loosen under movement or vibration.
After locking the clamp, gently shake the tripod at its head. If you feel play or notice wobble, re-tighten the connection before continuing. Don’t start recording until the lever is fully locked. Even slight looseness can let the camera shift, misalign its angle, and change your framing. Keep your fingers clear of the hinge as you close the lever, and confirm it stays seated.
Verify Horizon Levelness
Set the tripod on firm, level ground, adjusting the legs if needed to keep the GoPro’s horizon straight. After mounting the camera, check the horizon on the rear screen or in the app. Even a slight tripod angle can appear pronounced in wide footage. If the head has a level bubble, center it before tightening knobs and thumbscrews.
With a ball head or adjustable mount, confirm the horizon is level before locking the head; locking too early can reintroduce tilt.
Record a five-to-ten-second test clip and review it before your take. Look for a straight horizon throughout the clip, not just in the opening frame. If it drifts, rebalance the tripod legs or tighten the mounting connection, then check again.
Prevent Adapter Thread Loosening
To prevent vibration from loosening the adapter, confirm it matches the tripod’s thread, usually 1/4-20 UNC, or 3/8-16 UNC on larger setups, then tighten the thumbscrew or socket firmly. After mounting your GoPro, gently shake the tripod; any play means you should secure the connection before recording. Use a rotating ball head or alignment plate to aim precisely without repeatedly loosening the threaded stud.
For a screw-on adapter, recheck tightness during long timelapses or action sessions; vibration can back threads off. Set the tripod level and add weight outdoors to reduce movement and stress on the adapter. Confirm full thread engagement before you begin.
| Situation | Practical check |
|---|---|
| Before recording | Shake tripod; tighten any play. |
| Long sessions | Recheck screw-on adapter periodically. |
| Outdoors | Level tripod; add base weight. |
Rinse Saltwater Residue
After each saltwater session, rinse the tripod mount and GoPro adapter with fresh water to remove salt that can corrode threads and hinges. Pay extra attention to the 1/4-20 connection, thumbscrew, and clasp contact points; salt buildup can make the mount loosen or seize.
If possible, remove the camera before rinsing so fresh water reaches internal joints in the tripod head and adapter. Use fresh water only; skip harsh cleaners. After rinsing, dry every surface with a microfiber cloth, then let the parts air-dry completely before you reattach the GoPro.
This prevents moisture from remaining in threaded and hinged areas. Repeat this routine after every saltwater outing, especially when you use the mount in exposed outdoor or underwater setups. Check all joints and threads before your next shoot.
Conclusion
Choose a tripod adapter that matches your GoPro and tripod, then mount it on a stable surface. Tighten the clamp lever, check that your horizon is level, and confirm the adapter thread stays secure before recording.
Use a quick-release buckle when you need faster camera changes. After saltwater use, rinse the mount with fresh water and dry it thoroughly. These checks help you capture steady footage and reduce the risk of a loose or misaligned camera.