Is a Camera Slider Worth It? What It Really Adds to Your Videos
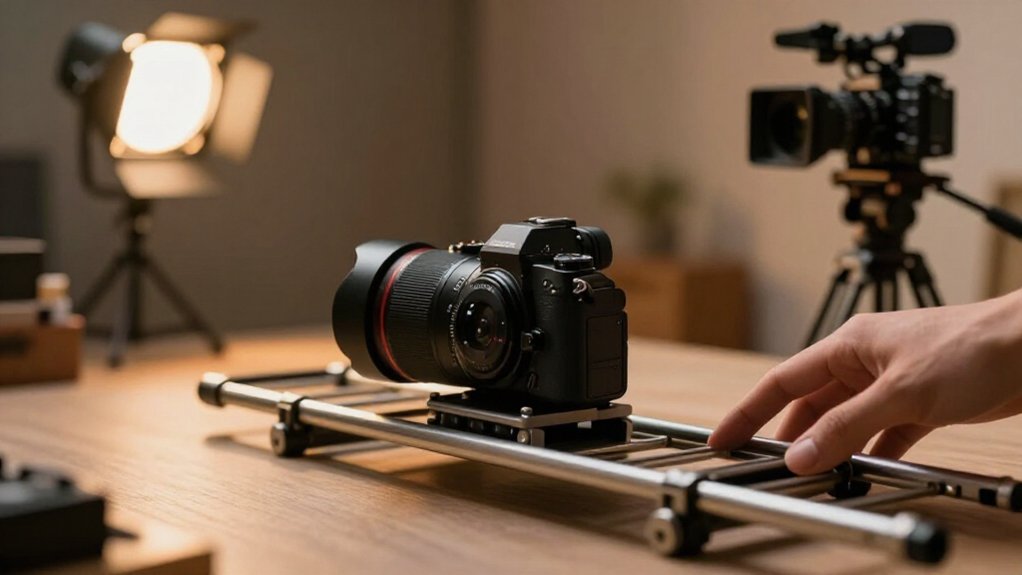
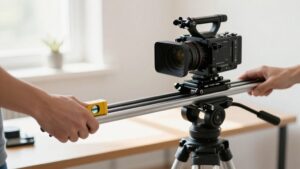
A camera slider is worth it when you use controlled movement to add depth and polish to shots that would otherwise stay static. A short slide past a doorway shifts the foreground against the background, creating visible parallax; a slow push-in adds subtle motion to interviews or product shots.
If you shoot often, motorized control helps match repeated moves; for occasional hero shots, a manual slider may suffice.
Level the rail, check payload and joints. Setup details follow.
When Sliders Improve Shots
When a shot needs smooth, controlled movement, a slider can add depth without the shake of handheld footage. Use it for a slow push past a doorway or wall to reveal a subject gradually; the camera’s changing angle makes the reveal feel intentional. You can also track beside a moving subject so the background shifts while your framing stays composed.
For time-lapse sequences and product or b-roll, a glide across a room, architecture, watch, or food gives surfaces and details a polished sense of depth. Choose a slider when you need repeatable framing or a coordinated focus pull from foreground to background as you move. A short roughly one-meter rail can handle foreground moves and reveals; longer rails need support to prevent wobble.
Budget and Shooting Frequency
If you shoot slider moves often, the cost spreads across enough projects to justify the extra tool. A slider remains an optional move, not a replacement for every stabilization setup. If you film occasionally, particularly documentary-style work, you may pay for a setup and shots that feel less useful than quick gimbal or handheld coverage.
For low-frequency corporate jobs, a short slider around one meter can create a polished reveal without the price or bulk of a kit. On a tight budget, a manual slider near $100 may cover hero shots, but mount it on stable support to keep the frame from trembling. For hikes and field assignments, weigh the carry weight beside your tripod; bring the slider only when planned moves justify it. Over time, frequency turns that cost into useful production value.
Repeatable Parallax Moves
Beyond cost, a slider earns its place by making parallax moves repeatable: as you push sideways, coordinated panning keeps the subject framed while nearby objects shift faster than the background, adding visible depth.
Try a short 1 m slide past a doorframe: its foreground edge sweeps across the frame, selling depth even when the background barely moves.
| Take | Keep |
|---|---|
| Reveal | Foreground edge |
| Setup | Rail level |
| Pace | Match each take |
Level and mount the slider precisely, aligning the tripod axis with the rail; a right-angle setup can introduce tilt forces. Move at a deliberate, matching speed on every take to preserve the same shifting layers. Without track time, a video-head monopod can mimic a brief slide, but you’ll need to control your body’s translation carefully.
Manual Versus Motorized Control
With a manual slider, you control the carriage by hand, so start slowly and build speed to avoid a jerky frame. A motorized slider uses programmed movement to keep each pass steady and repeatable, giving you finer control over slow pushes and reveals.
Choose manual for hands-on flexibility, or motorized for consistent moves with less practice and operator effort.
Control Precision
Control precision comes down to how steadily you can manage speed: on a manual slider, start slowly and build pace gradually, since small changes in hand movement can appear as micro-jerks in the frame.
Before you roll, level the track, lock the mounts, and minimize flex; a loose setup can undermine fine speed control.
With a motorized slider, app settings let you dial in a programmed glide without relying on your hand to meter every inch. A GVM 80 Pro (GR-80QD), for instance, supports app-controlled motion and time-lapse, giving you precise command over the move.
For a slow reveal or a track that must hold focus, that control can protect your framing; choose manual for short, straightforward passes where you can guide the pace yourself.
Movement Consistency
Manual or motorized, how consistently does the camera travel? With a hand-pushed slider, your move can look jumpy if you launch or accelerate too quickly. Start slowly, then build speed gradually; that controlled push keeps the camera gliding at an even pace. On a well-leveled rail, steady travel helps suppress micro-jitters and wobble on long moves.
A motorized slider takes your hand speed out of the equation. You can program app-controlled stepper-motor movement and repeat the pace shot to shot. For example, a belt-driven GVM 80 Pro supports 11 pounds and can run consistent horizontal moves using programmed steps.
Still, the motor can’t steady a loose rig: secure the mounting plate, use a screw-mounted fluid head, and match a tripod setup to the slider axis.
Shooting Flexibility
A smooth move is only part of the choice; the way you want to shape it matters, too. Manual sliders give you direct, responsive control: you can make framing corrections as the subject shifts, then ease the camera into a slow glide. Level the rail and begin gradually; if you accelerate only when needed, you’ll reduce jumps that uneven hand speed can leave in footage.
Motorized sliders exchange some spontaneity for programmed, repeatable motion. Stepper-motor control and an app or remote let you reproduce a move shot after shot, with speed ramps and glides that are hard to perform by hand. A model such as the GVM GR-80QD Pro can handle time-lapse or cinematic tracking, so you can focus on composition on screen rather than matching your hand speed.
Setup And Operation
Before moving the camera, level the slider rail with its adjustable feet and align the tripod plate with the slider’s axis to limit wobble. Mount the carriage on a screw-mount fluid video head; a larger head often flexes less, keeping the camera’s path steady.
With manual control, push the carriage slowly, then build speed gradually. You’ll need practice and consistent pacing to prevent jumpy, micro-stutter footage.
Motorized control takes that performance pressure off your hands: program the move in an app for repeatable time-lapses or smooth, consistent push-ins and pull-outs.
Check load and balance before you run a motor. On a GVM 80 Pro, rated around 11 pounds, balance your camera so the belt and rails track freely without binding or flexing. Choose the mode that fits your shot and workflow.
Productive Moves for Interviews
For interviews, use a slow, short slider move to add subtle motion while keeping your subject sharp and in focus. Match the move to the tone, and coordinate the slide with a steady pan so the background shifts without distracting parallax.
If you need matching takes, program a motorized slider for predictable, repeatable movement.
Add Subtle Movement
During an interview, a short slider, around one meter, adds motion without pulling attention from the subject. A slow, gradual move works best: ease the carriage forward to reveal the subject, drift laterally to shift the background, or slide past a softly blurred foreground prop.
Manual operation benefits from an even pace; abrupt starts and stops make footage look jumpy. Set up carefully: secure the camera to the carriage with a screw-in fluid head, level the rail, and align its travel axis with your tripod plate to reduce visible wobble.
For repeatable push-ins or slow tracking, a belt-driven motorized slider rated near 11 pounds can hold a steady speed without the battery limits some gimbals impose. Keep the move restrained, and let the foreground provide depth.
Maintain Interview Focus
When you want an interview shot to feel more dynamic without losing the subject, use a slow, controlled push-in or tracking move. Keep the interviewer framed as the background shifts smoothly, adding production value without stealing attention.
Mount your camera on a screw-mount fluid tripod head on the carriage. Level the slider on its adjustable feet and secure it to heavy-duty tripods or stands; any wobble shows clearly at eye-line. Move slowly enough to avoid micro-jitters that can distract viewers or pull focus.
Coordinate pan and tilt with the rail movement. A mostly straight push-in helps you avoid opposing motions and distracting parallax that can make eyes or facial angles feel off. If you need a focus scene change, rehearse a controlled pull from a foreground or desk detail back to the interviewer, keeping focus smooth and deliberate.
Use Motorized Repeatable Moves
A motorized slider lets you repeat a slow push-in, track-back, or subtle parallax move at the same speed and distance on every interview take. Program a short, roughly one-meter move to reveal foreground detail or shift the framing precisely for a cut.
With an app-controlled, belt-driven unit such as the GVM 80 Pro, you can set start and stop points, then run the move again without manually matching each pass. Its roughly 11-pound capacity suits many interview rigs. Mount the carriage on a solid tripod head and level it carefully; a flexing setup can turn a smooth programmed slide into micro-jitter. For b-roll, track beside a walking subject or create a controlled reveal, keeping the camera’s path consistent across takes without extra setup guesswork.
Match Movement To Tone
For interviews, let the movement match the conversation: use a slow slide or a short, roughly one-meter reveal so the camera adds depth without distracting from the subject. Keep the slider level, and secure the carriage to a solid screw-mount fluid head; this helps the camera travel on-axis without wobble as you track while holding your framing on the subject.
Match the slide’s length to the story beat. A move around a foreground element can make lateral motion visible without overpowering the answer. For consistent composition, try a motorized, slow back-and-forth track or a gradual pan while keeping your subject sharp. If you want more energy, use a mechanical push-in reveal; fast side-to-side moves can feel restless, and a slider won’t pivot as freely as a gimbal when documentary coverage calls for quick reframing.
Payload and Tripod Limits
Before you mount your rig, check the slider’s payload rating against the combined weight of your camera, lens, cage, matte box, and batteries. For example, the GVM 80 Pro supports up to 11 lb (about 5 kg), but your complete setup, not the camera body alone, must stay within that limit. Weigh the rig as you’ll shoot it, including accessories you might add later.
The carriage rating doesn’t guarantee a steady image: a light or flexible tripod head can bounce as the camera crosses the track. Choose a heavy-duty video tripod and a sturdier fluid head sized for the full load. Secure the carriage through compatible 1/4-20 or 3/8-16 screw holes; any flex at this joint will show in the frame. With a longer slider, add stands at both ends. The extra support helps control bending and vibration, keeping a slow move smooth rather than visibly trembling.
Belt-And-Bearing Replacement Costs
As belt-and-bearing wear builds with frequent use or rough carriage travel, replacement costs depend on more than parts: you may also pay shipping and spend time partially disassembling the drive to reach the belt and tensioner.
Belt swaps may be quick on service-friendly models; otherwise, you’ll spend time reaching the motor pulley and tensioner. Bearings usually last longer on maintained sliders, but replacement can take more work: you may need to remove the carriage or bearing block, then realign and relieve it to restore motion.
Budget sliders may share cheaper components; premium brands can charge more and restrict availability. Overloading your slider or using abrupt stops strains belts and bearings, increasing replacement odds. Compare parts, shipping, and service access before buying; a low price won’t guarantee low lifetime costs.
Check Rail Joint Smoothness
A rail joint can look flush but still jolt the camera, so run the carriage slowly across the full track and watch for a click, dip, or vibration at each seam. Even a slight height or level mismatch can turn a steady push-in or pull-out into visible micro-jitters. Check the connection under the load you’ll actually use: your camera, lens, and head.
- Move the carriage across every seam in both directions; listen for a click and watch the frame for a tiny bump.
- Look for tight, well-seated joints, precision rail sections, and mounting hardware that hold one straight line.
- If feet adjust, re-level after joining sections; a tilted setup can magnify a small seam mismatch.
Reject any joint that changes speed or adds vibration.
Quick Setup on Location
For a quick location setup, level the slider by adjusting its feet until the rail sits even and won’t wobble mid-move. Pre-mount your camera and the correct 1/4-20 or 3/8-16 plate, or your slider’s standard mount, on the carriage before you leave. A compact rig saves minutes when the light is changing.
- Choose a short slider, around one meter, so you can pack it quickly, steer around obstacles, and align it more easily on uneven ground.
- Set it on a heavy-duty tripod, matching the slider axis to the tripod plate alignment for a secure, straight track.
- Run a 30-second dry test: watch the carriage glide, then check that your planned travel distance fits the available space.
This keeps your first take on schedule.
Conclusion
A camera slider is worth it when its movement makes a shot clearer, not merely busier.
On location, lock the tripod, check the rail joint, balance the payload, and rehearse a short move before recording. Choose manual control for quick, quiet adjustments; go motorized when you need repeatable parallax or precise takes.
Weigh that added control against setup time and replacement costs. If a locked-off shot already serves the scene, leave the slider packed and keep filming.