How to Choose a Fluid Head for Video: Payload, Drag and Counterbalance
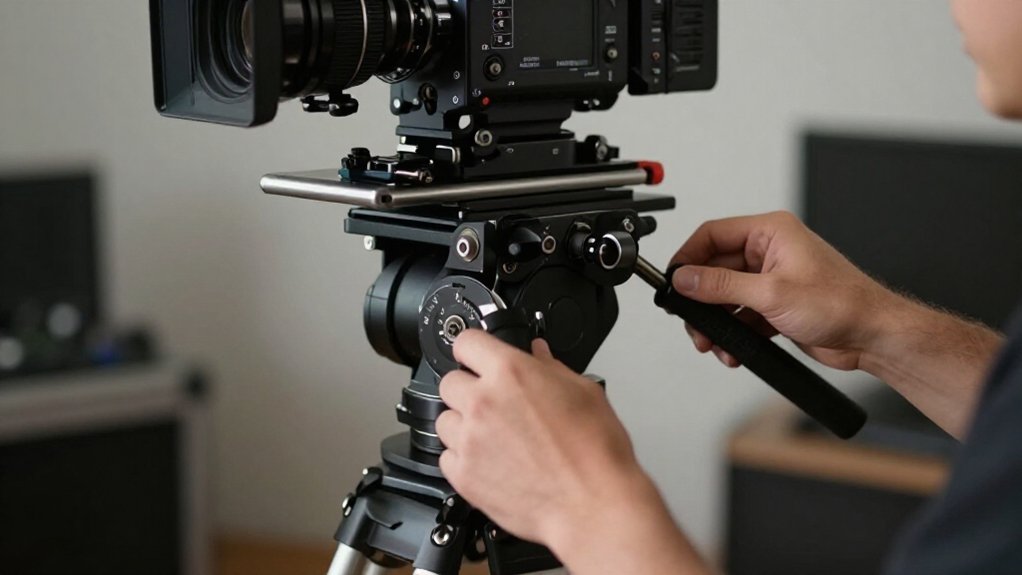
Choose a fluid head whose published payload range exceeds your fully built rig, including camera, lens, batteries, monitor, and accessories. Weigh it assembled, respect the lower limit of the head or tripod legs, and leave a stability margin.
Match the bowl or flat base to your support. Balance first: set drag low, adjust the plate and counterbalance until the camera holds position. Then tune pan and tilt drag separately for smooth starts and stops.
More guidance follows.
Payload, Drag, and Counterbalance
Start by matching the head’s rated payload and balance range to your complete rig—camera, lens, batteries, monitor, matte box, and accessories. Weigh everything as you’ll operate it, then choose a head whose published range covers that load. The Manfrotto Nitrotech 608 suits rigs up to 14 lb; consider the Nitrotech 612 for loads near 20 lb.
Counterbalance should hold your camera at different tilt angles, while pan and tilt drag control movement resistance. Set these independently: damping affects each axis’s starts, stops, and smoothness differently. Heads offer continuous or stepped adjustment; the Sachtler Cine 20, for example, provides seven drag steps and a SpeedBalance boost. For heavier rigs, stepless drag may offer finer control. Check specifications carefully: the Cartoni Mixo 21 supports up to 46 lb.
Balance Before Drag Tuning
Once the head’s payload range fits your rig, balance the fully assembled camera, lens, battery, monitor, mic or cage, matte box, and heavy accessories before adjusting drag. Set pan and tilt drag to zero; lock pan/tilt and begin with the lowest counterbalance setting. Unlatch tilt and slide the quick-release plate forward or backward until the rig stays neutral.
Test counterbalance by tilting 30° and releasing. If the camera creeps upward, lower the setting; if it creeps downward, raise it. Check balance first: with the rig neutral, make slow pans and tilts. Drift or jerky starts point first to poor balance or a misplaced center of gravity, not weak drag. Once the rig stays stable throughout the tilt range, tune pan and tilt drag separately to suit your movement.
Integrated Bowl Convenience
An integrated bowl lets you level the head quickly, but it must match your tripod or pedestal: choose 75mm, 100mm, or 150mm to fit its bowl securely. Check the support before mounting; a mismatched seat can rock or load an adapter unevenly. Use a flat-base head when your support has a flat plate, avoiding adapter stress.
| Mount | Match | Practical result |
|---|---|---|
| 75/100/150mm bowl | Same-size bowl | Secure seating |
| Flat plate | Flat-base head | Direct fit |
| Mixed systems | Needed bowl/base | Faster swaps |
The correct bowl or adaptor keeps your rig’s center of gravity aligned, supporting consistent counterbalance through tilts. Proper seating also helps pan and tilt locks engage cleanly, limiting drift and micro-movement.
If you switch supports, choose the mounting option you use most; you’ll reduce setup time.
Head-Leg System Ratings
Check the head and tripod’s separate payload ratings against your fully assembled rig, including accessories. Verify the complete-system limit and bowl or base compatibility, using an adapter if needed. Treat the lowest rating as the practical limit, and leave a stability margin.
Separate Head and Leg Ratings
A fluid head and its tripod legs have separate payload limits, and both must exceed the fully built weight of your camera rig, including the body, lens, batteries, monitor, and accessories.
Treat each rating independently; a head doesn’t raise the legs’ capacity, and the legs can’t compensate for an undersized head. Weigh your setup, including cage, follow focus, and matte box. Check the head with your heaviest configuration and balance point: slide the plate until the rig stays level with the tilt lock released.
For the support, use the legs’ and bowl or adapter rating; the legs may limit stability even when the head carries the load.
Match the mounting interface, for example a 100mm bowl or flat-base adapter, and confirm pan/tilt lock engagement.
Check System Payload Limits
Once you’ve confirmed the head and legs can each support your rig, compare their limits with its worst-case assembled weight, not just the camera body. Add the fully built configuration: body, lens, battery, monitor, microphone, cage, matte box and follow focus.
Keep head payload and tripod/leg-system payload as separate ratings; each must exceed that worst-case weight. If the manufacturer lists a complete-system limit for the head, legs, bowl and adapter, check it too, especially when balance behavior is uncertain.
Confirm units and configuration before comparing figures: a 21 kg/46 lb rating must align with your rig’s measured weight in the corresponding units and setup. Mount and balance the rig on the head, checking plate position and interface; staying within payload alone doesn’t ensure safe, smooth tilting.
Identify the Weakest Component
Even if your rig stays within the head’s payload limit, the tripod legs or a documented head-leg system limit may still cap the load. List your heaviest actual camera, lens, battery, monitor, cage, and accessories, then compare their total weight against the head payload, tripod leg rating, and any documented system limit. Any can cap the load.
Check that your rig’s center of gravity falls within the head’s counterbalance range. If tilt drifts or jerks, the rig’s balance may exceed that range; changing fluid drag won’t fix it. Confirm the head and legs share a compatible interface: the flat base or bowl must fit and seat correctly. A mismatched adapter can mimic head weakness. For example, a Nitrotech 608 suits rigs up to 14 lb; a 612 targets about 20 lb. Check that the legs support your chosen rig, too.
Allow a Stability Margin
When you weigh your worst-case rig, compare it with three separate limits: the head’s documented payload, the tripod legs’ payload, and any complete-system rating for that configuration.
Build your worst-case weight from body, lens, battery, monitor, matte box, focus gear, and forward accessories. Match it to documented ratings, not headline numbers. Choose a head rated above this build; that’s your stability margin. The Nitrotech 608 suits rigs around 14 pounds or less; the 612 serves roughly 20-pound-class systems.
Slide the quick-release plate to find the balance point and confirm pan and tilt locks engage fully. Drift or jerking during movement often signals poor balance, not insufficient fluid drag. Match the head’s bowl or flat-base interface to the legs; for bowl heads, verify the 75-, 100-, or 150-millimeter size. Correct mounting keeps the head-leg system stable within its rated limits for the same configuration, before you load or move the camera.
Frequent Pan-and-Tilt Work
For repeatable pans and tilts, match the head’s documented payload range to your fully built rig, then balance the rig on the plate. Set pan and tilt drag separately to suit your movement, and use counterbalance to limit drift during slow tilts.
Level the head before each take, then test both axes for smooth movement and secure locking.
Balance for Repeatability
Frequent pan-and-tilt work starts with balancing the fully built camera rig: slide the quick-release plate until the camera hangs level at your chosen tilt angle without drifting. Lock pan and tilt, then set both drags to zero for the initial balance check. Raise or lower the tilt in roughly 30-degree increments and watch whether the rig moves up or down.
Apply your head’s counterbalance instructions across the usable tilt range: if the camera rises as you tilt down, counterbalance is too high; if it drops, it’s too low. Adjust until the rig stays stable throughout. Recheck balance whenever you change lenses, batteries, monitors, or other accessories. A head with continuous or stepless counterbalance helps preserve repeatability as the rig configuration and camera position change.
Match Drag to Movement
Set pan and tilt drag independently to make slow, accurate moves feel consistent on each axis. For frequent pan-and-tilt work, begin near zero drag and increase it gradually. Your starts and stops should remain smooth, while the head damps movement without locking up as you frame. Use higher drag for slow, steady moves such as interviews, and lower drag when you need faster repositioning but still want control.
First, set counterbalance to eliminate drift, especially during slow tilts; tilt drift usually points to a balance or center-of-gravity error, not inadequate fluid damping. After changing counterbalance or plate position, test a slow pan and slow tilt again. Adjust drag in small steps until both axes move repeatably throughout the tilt range. This check keeps your framing predictable.
Prioritize Pan-and-Tilt Controls
When pans and tilts are routine, prioritize adjustable fluid drag and continuous counterbalance over a head’s “fluid” label. Frequent moves expose jitter, drift and jerky starts quickly. First, confirm the head supports your fully built rig’s worst-case payload in pounds or kilograms.
Balance the camera before judging drag: if it drifts during a slow tilt, correct the center of gravity or counterbalance, not the drag setting. Then test slow pans and tilts, adjusting each axis independently; separate controls let you tune starts and stops to your movement speed. Seek smooth motion without creep when locks engage.
Continuous systems, such as Cartoni Master heads, let you refine drag and counterbalance across the tilt range, helping maintain control as framing changes. Check that locks engage reliably, especially when you pause between moves.
Level Before Each Take
Smooth drag and counterbalance depend on a level setup. Level the tripod legs first to keep the horizon true; tilt drift or hunting in pan-and-tilt tests can come from a mounting angle, not poor fluid performance.
With the rig installed, set pan and tilt drag to zero, then lock the controls before setup. Center the rig’s weight over the head, then slide the quick-release plate until the camera holds position when you release the tilt lock.
After balancing, test slow pans and tilts. Adjust pan drag and tilt drag separately to control starts and stops during frequent moves.
Before each take, recheck balance and lock engagement with a slow pan-and-tilt movement. A change in lens, battery, or monitor position can shift the center of gravity and compromise level work.
Quick-Release Plate Compatibility
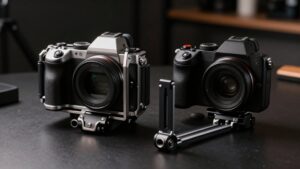
Before choosing a fluid head, check that its bowl or flat-base interface matches your tripod legs, then verify that its quick-release plate fits your rig and slides far enough to balance the fully built camera. Match the bowl to your legs, 75, 100, or 150 mm, or use a bowl-to-flat-base adapter for a flat-based head.
Check whether the head accepts a sliding plate and its format; geometry limits fore-and-aft travel. With your lens, battery, monitor, and accessories mounted, confirm the plate travels far enough for neutral balance.
Verify its screws and locking pin fit your cage or rig plate and secure repeatably. For moves among tripod, slider, or pedestal, choose an integrated release specified for those platforms and confirm the plate works on remount.
Warranty and Parts Availability
Once the plate and mounting interface fit your rig, check how well the head can be serviced over its working life. Check the warranty before buying: confirm its term, coverage, and whether you must use an authorized service center. Parts support varies by brand, so look for availability of wear items: drag cartridges, counterbalance springs and knobs, pan/tilt bearings, and level-bubble assemblies.
A 100mm bowl or flat base makes components and adapters easier to source. Ask whether your model has orderable service kits matched to its payload and counterbalance design; don’t assume generic substitutes will fit or perform.
Then confirm repair costs, shipping lead times, and turnaround in your region. Ask if the manufacturer offers exchange units to limit downtime when repairs take longer than expected.
Unmarked Drag Settings
If a fluid head’s drag scale is unmarked, use its numbered detents or clicks rather than guessing by knob rotation. First, balance your camera with continuous counterbalance; drag controls movement resistance, not balance.
- Set pan and tilt drag to zero, release one axis, and confirm the rig moves freely.
- Increase pan drag by clicks, testing slow pans for jerk or drift.
- Adjust tilt separately, checking slow tilts for the same faults.
- Record each final position in steps for your worst-case rig weight.
Repeat the tests step by step until movement stays steady without jerking or running away. For example, note “step 3 pan, step 4 tilt,” then reapply those positions with the same rig. Click-based records make blank scales usable and results repeatable.
Transport and Uneven Locations
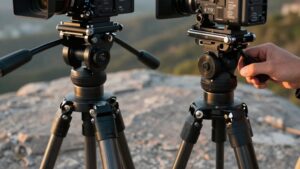
For transport and uneven locations, choose a head with precise leveling and independent pan and tilt locks so the rig holds its horizon on sloped ground and between setups.
Match your worst-case complete payload, camera, lens, battery, monitor, mic, cage, accessories, because an under-rated head may jerk or drift during tilts as footing shifts balance.
- Choose adjustable counterbalance, continuous or stepped, to keep the camera stable across the tilt range as you reposition on ramps, grass, or gravel.
- Tune pan and tilt drag separately; start near zero, test a slow move, then add drag to limit overshoot or vibration on uneven legs.
- For field use, confirm bowl and mount compatibility, such as a 100mm bowl or flat base. After leveling, make a slow full pan-and-tilt test before recording.
Conclusion
Choose a fluid head by matching its payload and counterbalance to your camera, then balance the rig before tuning drag. Check whether an integrated bowl suits your legs, and verify the head-leg system’s ratings. If you pan and tilt often, prioritize repeatable controls; confirm quick-release compatibility, warranty coverage, and parts access.
Test unmarked drag settings yourself. Finally, consider transport weight and uneven locations, so you can level the head and work wherever your shoots take you.