How to Choose a Gimbal for Your Camera: Payload, Size and Features Compared
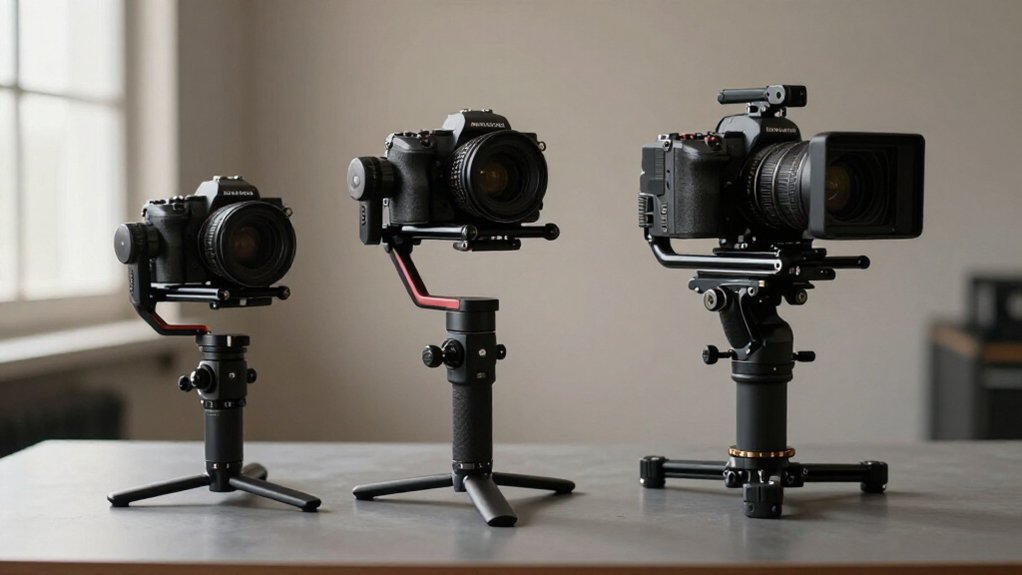
Choose a gimbal by weighing your fully built camera rig, not the camera body alone. Mirrorless users can prioritize compact size and fast setup; cinema operators need payload headroom and stronger motors for monitors, follow-focus, and matte boxes.
Check tripod threads, plate fit, and clearance through full tilt, pan, and roll, including cables and lens hoods.
Then compare runtime under load, low-angle handling, and spare-part access. Hands-on checks can reveal which trade-offs matter most.
Mirrorless vs. Cinema-Rig Picks
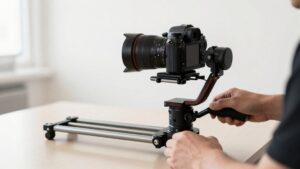
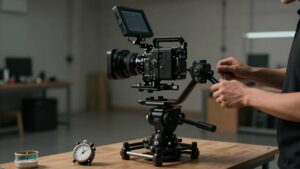
Choosing a gimbal starts with the rig you’ll actually carry: mirrorless kits usually benefit from compact balance and quick setup, while cinema rigs need more payload headroom and motor torque for accessories such as a follow-focus, monitor, or matte box. For a mirrorless body and standard zoom, match the gimbal’s rated capacity to your build, not the camera alone. The WEEBILL 3S supports up to 3 kg.
Choose it when you want portrait/landscape switching or Sling Mode 2.5. For cinema, add capacity beyond your camera-only weight so the motors can handle a follow-focus, monitor, cage, and matte box. Weigh your body, lens, battery, cage, and accessories in grams, then leave headroom. For walking shots, value stable movement and Bluetooth shutter control over headline payload.
Tripod-Mounting Requirements
Before mounting a gimbal on a tripod, check for a compatible 1/4″-20 or 3/8″ interface and confirm the base clears the handle and balance arms. Next, compare the gimbal’s footprint and bottom-mount position with your tripod head; a compact base may fit where a wider one blocks the handle. Check whether the gimbal uses a standard screw directly or needs an adapter, then tighten the connection before loading your camera.
Measure the head plate and check its quick-release format against the gimbal’s mounting setup. Plate height matters: a tall plate can collide with the base, while a low setup may leave the gimbal sitting unevenly. If your model has tripod-style feet or a built-in stand, test whether they deploy with the tripod attached. Some designs require you to choose one support method, so confirm the arrangement in the manual before a shoot, with your exact tripod head outdoors first.
Balance and Motor Clearance
Match the gimbal’s payload rating to your fully assembled rig, including the phone and case or any added lens, battery, and accessories. Check the total in grams or kilograms before mounting; staying below the maximum reduces motor strain and jitter. Leave headroom rather than choosing a rating that barely covers your travel setup; a 3 kg model can carry a lighter rig with less risk of overheating on long shoots.
| Check | What to verify |
|---|---|
| Fit | Clamp width and case thickness; often ≤10.5 mm |
| Clearance | Level position; axes move freely |
Mount your rig, then test each axis. Long lenses or bulky cases can block travel despite adequate payload. Rebalance after every lens, battery, or accessory change; small shifts can cause tilt or roll corrections.
Battery Runtime Tradeoffs
Compare the rated hours per charge with your likely shooting conditions; heavier payloads, continuous stabilization, and cold weather can cut real-world runtime. Smartphone gimbals often last 10–15 hours, while heavier camera rigs may run shorter and trade battery life for capacity or lower weight.
Check for USB or reverse charging, and treat vague “up to” claims as best-case figures when planning a shoot.
Rated Versus Real-World Runtime
A gimbal’s advertised runtime reflects ideal conditions, not sustained motor load or cold-weather shooting, so heavy panning and long takes can drain it faster. Treat the rating as a comparison point, not a shoot-day guarantee. If a model claims 10–12 hours, plan for fewer hours in practice: pack a spare battery or schedule swaps before a long event or travel day.
During testing, run your usual moves and take lengths, then compare the battery indicator over a fixed interval. Check whether it supports USB or reverse charging; that can keep your phone powered during a solo shoot, though it won’t stop the gimbal battery from declining. For predictable sessions, favor larger battery systems and steady runtime over advanced features that add processing demands. Don’t assume a headline figure matches your workflow.
Payload’s Impact on Battery
Runtime depends on more than the battery rating: a heavier camera, lens, and accessory setup makes the motors work harder to hold roll, pitch, and yaw, draining power faster. On smartphone gimbals, keep your phone within the clamp’s safe range; lower motor effort helps approach advertised 10–15-hour runtimes by limiting current draw. For larger gimbals, compare your full camera, lens, and accessory load with rated payload.
Exceeding it strains motors, raises power use, causes jitter, and may overheat them. Long travel or event shoots make this drain consequential. If you add a heavier lens or accessory, rebalance at the neutral point; reduced corrective effort can preserve runtime. A well-balanced setup draws less power than a poorly balanced one, even at the same payload under load.
Runtime Versus Gimbal Weight
How long a gimbal runs depends partly on how much weight you’re willing to carry: larger battery systems can extend shooting time but add bulk. A travel model rated for roughly 10 hours gives you a useful baseline for a full shooting day, but compare that figure with your actual setup. Once you mount a heavier camera and lens, the motors work harder and can drain the battery sooner, regardless of the advertised runtime.
Built-in lights add another load; a travel gimbal pushing about 1,000 lux may run shorter than a similar light-free rig. With heavy-duty models supporting around 3 kg, balance your camera, lens, and accessories, then choose capacity comfortably above their combined weight and plan around the stated hours for real shoots.
Charging and Power Options
Beyond carrying weight, battery design determines whether a gimbal can cover your shooting day. Check the maker’s runtime rating; stabilization motors draw power quickly, so compare models against your schedule. Many gimbals target 10 hours or more, but lights and other electronics shorten that figure.
A fill light rated up to 1,000 lux can help, yet brighter output typically costs runtime.
For lighter travel, look for USB charging and reverse charging, which lets you top up a phone from the gimbal. Compare recharge time and battery architecture too: removable 18650 cells can extend use versus a sealed pack. If runtime falls short of your session, pack spare cells or a power bank. Don’t count on AI tracking or firmware to save power.
Low-Angle Filming Needs
For floor-level shots, compare minimum clearance and underslung mode to see how close you can get without the camera or gimbal dragging.
Check that the screen and lens stay clear of the ground and gimbal arms as you tilt. Leave payload headroom for your lens and accessories so the motors can stabilize reliably at low angles.
Minimum Clearance
Low-angle shots often fail when a gimbal’s motors, handle, or base hit the ground before the lens reaches the desired angle. Minimum clearance is the gap between the rig’s lowest point and floor; it determines how close you can place the lens without collision or tilt limits. Compare near-floor pitch: a model that lets you mount the camera lower beats one with a high center mount.
Check tripod feet or flat-base geometry; foot height and undercarriage shape affect lens-to-floor distance. Fit your phone case, lens hood, or cage; added width or height can cause contact sooner. Balance the rig, then pitch down slowly while watching the lowest hardware. Payload overload can restrict motion, so the test may not show the gimbal’s full low-angle range.
Underslung Shooting Mode
When you need shots below chest level, underslung mode lets you flip the gimbal and film from underneath as you walk, bringing more ground and subject context into the frame. Compare models for a dedicated hardware setting, such as Sling Mode; don’t assume every gimbal supports it. Balance your camera, lens, accessories, and added battery, then keep total weight below the payload. Underslung use makes poor clamp fit or overload apparent, potentially causing jitter or motor strain.
For travel, a design around 705 g can feel easier to hold in a low stance than a heavier rig. Check quick portrait-to-landscape rotation to avoid awkward rewiring or rebalancing mid-shoot. Finally, test three-axis yaw and panning while walking beneath your subject; responsive control helps limit shake.
Screen and Lens Clearance
At full tilt, check that your screen or lens clears the gimbal’s motors and frame before choosing a model.
For phones, measure the device with its case and screen protector installed, then compare its width with the clamp’s maximum—10.5 mm. Tilt the screen down and watch for contact between clamp, screen, and motors. For mirrorless or DSLR setups, perform a max-down motion test during setup; larger zoom lenses may strike the gimbal at low angles.
Prefer models that state clearance and provide pitch limits or adjustable stops. Repeat the test with filters, lens hoods, or extension rods fitted, since added thickness can obstruct the screen or lens. Clearance matters more than selecting a stabilization mode: clutter can push operation near limits, risking jitter and unstable movement.
Low-Angle Payload Balance
A gimbal for low-angle work needs enough payload headroom to balance your camera, lens, and accessories without straining its motors. Check the maker’s stated payload against your rig weight, including a case, sunhood, and follow-focus batteries. Leave margin: an underbalanced gimbal may jitter or shut down when its motors work hard.
For a crouched stance, compare portrait-landscape or angle-rotation modes; WEEBILL 3S offers quick switching and Sling Mode 2.5. When you change to a long lens, choose a model you can rebalance; you may need to re-balance the MOZA Air 3.
For travel, the 705-gram ZHIYUN Crane M3S is compact, but check its maximum payload to avoid motor overheating. Verify three-axis stabilization: 2-axis designs can’t correct yaw as you walk and tilt down simultaneously.
Lens and Cable Clearance
Before buying, test whether the lens and its accessories clear the gimbal throughout its full range of motion, not just in the balanced position.
Check clearance with the hood installed; during yaw, the lens must avoid the clamp, motors, and frame so the stabilizer can lock and pan. Run HDMI, USB, remote, or microphone cables while rolling to both extremes. Nothing should snag or pull tight.
Compare lenses with variable-length zooms: extension can block movement even when payload balance appears right. Fit follow-focus rings, filter holders, battery grips, and matte boxes, then check motor arms for interference; you may need to disable an axis. If you’re mounting a wireless transmitter, route its antenna and cable clear of pitch and roll axes, with margin to limit vibration and cable fatigue.
Repairability and Spare-Part Availability
Check a gimbal’s repair options before you buy: brands that publish parts catalogs and sell motor units, arm assemblies, or control boards separately can be easier and cheaper to maintain than brands that require center-only repairs. Compare each catalog with the service policy: check whether you can order components directly or must ship the unit to an authorized center.
Inspect the battery design too. Removable 18650 cells are easier to replace than a sealed lithium-polymer pack, which can make repair costly and shorten service life. Check documented firmware updates and an OTA route; support matters when parts remain available.
Try the clamp and mounting interface, then confirm you can buy replacements for worn springs, screws, or plates. Parts needn’t be hard to source locally.
Hidden Payload Limits
Treat payload as the maximum balanced weight the motors can safely hold, not just your camera body’s weight: add the body, exact lens, batteries, cage, and other accessories, then compare the total with the gimbal’s rating. Then test your full rig, not a stripped-down showroom setup:
- Weigh body, lens, batteries, cage, and matte box together; keep a margin below rating.
- Swap a light prime for a heavy zoom and recheck balance; hidden stability range may be lower.
- For phones, include case, screen protector, and add-on lens; check weight and clamp width, often limited to about 10.5 mm.
- Compare real-world capacity: WEEBILL 3S supports about 3 kg, while ~705 g travel models won’t reliably balance heavier mirrorless builds.
Overload causes heat, jitter, and premature motor wear.
Quick-Release Plate Compatibility
A quick-release plate can speed up lens or battery swaps, but only if it matches your gimbal’s mounting standard and camera interface. Before buying, compare the plate standard, such as Arca-Swiss-style, and its dimensions with your gimbal’s clamp and camera base. Then check fit in practice:
- Align the screw position with your camera’s tripod socket; confirm the plate clears battery doors and cable ports.
- Lock the plate and test for side-to-side play. Any wobble can become micro-jitters in your footage.
- If you change lenses or batteries often, check that the plate returns to the same position each time, so you won’t rebalance from scratch.
- Confirm whether the gimbal includes the correct plate or sells it separately; a similar-looking plate may not fit.
A secure, repeatable interface matters as much as fast mounting.
Conclusion
Choose your gimbal by matching its tested payload to your camera, lens, and accessories, not the body alone. Mirrorless setups usually favor lighter, compact models; cinema rigs need stronger motors, more clearance, and often longer runtime.
Before buying, mount your tripod plate, balance the full rig, check cable and low-angle clearance, and confirm quick-release compatibility. Compare real-world limits, not headline specs, and verify spare parts are available. The best choice is the one you can balance, operate, and maintain reliably.