Camera Gimbal Payload Capacity Explained: Body + Lens Weight Limits
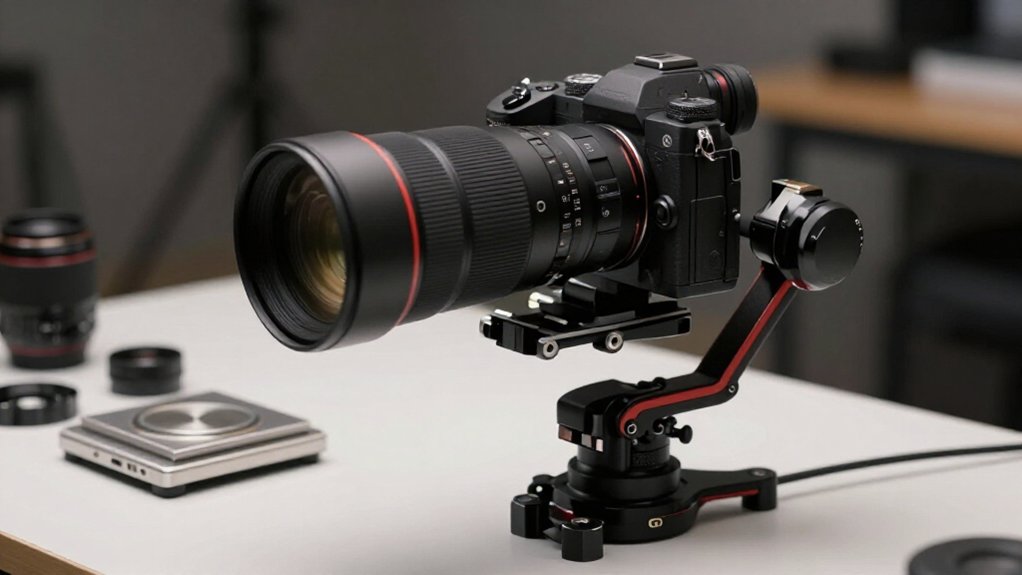
Count your camera, lens, battery, cage, monitor, transmitter, follow-focus, and every mounted accessory toward your gimbal’s payload limit. That rating is a motor-load ceiling, not a promise of balance or footage stability.
Balance the rig and keep its center of mass close to the axes; long lenses such as a 70–200mm create more leverage than a 50mm prime.
Leave motor headroom, check for vibration, and account for wind and zoom extension.
The sections ahead explain checks.
Body-and-Lens Weight Basics
Start by adding the camera body, lens, and every mounted accessory, such as a battery, monitor, transmitter, or follow-focus, to find the gimbal’s actual payload. Include the cage and every attached item; additions change total weight and center of gravity. Payload capacity marks the motors’ maximum supported load, but doesn’t guarantee balance or stable footage. Balance the rig physically and check for vibration.
Lens geometry matters too: a 70–200mm zoom places mass farther from the tilt axis than a 50mm prime, increasing leverage and complicating adjustment. Even below the limit, your rig may exceed the gimbal’s balancing travel, causing instability and motor strain. Leave headroom, especially with long, heavy zooms, to preserve responsive, smooth stabilization during demanding moves and extended shoots with your setup.
Camera-and-Lens Weight Reference Chart
A camera-and-lens weight reference chart helps you compare tested combinations, but treat payload capacity as a hard cap for the entire rig: body, lens, batteries, cage, monitor, microphone, and filters. Match your camera model and specific lens to a tested entry; total mass alone won’t confirm fit. Check balancing range and center-of-gravity distribution, then leave motor headroom to reduce vibration or lag.
| Chart check | Practical action |
|---|---|
| Total rig mass | Include accessories |
| Long zoom | Check tilt leverage |
| Lens length | Allow balance margin |
Prioritize telephoto entries: a 70–200mm can strain tilt and shift the center of gravity forward more than a similar-mass 50mm prime. Treat payload as a motor limit, not a target; accessories alter both load and balance before you begin filming.
Lens-and-Body Mass Terms
When matching a lens and body to a gimbal, distinguish total rig weight from how that mass is positioned.
Payload capacity describes the motor load limit, but it doesn’t ensure equilibrium. Your body and lens must keep their combined center of mass near the axes for smooth movement. Count mounted accessories with the camera or lens: they add mass and can shift that center.
Consider leverage as well as total mass. A 70–200mm telephoto extends weight farther forward than a 50mm prime, increasing tilt-axis load and the balancing travel you need. Thus, two rigs with equal total weight may stress the motors differently.
Treat the payload limit as a ceiling; leave headroom so the motors run smoothly and reduce the risk of vibration.
Gimbal Payload Test Conditions
Payload capacity is measured under controlled conditions, so define your test setup before comparing results. Use your exact camera, lens, and accessories, then check balance, center of gravity, and clearance.
Test tilt and pan movements on level ground and in realistic conditions to assess stability, motor strain, and vibration.
Define Payload Test Conditions
Manufacturers usually test a gimbal’s payload rating indoors, without wind, on a flat surface, using a camera balanced exactly as specified. Before testing, they level-calibrate the gimbal and balance its load so the center of gravity sits correctly. The test checks whether the motors can hold and stabilize the setup at or below the stated limit under these controlled conditions.
Manufacturers may use a representative fixture or only a set of configurations, so the rating doesn’t cover every build or torque pattern. Treat it as an operating limit under ideal assumptions, not a guarantee of performance everywhere. Outdoors, wind gusts, soft ground, uneven footing, or tilted shooting angles can add force to axes. Your setup may lose stability below its payload rating.
Specify Camera And Lens
Which camera-and-lens setup should you test? Start with the exact body and lens you’ll use; a payload rating alone can’t predict balance or stabilization. Long telephotos and large-aperture zooms move the center of gravity forward, increasing the tilt axis’s balancing travel. Even when a lens fits the weight limit, that shift can reduce stability.
Check the rig’s physical clearance, too: eyecups and flip screens may hit the rear, while wide zoom barrels may interfere at the front.
Treat official payload ratings as controlled-condition guidance, not a guarantee for your setup. Rebalance the gimbal and verify performance with your actual camera-and-lens geometry on a level surface. When available, compare your combination with the manufacturer’s tested or recommended pairings, such as a Sony A7R IV with a Samyang 35mm T1.5.
Include Added Accessories
Once you’ve chosen the camera and lens, add every mounted accessory to the test setup: batteries, monitors, wireless transmitters, microphones, ND filters, cages, and follow-focus hardware. Weigh the complete rig as configured, including its lens and body; don’t rely on the camera’s bare weight or a published payload figure alone.
Ratings usually come from controlled tests on a flat floor with few external factors, so outdoor wind and your added load can push motors toward instability. Long telephotos and large-aperture zooms also add leverage at the tilt axis; a rig under the stated limit may still vibrate.
If you operate near maximum, shifted camera mass raises motor torque demand, can reduce stabilization performance, and may accelerate motor wear. Leave safety headroom for demanding conditions.
Check Balance And Clearance
Before powering on, balance the fully built camera rig and move it through the gimbal’s pan and tilt range; it shouldn’t droop or hit the frame. Check rear clearance for eyecups, flip screens, and deep DSLR bodies, then check the front for long lenses.
Contact can force awkward angles and shift the center of gravity. A longer lens increases the lever arm, so a telephoto or zoom may demand more tilt-axis travel and overload that axis before total payload reaches its rating. Keep every accessory mounted during this check, including filters, transmitters, microphones, cages, and follow-focus units; their placement changes weight distribution and can strain motors. After confirming physical balance, run the gimbal’s balance or auto-tuning procedure. Manufacturers test payload ratings on flat surfaces without wind. Soft ground, slopes, and wind can reduce usable stabilization margin, even when your rig stays below the stated limit in real conditions.
Test Movement And Stability
Test movement under realistic conditions, since a balanced rig that stabilizes on a flat, windless surface may struggle in the field.
In a test, keep the gimbal on level ground with little wind or shock, then confirm the rig is balanced before judging stabilization. Next, try fast pans, tilts, and start-stop moves; these expose vibration or lag sooner than slow, level walking.
Repeat on uneven ground and through tilt angles, which shift the center of gravity and raise motor stress. Check rear clearance for screens or eyecups and front clearance for long zooms; contact can restrict travel. Finally, test with a battery and run longer takes near the rated payload limit. Torque demand can weaken stabilization over time, when the setup passes a flat-surface test.
Interpreting Payload Limits
A gimbal’s payload limit is a motor workload rating, not a guarantee of smooth operation at that weight. You should treat the published maximum as a ceiling, not a target: motors can vibrate or lag near the limit, even when your rig remains technically within spec.
Compatibility also depends on each axis’s balancing travel, motor torque, and the rig’s center-of-gravity distribution. A longer or heavier lens can increase leverage and tilt-axis load, while accessories may shift balance forward, backward, or sideways.
As a result, two setups with identical total weight may demand different adjustments and motor effort. Balance every axis with the complete rig, then leave payload headroom; reduced motor strain supports quieter operation and smoother slow-shutter transitions without relying on the maximum rating during real shoots.
Zoom Lens Extension Limits
Zoom lens extension can push the camera’s center of gravity forward, increasing tilt-axis load and making the rig harder to balance. Even when your body-and-lens weight stays below the payload rating, a long lens can strain motors or trigger vibration because its mass sits farther from the tilt axis.
With a 70–200mm zoom, you’ll usually need more balancing travel than with a roughly 50mm prime; some gimbals lack enough adjustment to rebalance it. If the lens extends or retracts during a shot, its changing position shifts balance. Your gimbal must compensate within its control range, or stability may suffer. If it can’t, lock the zoom position before recording. For headroom, avoid maximum extension and check front-lens and rear-screen or eyecup clearance while zoomed carefully.
Battery Grip Weight Scenarios
Once you add a battery grip, count its batteries and any attached accessories in the rig’s total weight, not just the empty grip shell. That mass raises your max combat weight and shifts the camera’s center of gravity, increasing tilt-axis workload. Near the gimbal’s payload limit, a grip can turn a stable setup into vibration or lag as motors correct an off-center load.
Include powered accessories and allow headroom; battery and accessory weights can determine whether you can balance the rig. Even an increase in grams can create leverage if the grip moves weight fore or aft. After mounting it, rebalance and check the adjustment range and torque headroom.
Two rigs of equal weight can behave differently because weight location, not payload alone, sets balance demands.
Gimbal Motor Overheating
When gimbal motors run near their payload or torque limit, they may overheat because they must constantly correct the load. Even if you’re within advertised payload, a long lens can shift the center of gravity and increase tilt-axis demand, raising motor temperature. Accessories or limited balancing travel can add strain, while heat may appear as micro-jitter, lag, or audible motor effort as protection throttles power.
Use these checks:
- Leave comfortable payload headroom; don’t operate at the rated limit.
- Rebalance after each lens or attachment change, including filters, monitors, follow-focus units, and transmitters.
- After an aggressive pan or tilt with a heavy rig, avoid starting a prolonged take immediately.
If stabilization degrades or motors sound strained, stop, let them cool, and correct balance before continuing shooting.
Cage-and-Plate Weight
A camera cage, side handle, and lens plate all count toward payload and can shift the rig’s center of gravity. Add them to your max-combat-weight calculation before checking the rating: camera, lens, cage, baseplate, rails or rods, and every mounted accessory.
- Weigh the complete build; don’t rely on the camera-and-lens figure alone.
- Check balance, not just payload: an extended, heavy plate can move the center of gravity and raise motor torque, causing vibration or less-smooth stabilization.
- With a long lens, forward shift loads the tilt axis and uses more adjustment travel.
When you switch to vertical shooting or an L-bracket, reassess the plate’s weight distribution. Rebalance that configuration, then test whether the gimbal holds through movement; staying below its rating doesn’t guarantee smooth operation.
Conclusion
Before mounting your camera, weigh the complete setup: body, lens, battery, card, plate, and any accessories. Compare that total with the gimbal’s payload rating, but also check balance, lens extension, and motor performance under your actual shooting conditions.
A setup below the stated limit isn’t automatically workable if it can’t balance or causes overheating. Test with your intended movements, then remove unnecessary weight or choose a stronger gimbal. You’ll get safer operation and more reliable footage.