What Is a Gimbal Counterweight and When Do You Need One?
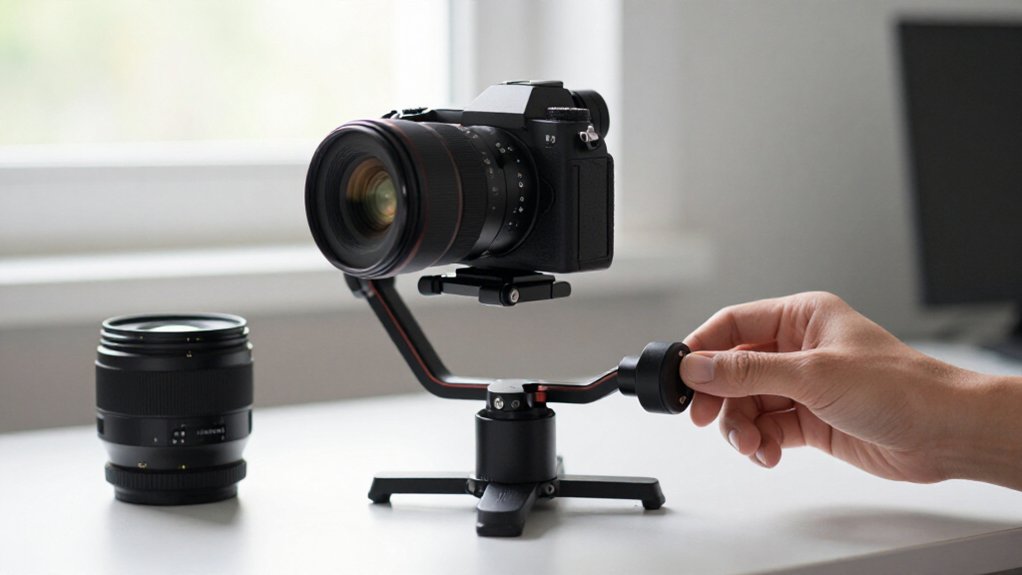
A gimbal counterweight is a small, attachable mass that shifts your phone’s balance point so the motors don’t have to fight an off-center load.
You need one when a Moment lens, microphone, or heavier case makes your phone tilt, drift, vibrate, or strain the gimbal.
Attach it opposite the added weight, then add pieces gradually until the phone rests level.
Check clamp fit and clearance first; the steps below help you tune your Osmo setup.
DJI Osmo Compatibility
For the DJI Osmo Mobile 3, CamKix’s counterweight set includes four stackable stainless-steel weights of about 17 g each, letting you fine-tune balance for heavier phones or lens setups. The added mass can reduce motor strain when your phone carries a lens.
CamKix’s system works with all Moment lenses and 37mm filters, though a Moment setup that includes filters may exceed the Osmo Mobile 3 hardware clearance. Check physical fit before relying on that combination.
Compatibility also depends on your phone’s weight distribution: reports indicate the counterweight system doesn’t work with Samsung phones, whose camera placement creates a center-weighted load.
For other phones, verify that your complete phone-and-lens assembly remains within the gimbal’s supported payload and moves freely through its range of motion.
Osmo Mobile Counterweight Setup
Once you’ve confirmed the counterweight fits your Osmo Mobile setup, attach its clip to the ¼-inch mounting point. Mount your phone in the gimbal clamp, attach any add-on lens, and slide the phone outward enough to provide clearance. Thread in one weight first; add a second only if the tilt motor still works hard to hold the phone level.
| Setup check | Action | Purpose |
|---|---|---|
| Clip | Secure to ¼-inch point | Provide mounting |
| Start weight | Thread in one | Begin with less mass |
| Need more | Add second weight | Increase counterbalance |
| Kit size | Four stackable weights | Adjust incrementally |
CamKix-style kits include four stackable stainless-steel weights, about 17–24 g each. Use this setup for a heavier phone, lens, filter, or microphone. Add only enough mass for the tilt motor to hold position without strain, and keep every weight securely threaded.
Balancing Phones With Lens Attachments
With a lens attached, the phone’s weight shifts toward the lens side, so the gimbal motors may struggle to keep it level. When you mount a Moment lens, the mass can prevent the phone from sitting balanced in the clamp. The motors then work against the off-center load, which can cause drift, vibration, or reduced runtime; you may need to steady the phone by hand.
Position the phone with its lens edge close to the motor, then add counterweight opposite the lens until the phone rests level or leans slightly toward the weight side. Adjust in small increments, checking balance before powering on. Different lenses and filters change the load, so repeat this check whenever your setup changes. Use a clamp-mounted phone rather than relying on a magnetic sticker, and confirm the phone stays secure. Balance lets the motors stabilize the rig without fighting the attachment.
Included Counterweight Hardware
Your kit typically includes a clamp and stainless-steel weights, with the exact number and mass varying by model. Stack the knurled weights to fine-tune balance; screw-based kits use 1/4-inch threaded mounts to secure them.
The clamp’s mounting holes let you add weights incrementally, while its anti-skid surface grips the gimbal.
Included Parts
A gimbal counterweight kit typically includes several small metal weights and mounting hardware, so you can adjust balance in small increments rather than add one fixed mass. Depending on your model, you’ll find a clip that attaches to the gimbal and gives you mounting points for the weights. Some clips use three quarter-inch screw holes, allowing you to stack pieces securely.
Other designs let each weight connect directly to the next: knurled edges improve grip, while a threaded screw on one side fits the receiving hole on the other. You might also find a combination of a mounting clip and separate counterweight screws, rather than identical pieces. Check that the supplied parts match your gimbal’s attachment system and that each connection seats fully before use. Keep unused pieces together in the provided pouch, if included, during setup or transport.
Weight Specifications
Most counterweight kits include a clip and several stainless-steel weights, letting you adjust balance in small increments. Many kits supply about four weights; some use four 17-gram pieces. CamKix includes four 10-gram counterweight screws and one clip, giving the complete set a listed total of about 50 grams.
| Component | Example specification | Check |
|---|---|---|
| Weights | Four 17-gram pieces | Confirm each weight |
| CamKix set | Four 10-gram screws; about 50 g total | Include clip in total |
| Clip fit | Clamp width: 18 to 22 mm | Check device clearance |
Stack weights through the ¼-inch thread to tune balance for your phone and accessories. Totals vary by kit; the clip may contribute to set mass. Check clamp width, often 18 to 22 mm, against setup, then add weights incrementally and test balance before powering gimbal.
Mounting Hardware
Alongside the clip, you’ll typically find the threaded ¼” hardware that actually secures the counterweight to your gimbal’s mount.
Your kit may include a clamp and stainless-steel weights, such as four 17-gram pieces or four 10-gram screws. Check your kit; hardware and weight formats vary.
Most systems let you add weights incrementally. Attach one, then balance your phone-and-lens setup on the gimbal.
Add pieces until it sits level or leans slightly toward the counterweight side. This adjustment helps you avoid adding more mass than needed.
Some clips provide multiple ¼” screw holes, letting you position weights in configurations and secure it. First, measure your mount and compare fit requirements.
A clamp may span 18–22mm; confirm your gimbal uses the mounting system.
Phone Case Weight Effects
Your case changes the phone’s balance point, and extra weight near the lens can make the gimbal’s motors work harder. If the phone won’t sit level, add counterweights one at a time until it balances.
Removing or switching cases changes the setup, so rebalance before filming.
Case Weight Changes
Because a phone case adds weight and sometimes thickness, it can shift the phone’s seesaw balance and make the lens side droop. A heavier case may require a counterweight so your phone sits level, or slightly angled, when you release it. On an OM 4, pairing a heavier case with an add-on such as a Moment lens can increase that requirement.
The counterweight helps reduce motor effort when the mounted setup doesn’t balance naturally. First, check the clamp: a thick wallet-style case may prevent secure attachment, and a counterweight won’t correct a poor grip. To test, remove the case briefly and remount your phone carefully.
If the lens side drops only with the case installed, add a counterweight, provided the clamp grips securely.
Added Mass Imbalance
When a heavy or uneven phone case adds mass near the lens, the camera side can tip downward and force the gimbal motors to keep correcting the imbalance. A counterweight adds mass opposite the lens or attachment side, helping your phone sit nearly level like a seesaw.
With a Moment lens, lens and case weight may leave the camera end too heavy for proper balance; add opposing mass until the phone balances on its own. Start with a small counterweight, then stack more as needed until tilt is minimal.
Without enough counterweight, your gimbal may shake, make its motors work harder, and drain battery faster as they compensate for the imbalance. That load can shorten runtime during long recording sessions and limit available power.
Case Removal Adjustments
Changing or removing your phone case shifts the phone’s balance point, so a gimbal that balanced before may now feel tippy or make its motors work harder. Different cases add mass near the camera or counterweight side, changing how the phone sits. If you reattach a thicker or heavier case, rebalance the setup; don’t assume the old position still works.
First check clamp grip and clearance. Move the phone outward if needed to prevent contact between the lens, motor, or arm, then tune the counterweight. Add a small amount—such as one weight—at a time on the counterweight side. Stop when the phone sits level or slightly angled toward the weight side and can rest without your hand holding it.
Counterweights for External Microphones
Attaching an external microphone to your phone almost always upsets the gimbal’s lens-side balance, since that added weight sits above or beside the phone rather than in line with its original center of gravity. First, balance the phone without accessories. Mount the microphone, then add counterweights on the opposite side of the lens-side seesaw.
Use your kit’s increments, such as 17- or 24-gram clips, or multiple 10-gram steel weights. After each adjustment, release the gimbal and check whether the phone stays level on its own. Aim for neutral balance or a resting bias toward the counterweight; don’t leave the rig leaning toward the microphone. Recheck after changing the mic’s position or cable routing. This setup helps the gimbal hold a steady frame with less corrective effort.
Motor Overheating Risk
An unbalanced phone and Moment lens can force the gimbal’s motors to work harder, increasing overheating risk during prolonged use. Moment lenses often add substantial weight on one side, so your gimbal must continually resist the resulting tilt. That sustained effort raises motor workload and can push temperatures beyond a safe operating range, especially during long shoots.
A counterweight helps by balancing the phone, lens, and accessories, reducing the force the motors need to maintain level positioning. For an OM 4, follow its guidance: thread one counterweight into the pinhole, then add a second if needed. Check that your phone sits level on its own or leans slightly toward the weight side. Once balanced, the motors can stabilize the rig with less continuous effort, helping limit heat buildup. Don’t rely on the motors to compensate for a heavy lens-side imbalance.
Using Incorrect Counterweight Placement
If you place the counterweight on the wrong side, it won’t offset the lens-heavy end, so the phone may not stay level and the gimbal motors must work harder to correct it.
Use these checks to correct placement:
- Mount the weight on the non-lens side of the phone’s seesaw, opposite the lens-heavy end.
- Start with one weight; add another only if needed. Too much mass can tip the phone past level toward the weight.
- Seat the weight in the gimbal pinhole so it threads correctly; poor seating can leave the motors correcting continuously.
- Release the phone: it should sit on its own, not tip immediately. On an Osmo Mobile 3, bulky lenses or filters may overwhelm adjustment; remove lens-side bulk if balance remains impossible.
Inspect Counterweight Clamp Fit
Once you’ve corrected the weight’s position, check that the clamp fits your gimbal’s phone mount and stated width range. Confirm the clamp matches the mount’s attachment system, including any ¼-inch threads, and falls within the maker’s specified width; a CamKix clip, for example, fits 18–22 mm.
Check 4×10g screws plus a 24g clip or wrapper thread or stack as intended. Position the assembly to balance the lens side against the counterweight side, then move each gimbal axis through its range. Keep the phone and lens clear of the motors; contact can restrict travel or disrupt stabilization. With an add-on lens, verify the clamp and weights leave enough clearance for the phone to sit independently and remain level or slightly angled after you attach them.
Conclusion
With your DJI Osmo Mobile, add a counterweight only when a lens attachment, case, or microphone prevents balance. Use the supplied hardware where available, and position it opposite the added load as specified. Recheck balance before powering on; an unbalanced phone can strain motors and overheat them.
Don’t assume a heavier counterweight solves every setup. Confirm clamp fit, secure parts, and test movement. If the gimbal still tilts or vibrates, remove accessories before filming.