How to Attach a Phone to a Tripod: Mounts, Clamps and Adapters Explained
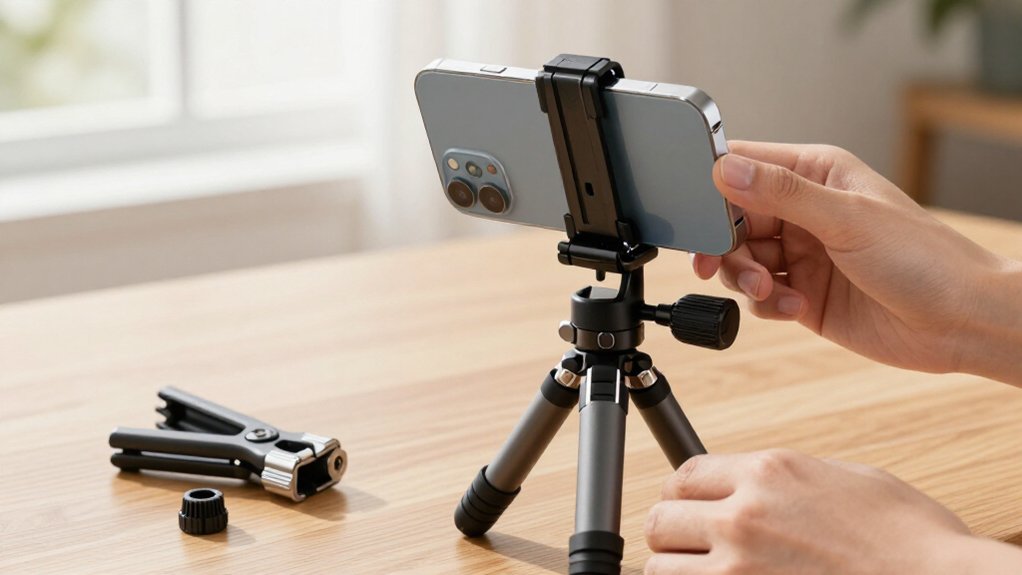
Choose a mount that fits your phone with its case on, and verify MagSafe alignment or clamp clearance around buttons.
Match the adapter’s 1/4-20 socket to your tripod screw; use a thread adapter if needed.
Hand-thread it, then secure the phone on flat contact points.
Center its weight, frame your shot, and tighten the knob.
A locking washer can limit loosening.
Tap-test the setup; if it shifts, reposition before filming.
Continue to check clearance and stability.
Choosing the Right Mount
Before choosing a mount, check that it fits your phone with its case on; for a magnetic mount, confirm MagSafe or compatible alignment.
For a clamp-style model, choose rubberized pads and position the jaws on a flat, hard section of the case. Keep them clear of the power and volume buttons so you can operate the phone without shifting the grip. For steady video or photos, prioritize a secure lock and minimal wobble, particularly during longer takes.
A 360-degree joint or pivot lets you switch between portrait and landscape framing and fine-tune the angle. If you move between a desk setup and a tripod, choose a quick-release base or plate. You’ll attach and detach the phone, then return to consistent framing with less readjustment. Confirm the phone stays fixed as you rotate it.
Check Tripod Thread Compatibility
Check the tripod thread before attaching the mount: most phone adapters use a standard 1/4-20 screw, so confirm your tripod head or adapter has a matching thread. Many mounts label ¼-20 compatibility; that marking tells you the mount should mate with the common tripod screw.
- Compare the tripod head’s screw with the mount’s socket; some larger heads use 3/8-16 instead.
- If sizes differ, fit a suitable thread adapter so the mount seats fully without wobble.
- Hand-thread the mount first; it should engage smoothly, not cross-thread or stop early.
Once attached, shake it gently before you add your phone. If it shifts, remove it and check the thread or adapter rather than forcing the screw; a snug, stable fit protects the mount and tripod hardware.
Step 1: Position Your Phone for Framing
Position your phone’s weight over the tripod head, then angle the camera downward about 45° to reduce glare and frame a natural-looking shot. Confirm the phone sits balanced above the head; an off-center load can make it tilt when you reposition it. If your mount rotates through 360°, use that range to switch between portrait and landscape without removing the phone.
With a clamp, grip a flat, rigid part of the case, and make sure its jaws don’t press the power or volume buttons. For video, set the viewing angle before recording and align the lens with your subject. Check the preview for headroom, level lines, and unwanted background details, then make small adjustments to the tripod’s position rather than shifting the phone in the clamp.
Step 2: Tighten the Mounting Knob
Seat the phone in the clamp or adapter, then tighten the mounting knob in small turns until the rubberized pads hold it firmly without pressing the side buttons. Watch the clamp as you turn; gradual pressure helps it stay straight and keeps your framing from shifting while you secure the phone.
With a quick-release base, lock the base with its knob first, then recheck tightness once the phone is fully seated. Set your preferred landscape or portrait angle and use the adjustment knob again to remove wobble after moving the phone.
Finish with a gentle tap on the phone; if it drifts or the frame shifts, tighten slightly and check button clearance before shooting photos or video. Keep the setup stable between takes.
Step 3: Open the Spring-Loaded Clamp
With the tripod adapter secured, open its spring-loaded clamp by pressing the lever until the jaws clear your phone, with or without its case.
Locate the contact pads and check that the opening suits your phone and case dimensions. Slide the phone between the jaws, centering the pads on a flat section of the case or back. Keep them clear of the power and volume buttons to prevent accidental presses.
Release the lever so the clamp closes against the phone. Gently tap the setup; check grip before shooting.
If the adapter has an angle adjustment, set portrait or landscape orientation without letting the phone shift under light pressure. If the clamp feels loose, reseat the phone and verify that your case fits the adapter.
Step 4: Engage the Magnetic Lock
For a magnetic mount, use a MagSafe-compatible model and the case its maker recommends for the strongest hold. Rokform, for example, uses N52 neodymium magnets, which pull a compatible phone into position and help keep it steady for video and photos. Match the mount with Rokform’s recommended case; the company says you generally need it to get the strongest, rock-solid connection.
Bring the phone squarely toward the mount and let the magnets seat it rather than forcing the assembly into place. Check that the phone sits centered, then give it a quick, gentle tap. If the mount includes a MagSafe charging head with pass-through power, connect a cable and keep charging while you film.
Confirm the mount remains firm before you begin a long take, and retighten the tripod head if the tap shifts the setup throughout your next full recording session.
Step 5: Verify Portrait-or-Landscape Clearance
Once the phone’s attached, test its rotation before tightening the setup fully. Check the clamp or plate clears the camera bump, flash, and case edges; slight contact can stop a turn. Rotate the phone a full 90-degree turn on the tripod head, watching for collisions with mount arms, plate, or connector area.
Confirm the screen stays centered and unobstructed for framing in both orientations. With a spring-loaded clamp such as Neewer SP-02, check that neither position presses power or volume buttons. For a magnetic system like Rokform, make sure your case lets the phone sit flush in portrait and landscape; edges shouldn’t lift and loosen the hold. If anything binds, reposition the phone or adapter and repeat the test before setting final framing.
Step 6: Apply a Thread-Locking Washer
A thread-locking washer can help keep a 1/4-20 phone-mount connection from loosening under vibration. If your mount uses a 1/4-20 screw, place the washer between the mount base and tripod head, with both mating surfaces clean. Dust or grit can prevent it from seating flat, reducing consistent friction at the joint.
Use the washer for a heavier phone setup or a long video take, especially when repeated starts, stops, and camera motion may work the screw loose. Tighten the connection fully, then stop when it feels secure; don’t over-torque it, since excess force can damage threads or make removal difficult. Before filming, inspect the joint and confirm the washer remains seated; if movement appears, re-check the 1/4-20 connection before continuing with your phone mounted.
Tap-Test Mount Stability
After mounting your phone, gently tap the phone and tripod head to check for shifting or wobbling. Use the test with your phone’s weight centered over the mount; uneven loading can cause drift under light force. On a clamp-style mount such as the Neewer SP-02, confirm the clamp locks firmly and its rubber pads grip the phone.
If you detect looseness, retighten the clamp, then tap. With a magnetic mount such as the Rokform N52 and a proper MagSafe-compatible case, expect virtually no movement; the magnet should hold the phone securely. If the setup fails the test, especially if drift returns after tightening, reseat the plate or adapter, or adjust the grip and angle. Repeat the test before you start filming or taking photos.
Camera Button Interference
Before tightening the clamp, check that its contact points won’t press your phone’s power or volume buttons; spring clamps can land on the button edges and trigger accidental changes. Rotate the phone through its full range before locking the head; a 360-degree adapter can shift button clearance at each angle. With a thick case or raised covers, verify the jaws grip a flat case section, not the controls.
For magnetic mounts, check that the charging head clears side buttons; alignment depends on dock plate position. Then repeat the tap test: light pressure shouldn’t move the phone or redirect clamp contact onto a button.
| Setup | Check | Risk |
|---|---|---|
| Spring clamp | Button edge | Power-off |
| Magnetic head | Side clearance | Blocked control |
Recheck access in your final shooting orientation before recording.
Clean Clamp Contact Pads
Clean the clamp’s rubber contact pads with a dry cloth before mounting; dust, oil, or grit can reduce friction and let the phone slip. Check that both the pads and your case are clean and dry.
A dirty, textured case can still compromise the clamp’s hold. Seat the phone so each pad presses against a flat, rigid section of the case. Avoid curved edges, camera bumps, and soft silicone texture; these contact points can shift under load. Tighten the clamp, then give the phone a gentle tap test.
If it drifts, don’t record; reposition it and retighten. Inspect pads: worn, hardened, or slick rubber provides less friction and can increase wobble. Replace the mount or refurbish its pads when their surface no longer grips reliably.
Conclusion
Choose a mount that matches your tripod’s thread and grips your phone without covering its buttons. Position the phone, tighten the mounting knob, and check that the clamp pads sit cleanly against the case. If the connection feels loose, add a compatible thread-locking washer.
Give the setup a gentle tap-test before recording; retighten any shifting parts. These quick checks help you keep your framing steady and reduce the risk of your phone slipping during a shoot.