How to Build a Camera Rig: Cage, Handles, Rods and Monitor Mounts
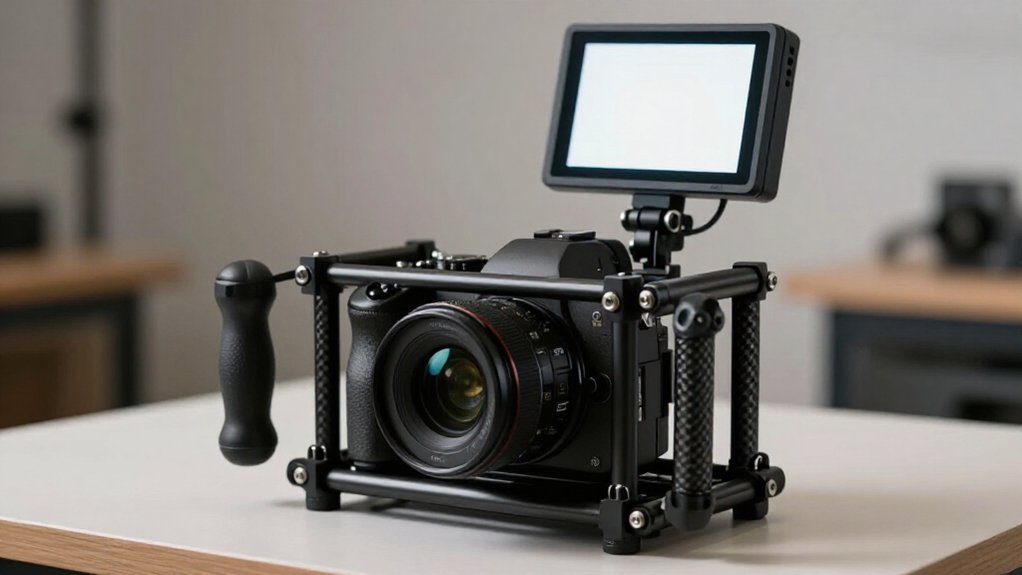
Build your rig in stages: allow 30–60 minutes for the core, then add time for a monitor and rods. Secure a camera-specific cage, keeping controls and battery access clear. Attach NATO rails and lock the top handle before lifting.
Add 15mm rods and an anti-twist monitor mount as needed.
Route a 12–24-inch HDMI cable along the cage and clamp it to prevent strain. Check the live feed, battery fit, and screw tension; the steps below cover each check.
Camera Rig Build Time
Plan on 1.5-3 hours to build a minimal handheld rig and 3-6 hours for a more complete production setup. You can assemble the core in about 30-60 minutes, then spend 15-30 minutes adding a monitor connection. Keep the HDMI run short, about 12-24 inches, to limit slack and twisting strain. If you use NP-F power, allow another 20-40 minutes to fit the plate and position the adapter with clearance.
Expanding the build with rods can add 30-60 minutes because you’ll need to align component heights and secure each clamp. Budget extra time for cable routing and access checks; small adjustments often take longer than fastening parts. Work in stages, verify clearances before tightening everything, and reserve time for a final connection and balance check.
Camera Rig Parts Checklist
Start your camera rig parts checklist with a camera-specific SmallRig cage, typically $40–$100, that preserves access to ports, battery doors, and buttons.
- Pair two NATO rails with a compact or rotating NATO top handle; you’ll switch from a camera-only profile to a handle-and-monitor setup without rebuilding.
- Choose a dedicated anti-twist monitor mount, then match a short HDMI cable to the cage’s routing points for a strain-conscious connection.
- Plan 15mm rod hardware, including an Arca/rod stack if needed to lift the camera and create clearance; rods give you attachment points for follow-focus and production accessories.
- Match plates and power to your workflow: an Arca Swiss cage plate and NP-F adapter with NP-F550, NP-F750, or NP-F970 batteries can keep your monitor running through longer handheld shoots.
Step 1: Set Out Camera Components
Before mounting anything, choose a camera-specific SmallRig cage, typically $40–$100, that provides precise attachment points while keeping ports, buttons, and battery doors accessible. Next, plan two NATO rails for snapping on a top handle and compatible accessories without repeated tightening. Choose a NATO monitor clamp or mount and position it so the screen stays stable and won’t twist loose during handheld movement.
Decide how you’ll power the rig before choosing the remaining hardware. For NP-F batteries, plan an Arca-Swiss plate and NP-F adapter behind the camera; you’ll typically need a 15mm rod base to provide clearance. If you expect to add rods, budget for a 15mm system now. That gives you room for handles, follow-focus gear, and later accessories without having to rethink the cage layout.
Step 2: Mount the Camera Cage
With the cage layout set, choose a SmallRig cage made for your exact camera body, typically $40–$100. Confirm it fits tightly while leaving ports, buttons, and battery access clear. Seat the camera fully and secure it with the correct screw sizes at the cage’s integrated points. A partial seat can stress the body or misalign accessory threads.
Install an Arca-Swiss plate on the camera-side of the cage as your quick-transfer interface; it lets you move the rig between setups. If you plan to use external NP-F power, mount the Arca battery clamp/base behind the camera. Add a 15mm rod base to provide clearance for the battery adapter and plate assembly.
Check that the cage won’t obstruct your HDMI cable path. Route the cable without strain points.
Step 3: Attach the Top Handle
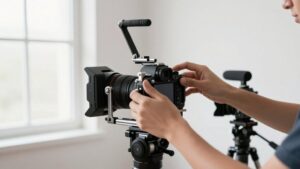
Once the cage is secure, attach a compact top handle to its built-in NATO rail, or add a top-center rail near the front for quick, tool-free repositioning. Choose a handle that matches your grip and load: a fixed NATO handle keeps the setup simple for carrying, while a rotating model lets you change hand angle without changing the rail footprint.
Slide the handle onto the rail and lock its clamp fully before lifting the rig. Check that it sits square and can’t shift under pressure. For a more secure accessory profile and less twisting, choose an ARRI-style anti-twist mount that locks tightly to the rail.
Confirm the handle clears camera controls and doesn’t block battery access. Recheck the clamp after repositioning and before shoot.
Step 4: Mount the Monitor Arm
Clamp an ARRI-style monitor mount to the NATO rail or handle, then position the screen close to the top of the rig using one-handed adjustment. Lock the clamp firmly before tightening other joints, and check its anti-twist points.
Choose a short, production-length HDMI cable; HDMI 2.0 supports up to 4K60. Route it to the camera with minimal slack, but leave enough movement to avoid strain at the monitor’s pivot points. Check that the arm clears your lens hood or matte box when you tilt the monitor or make a slight camera adjustment for framing.
Finish with a quick shake and hand-twist test. Recheck the clamp and anti-twist points; the mount should stay rigid through handheld movement. Repeat the test after any cable or accessory change.
Step 5: Balance the Monitor Position
To balance the monitor, mount it near the camera’s centerline on a NATO rail, then slide it forward or back until the viewing distance feels comfortable. Keep the monitor close to the centerline as you add a battery, rods, and handles; this helps the rig remain neutrally balanced rather than pulling to one side. Set the screen where you can read it without reaching or bending your wrist.
Tighten a rigid, ARRI-style mount so handheld movement won’t let the display twist or loosen. If you reposition NATO components, secure the mount again and check that it holds its angle. Use a short, production-length HDMI lead to avoid cable tension pulling the monitor or changing the rig’s feel as you shift your grip.
After each adjustment, hold the rig by its top handle and test its stability. Correct any front-heavy tipping before you shoot and begin recording with a steady setup.
Step 6: Route and Clamp Signal Cables
With the monitor balanced, route a short HDMI or USB-C cable along the cage and secure it with clamps near the monitor mount and cage entry. Use a compact run with no long loops; excess slack can catch on handles, pull at connectors, or unplug the monitor during handheld movement.
Add one or two clamps at each end: place one beside the monitor mount or handle, and another near the cage entry. This isolates cable movement from the ports and leaves only the connector strain relief to flex. Keep NP-F dummy-battery or external power leads on a separate path from the signal cable to reduce interference risk.
If monitor rotation requires extra reach, choose a managed or coiled cable and clamp the coil so it expands only as you turn the screen. Leave enough length for that movement, but don’t let the cable cross controls or snag on rods or accessories.
Verify HDMI Monitor Feed
Before mounting the monitor, connect it to the camera and confirm the HDMI link delivers the resolution and refresh rate you expect, such as 4K at 60 Hz when both devices and the cable support it. In the camera’s menu, set HDMI output to match the monitor’s supported resolution and bit depth. Check that you’re not restricted to a lower mode by mismatched settings or a weak cable.
Confirm the monitor displays a live image without black screens. Test zebras, false color, or LUT viewing while monitoring, if supported, and verify HDR metadata passes in the output mode when your camera provides it. Once the feed works, secure a short HDMI run and use clamps for strain relief, so movement won’t interrupt the signal.
Battery Power Troubleshooting
If your monitor or camera dies sooner than expected, check that the NP-F battery adapter sits fully on the long Arca plate and that the battery plate clears the camera door and cables at the 15mm-rod height.
| Check | What to verify | Action |
|---|---|---|
| Battery | NP-F550/750/970 size | Use 970 for longer monitor-heavy runtime. |
| Lead | Correct dummy battery; HDMI cable | Remove cable pull from power connector. |
| Cutouts | Spare same-type battery; external output | Swap battery, then confirm stable power. |
For intermittent faults, test a spare battery of the same NP-F type first; then inspect adapter contacts for looseness or misalignment. For longer takes, verify your external pack’s stable output; with an Atomos Shinobi, you’ll avoid cutouts. Match pack capacity carefully.
Inspect Cage Screw Tension
Once battery power is stable, inspect the cage screws before mounting accessories. Use the correct screwdriver size and steady pressure to seat each screw fully. SmallRig cages typically use small metric screws; overtightening can strip threads or deform the cage. Avoid wrong bits, which can round heads and leave connections loose.
If your cage has multiple accessory, ARCA, or NATO points, check each one. Lightly try shifting each plate; it should show minimal play.
After tightening, mount handles and plates, then apply hand pressure for a quick rig shake test. Creaking or movement signals a loose screw somewhere in the stack. Recheck tension after your first short shoot or transport cycle; cable routing and handling can slightly settle hardware and loosen previously tightened screws.
Conclusion
Before filming, inspect the complete rig: confirm the cage and handle are secure, rods and monitor mounts are locked, and cables are routed without strain. Verify the HDMI feed and check that the monitor and camera receive reliable power.
Tighten loose screws, but don’t overtighten them. Then lift and move the setup carefully to confirm nothing shifts or snags. A final check now helps you avoid interruptions, protect your gear, and start shooting with confidence.