
How to Use a Panoramic Tripod Head for Seamless Stitched Panoramas
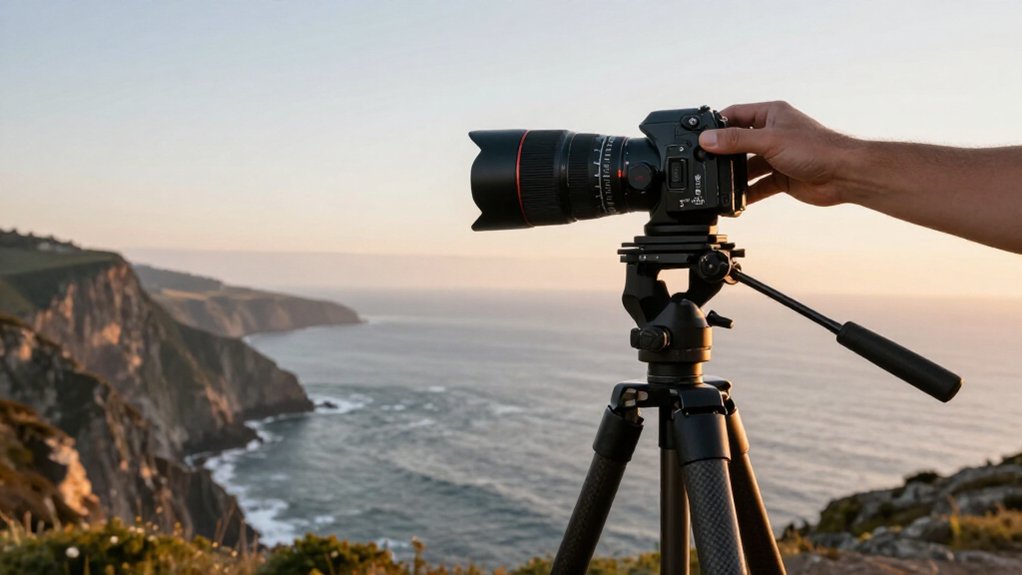
Align your lens’s nodal point over the tripod’s rotation axis, then lock focus and keep one focal length and manual exposure throughout the sweep.
Level the head and use a remote release to prevent camera shake.
Check for wind movement.
Pan smoothly, capturing overlapping frames with shared features, and place seams away from moving subjects.
Review edges and seams for cropping, parallax, or ghosting; lock the head before packing.
More useful setup details follow.
How Do You Set the Camera’s Nodal Point for Panoramas?
Place the lens’s nodal point directly over the tripod’s axis of rotation using a nodal slide or forward-back rail. Align the camera with a distant marker, then slide it until the marker stays aligned as you pan. For zoom lenses, record the rail position at each focal length you use.
Set the lens’s nodal point directly over the tripod’s axis of rotation with a nodal slide or forward-back rail. As you pan left-to-right, this pivot minimizes parallax between near and distant objects. To locate it, align your camera with a distant marker, including tape on a light stand 20 feet away.
Slide the camera forward or backward until the marker stays aligned when you recheck the viewpoint. With a zoom lens, the nodal point can shift as focal length changes. Test and record rail positions at settings such as 24, 35, 50, and 70mm.
Note each setting using clamp hash marks or the center reference, then save per-lens, per-focal-length notes. Once set, lock focus and rotate the camera; keep its height fixed for consistent alignment and seamless stitching.
Why Do You Need a Remote Shutter Release for Panoramas?
A wired remote shutter release lets you fire each frame without touching the camera, which avoids micro-shake that can misalign the stitch. Every frame must stay aligned with its neighbors, so triggering remotely keeps the rotation axis steady and gives stitching software cleaner overlapping edges to work with.
Pack a wired remote shutter release so you can fire each frame without touching the camera and introducing micro-shake that may misalign the stitch.
- Choose a wired release or interval mode that fires consistently throughout the panorama.
- Pan left to right by 5–10° per frame, triggering each exposure without breaking your rhythm.
- If supported, use the remote for mirror-up or electronic shutter to reduce vibration and blur.
- Lock focus manually; remote firing keeps focus and timing identical across frames, improving seam quality.
- Test sequence shooting before you leave; confirm every trigger registers, since missed frames can create gaps or failed stitches.
Keep the release within easy reach as you rotate the panoramic head, and watch the frame sequence advance on the camera display. A dependable trigger lets you maintain overlap while your hands stay off the body during capture.
How Do You Check for Wind Movement Before Shooting a Panorama?
Wait for the tripod to settle, then confirm a gust isn’t moving the head between frames. Even slight sway shifts the camera between exposures and causes misalignment that stitching software can’t repair. If gusts persist, extend fewer legs, hang weight low if permitted, and keep the head locked.
Before shooting, wait for the tripod to settle, then check that a gust isn’t moving the head between frames. Even slight sway can shift the camera between exposures, leaving frame-to-frame misalignment that stitching software can’t repair. If gusts persist, stiffen the setup: extend fewer legs, hang weight low if permitted, and keep the head locked.
Watch the horizon or building corners during a test frame; if either shifts, pause and check again before continuing. Choose a faster shutter speed to limit camera-shake blur, which can show as ghosting seams after stitching. Set exposure and focus first, then make the sequence short: rotate in small 5–10° steps and capture promptly to preserve overlap between frames, before wind or other conditions change.
How Do You Level a Panoramic Tripod Head?
Set the tripod on solid ground and use its built-in bubble level to bring the base level. Extend the legs fully and keep any adjustable center column low and locked. A level base keeps the rotation axis vertical, so the horizon stays straight as you pan through the sweep.
Level the tripod on solid ground, then use its built-in bubble level to bring the base level. Before shooting, extend the legs fully and keep an adjustable center column low and locked.
Level the panorama head until its rotation axis runs parallel to the horizon, not upward or downward. Check the bubble from front and side: a centered reading in one direction won’t reveal left-to-right roll. Even a slight roll can make the horizon jump at stitch seams across views.
Mount your camera and tighten every knob, then check the head again; clamping can shift the bubble. If available, compare the head’s reading with a second level on the camera hot shoe. If the readings differ, adjust the head, not the center column.
How Do You Capture Overlapping Frames for a Panorama?
Pan steadily from one edge of the scene to the other, rotating the camera about 5–10° per shot to keep roughly 20–35% overlap. Keep shared features visible in neighboring frames so stitching software has reliable edges and textures to align, and place seams away from moving subjects.
With the head level, pan steadily from one edge of the scene to the other, rotating the camera about 5–10° per shot to maintain roughly 20–35% overlap. Keep shared features visible in neighboring frames; this gives stitching software reliable edges and textures to align.
Keep manual focus and the same focal length throughout, because focus or zoom changes can shift detail at seams. Capture RAW files with a fast shutter speed to limit motion blur, which can weaken alignment.
Maintain the same pan direction and steady interval across the full sweep, left to right or right to left. Watch the horizon and frame edges as you move; each image should repeat clear, visible landmarks from its neighbor, with no gaps in the overlapping bands.
Why Should You Use Consistent Manual Exposure for Panoramas?
Manual exposure keeps brightness uniform from frame to frame. Set one shutter speed, aperture, and ISO for the entire sweep, and turn off Auto ISO, auto exposure, and HDR features. Otherwise each frame can change, and stitching software may amplify the differences into visible brightness bands across the panorama.
To keep brightness uniform from frame to frame, set the camera to Manual (M) and use one exposure—shutter speed, aperture, and ISO—for the entire sweep. Meter once from a representative area, a bright mid-tone if possible, then keep that reading as you rotate the head. Turn off Auto ISO, auto exposure, and dynamic-range or HDR features; these can alter each frame, and stitching software can amplify differences into brightness bands.
If clouds move or sunlight shifts, pause until illumination stabilizes. Alternatively, choose settings that preserve highlight detail consistently across the sweep. In post, adjust the panorama’s brightness or levels rather than changing individual frames. A locked exposure gives overlapping views the same tonal foundation, helping the stitch blend without exposure-driven contrasts.
How Do You Inspect Stitch Seams in a Panorama?
Zoom to 100% and check every seam for shifted edges, doubled or curved lines, ghosted movement, and abrupt changes in sharpness. Look closely at building corners, rocks, window frames, and shoreline edges, where foreground parallax can make repeated features diverge between neighboring frames in the stitch.
Zoom to 100% and inspect every stitch seam for shifted edges, doubled or curved lines, ghosted movement, and abrupt changes in sharpness. Check building corners, rocks, window frames, and shoreline edges where foreground parallax can make repeated features diverge.
In each sky section, scan seam by seam for alternating bright and dark bands; polarization or exposure differences can produce visible transitions. Compare 100% crops of the same structure on both sides of each seam. If one side looks consistently softer or darker, check for focus or exposure changes, not just blending errors.
When you spot an artifact, adjust the seam or control points in your stitching software. If parallax persists, reshoot that segment with manual focus and exposure and greater overlap. Global blur or healing won’t correct displaced geometry.
How Do You Lock a Panoramic Head Before Packing?
Re-lock the head in its ready orientation, with the camera centered and the platform level so the rotation axis and detents stay fixed in transit. Engage the built-in panning lock plus any separate tilt or drag locks, so the geared ring and base can’t shift when the tripod gets jostled.
After checking your stitch seams, secure the panoramic head before packing it. Unfasten and re-lock the head in its ready orientation: center the camera and level the platform so the rotation axis and detents stay fixed in transit. Engage the built-in panning lock, plus separate tilt or drag locks, to keep the geared ring and base from shifting when your tripod gets jostled.
Tighten the pan lock until you can’t turn the head by hand. Even a few degrees of movement can misregister frames during your next capture. If the head has index marks, check that the index aligns after locking; that gives you a known starting position. Pack the tripod with the head locked, and protect the camera and leveling bubble when possible.
How Do You Check for Edge Cropping in a Panorama?
In your first test stitch, zoom into each seam and inspect the outer 5–15% of every frame, where misalignment first appears. Look for clipped detail, doubled contours, or edges bent by the stitch, and check the far left and right ends. Proceed only when the horizon runs continuous.
In your first test stitch, check the outer edges to confirm each frame overlaps enough for clean alignment without software stretching or warping the image. In Photoshop or PTGui, zoom into each seam and inspect the outer 5–15% of every frame, where misalignment first appears. Look for clipped detail, doubled contours, or edges bent unnaturally by the stitch. Check the panorama’s far left and right, then trace the horizon across the full preview; it should remain continuous.
If the ends misregister, reduce rotation per shot or increase overlap before capturing the full sequence. Don’t rely on aggressive cropping to conceal geometric errors. If the top or bottom needs substantial trimming, correct the head’s rotation level or tilt and make another test stitch.
Proceed only when the edges look clean and the preview needs, at most, small black-border trims. Avoid broad crops that erase useful scene detail near frame edges.
How Do You Remove Ghosting From Moving Subjects in a Panorama?
Freeze moving subjects with a fast shutter, such as 1/500s or faster, and use burst mode when possible. Moving subjects appear as translucent duplicates when they shift between exposures, so faster capture reduces the difference between frames. Also place seams away from moving subjects when you stitch.
Moving subjects can appear as translucent duplicates when they shift between exposures, so freeze their motion with a fast shutter—try 1/500s or faster—and use burst mode when possible.
Overlap each frame by 15–30% and rotate smoothly; place seams where subjects move least to suppress duplicate shadow figures. For foreground motion, pan around the lens’s nodal point with a nodal slide: differing viewpoints amplify parallax and ghosting.
Don’t stitch through a nearby person if they change position; alignment can’t erase every mismatch.
| Situation | Best response |
|---|---|
| Moving crowd | Fast burst |
| Close subject | Reroute seam |
In Photoshop or PTGui, enable motion or ghosting reduction when available, but treat it as backup: software can’t rebuild a subject that changes substantially between frames. Review each seam at full resolution; a clean contour should remain single, not split into pale edges before export.
How Do You Lubricate a Panoramic Head’s Bearings?
Remove the camera first, then apply only the grease or light machine oil the manufacturer recommends. If the head uses a fluid pan/tilt mechanism, use just a trace and wipe away excess so it can’t reach locking surfaces. Turn the pan through its full travel 10–20 times to spread lubricant evenly.
Clean seams depend on consistent frame spacing, so check that your panoramic head pans smoothly from left to right. Remove the camera before servicing; an unloaded head keeps grit from the load out of the bearing races. Apply only the grease or light machine oil the manufacturer recommends. If your head uses a fluid pan/tilt mechanism, use just a trace, then wipe away excess so it can’t reach locking surfaces or trap dust.
Turn the pan through its full travel 10–20 times to spread lubricant evenly before shooting. Record the service date, then inspect movement again every few months, or sooner if you work in salty or dusty conditions. Consistent bearing motion helps you maintain even frame intervals and align panorama seams more cleanly.
Conclusion
Use your panoramic head to rotate the camera around its nodal point, keeping near and distant objects aligned. Level the head, secure it before packing, and trigger the shutter remotely to reduce vibration. Watch for wind, overlapping frames, edge cropping, and moving subjects that may create ghosting.
If rotation feels uneven, clean and lubricate the bearings. These small checks help you capture consistent frames and stitch them into a seamless panorama with clean edges and minimal distortion.
