How to Put an iPad on a Tripod: Tablet Mounts That Stay Steady
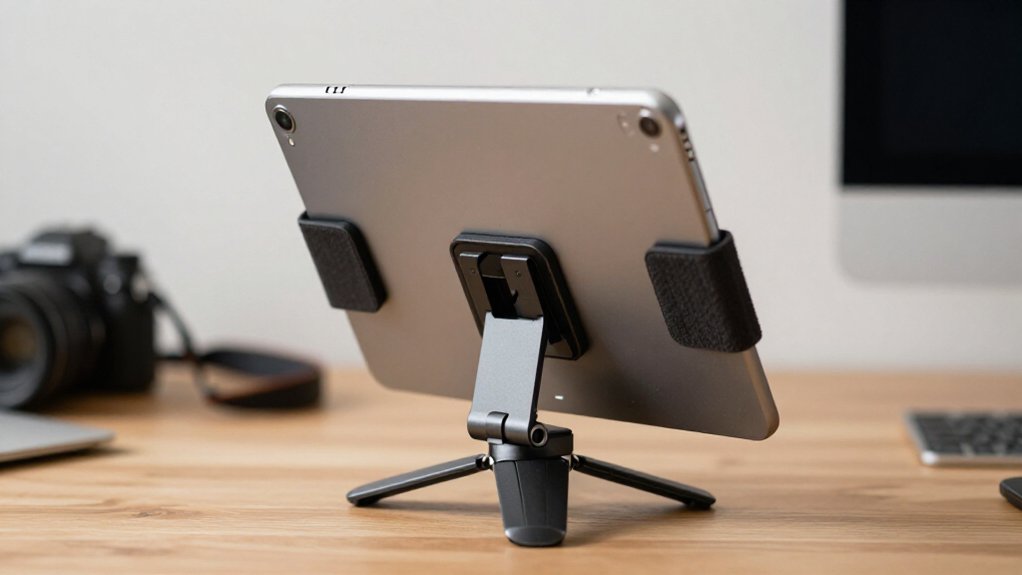
Choose a mount sized for your iPad, with a cradle and a 1/4″-20 tripod thread.
Confirm your tripod and head support the weight of the iPad, mount, and adapters.
Place the tripod on a flat, nonslip surface, attach the plate, and clamp the iPad without blocking controls or ports.
Tighten the side knob and head locks; test portrait and landscape for drift.
Clean threads before mounting.
Check connections for movement; further steps help prevent slippage.
Choose a Secure iPad Mount
Start with a mount that matches your iPad’s size and tripod. Choose a mount that accepts a 1/4″-20 tripod thread; models with two mounting points give you more options. If you keep your iPad in a case, select a system designed for that case, with a dedicated back interface that locks into the tripod connection.
Confirm the mount supports your iPad model and dimensions. A 12.9-inch iPad Pro needs a cradle or arms wide enough to hold the device without obstructing controls. Prefer a rigid clamp-and-arm assembly with a dedicated tablet interface over adapters that depend on narrow gaps or sliding dowels; those can miss buttons or loosen. For timelapse or video, choose a super-clamp, master-clamp, or arm system that locks to the tripod head.
Check Tripod Weight Capacity
Once you’ve chosen a secure mount, check that your tripod and ball head can support the combined weight of the iPad, mount, and any arm or adapter. Use your tripod’s rated payload, including the ball head, to confirm it exceeds the full assembly’s weight. Don’t rely on a tablet-only rating: gooseneck arms and quick-release adapters add leverage and increase effective load.
- Check that tripod and head threads match the mount—often 1/4″-20—and seat the connection fully to limit wobble.
- For Wallee/Connect Lite systems, include the bracket and arm in your capacity check.
- Mount the iPad in a controlled setup, then check for flex or drift; this matters with larger models such as 12.9-inch iPads.
Keep the rating within limits before relying on the setup during use.
Step 1: Clear a Stable Tripod Spot
Place the tripod on a flat, nonslip surface, lock its legs fully, and set the head so the iPad is level or angled as intended. Check that the head holds this position without slipping; a level setup helps keep the camera aimed at your subject and limits wobble during recording.
Look above the setup for lights, ceiling fixtures, or cables that could contact the mount, screen, or controls when you adjust its position. Remove loose items from around the tripod base so your feet and hands can move freely while you make adjustments and tighten knobs.
Before shooting, gently push the assembled mount and check for movement or play. If it shifts, correct the setup before recording to keep the iPad steady throughout capture.
Step 2: Attach the Mounting Plate
Before tightening anything, check that the mounting plate fits your iPad case and has the correct tripod thread, commonly 1/4″-20. Line up the plate so the tablet sits flush and centered. Check speaker openings and other cutouts, including a side speaker recess; misalignment can bow the case and leave gaps.
If the plate uses corner notches, rubber bands, or pads, fit those parts during assembly so you’ll limit movement when you angle the tripod. Once aligned, tighten screws or fasteners firmly. For a wood support, use threaded inserts where possible instead of tapping threads directly into wood; inserts resist loosening with repeated use.
After mounting the plate, check access to the iPad’s top button and other controls. Confirm the case still sits without forcing the assembly.
Step 3: Clamp the iPad Securely
With the mounting plate aligned, clamp the iPad in a case or bracket designed for its shape and thickness. Choose a mount with rigid 1/4″-20 tripod threads; these connect securely to standard tripod hardware.
Fit the tablet into a dedicated case, such as a Wallee Case, that mates with the bracket and keeps the device from sliding or falling out under vibration. Check that the bracket matches the iPad’s body and leaves needed speaker and camera openings clear. A close fit reduces side-to-side play.
If you’re building a bracket, add rubber bands or grip strips at the corners to limit lateral shifting. Tighten the clamp until no roughly one-millimeter gap remains; even small clearance can let the iPad shift over time during ordinary tripod use.
Step 4: Lock the Tripod Head
Once the iPad is mounted, set the viewing angle and fully tighten the tripod head’s ball tension and pan/tilt locks.
Do this with the tablet in place: its weight and leverage can loosen a ball head that felt secure when unloaded. Engage every lock your setup uses, including pan and tilt controls, so the clamp, arm, or gooseneck won’t creep during a time-lapse or video playback.
If your bracket has a built-in 1/4-inch-20 thread or uses Connect Lite, keep the head locked while you tighten the interface. This prevents the iPad from rotating as you fasten it. After tightening, gently try to move the tablet by hand. If it shifts, retighten the head locks and test again before recording or leaving the setup unattended.
Step 5: Tilt the Screen to Reduce Glare
After locking the tripod head, tilt the iPad with its gooseneck arm or ball head so the screen is roughly perpendicular to the brightest light source, then adjust it a few degrees to move glare bands off the display. For outdoor or LED-lit shooting, this angle reduces reflections. If strong workshop LEDs have just switched on, wait about three seconds for full brightness before fine-tuning; changing illumination can shift glare.
Keep the camera and edge plane slightly downward so glossy-surface reflections, especially near the lens, move away from you and the captured image. Check the display from your viewing position; make small adjustments until glare bands clear controls and preview details. Recheck tilt after the iPad settles in its holder during your actual shooting setup.
Step 6: Tighten the Mount’s Side Knob
Find the mount’s side knob and tighten it in small increments until the cradle holds the iPad snugly, including any thick case, with no detectable play.
After each turn, check that the tablet can’t slide sideways out of the rails, notches, or rubber-band corner stops. If the mount has sliding rails or side supports, tighten them enough to resist movement during tilts, but leave the top buttons accessible. Don’t force the knob; excessive pressure can strain the case or mount.
Once clamped, simulate your heaviest use case by making quick tripod adjustments. Confirm the iPad stays aligned over the camera opening and the mount doesn’t flex. When you find the correct tightness, mark the knob position with tape so you can repeat secure clamping.
Test Both Screen Orientations
With the mount firmly secured, test the iPad in both portrait and landscape to confirm it remains locked and doesn’t shift under gravity. For larger models such as the 12.9-inch iPad Pro (2nd generation), check clearance around speaker and camera-microphone slots in each orientation.
Ensure the case doesn’t touch the mount’s rail or housing.
Check that the tripod interface, often with dual 1/4″-20 threads, seats firmly after you rotate the tablet. Observe whether its center of mass causes rotation or wobble. If the mount has rubber-band corner stops or rail notches, test their grip strength separately.
Run a recording or timelapse in each orientation. Confirm the display remains stable for your composition and the camera stays aimed throughout the test.
Stop Mount Slippage
To stop slippage, secure the mount with two 1/4″-20 threads rather than relying on friction alone. Choose hardware that locks the tablet and tripod interface together. Add rubberized contact points, such as silicone pads or notched bands, to resist sliding on smooth wood or metal when the tripod gets bumped.
Keep the fit tight, with minimal play; even slight looseness can amplify vibration. Cut edge rails or notches to constrain side-to-side motion and keep the iPad from falling during tilts.
| Component | Check | Benefit |
|---|---|---|
| Threads | Two 1/4″-20 | Firm tripod lock |
| Contacts | Rubberized pads | Resist surface sliding |
| Rails | Tight, constrained fit | Limit tilt movement |
For wood rails or blocks, use threaded inserts at the tripod interface, not direct tap-ins; inserts maintain consistent tightening and reduce loosening later.
Wipe Dust From Mount Threads
Wipe dust and grit from the tripod’s 1/4″-20 screw and adapter threads with a dry microfiber cloth or soft brush before mounting the iPad. Clean both the male tripod screw and the female threads in your mounted insert or tablet-holder adapter. Debris can stop the pitch from engaging smoothly, so turn the connection by hand first and confirm it advances fully without resistance.
If grit remains packed in the thread crests, use a brief burst of slightly compressed air or lift it out with a toothpick, then wipe the threads clean. Re-thread clockwise until the mount seats firmly; don’t force a connection that binds, because leftover grit can cause cross-threading and a tight-but-insecure fit. Clean before every shoot to keep accessories stable between setups.
Conclusion
After you’ve secured your iPad in a compatible mount, confirm the tripod supports the combined weight and stands on a stable surface. Tighten the mounting plate and side knob, then check both portrait and landscape positions.
If the mount shifts or slips, reposition the clamp and tighten it before use. Keep threads free of dust so connections seat fully. A brief stability test helps prevent movement during recording, viewing, or hands-free work with your tablet.