Gimbal Accessories and Mounts Explained: What Each Add-On Does
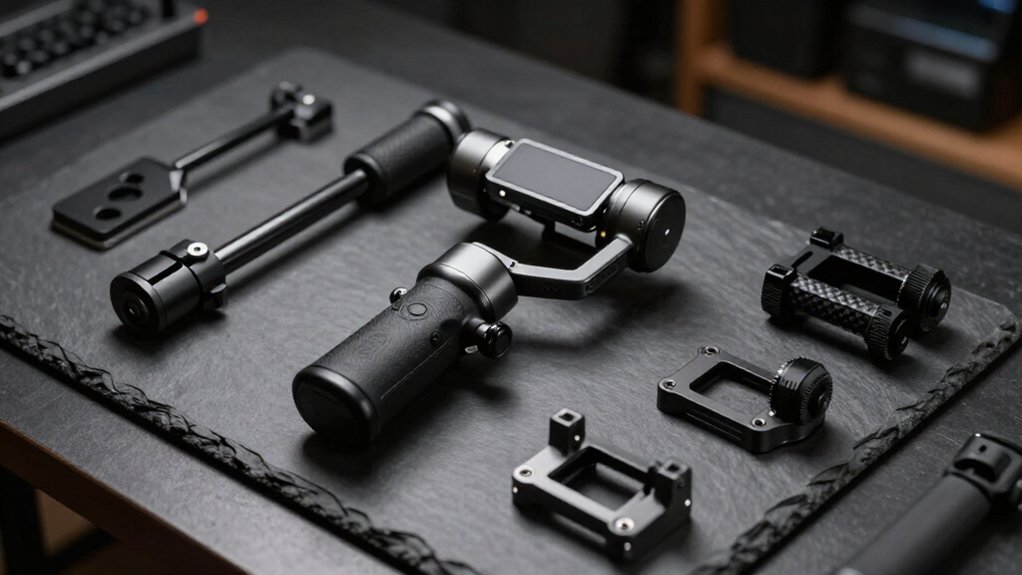
Gimbal accessories and mounts help you attach gear, balance loads, and position monitors, lights, or cameras.
Confirm exact gimbal support, match threads—often 1/4-20—and keep the monitor plus attachments within its rated load, at or below 1 kg.
Quick-release plates repeat camera placement; extension rods add reach; tripod bases steady shots.
Mounts secure accessories, clamps grip rails, and cages provide rigid points.
Secure transmitters, manage cable slack, and aim articulated monitors without stressing joints.
Continue for guidance.
Mount Compatibility Basics
Before attaching accessories, confirm that the mount is listed as compatible with your exact gimbal model; support varies across DJI, Zhiyun, and Moza models, including the WEEBILL LAB, WEEBILL-S, CRANE 3S, RONIN-S, and CRANE 3 LAB/Ronin SC.
Then check the mount’s rated load before installation. A monitor mount rated for up to 1 kg can help you avoid overloading the stabilizer, which may reduce balance and motor performance. Don’t assume that a compatible mount supports every accessory configuration; account for the combined weight of the monitor and any attached equipment.
If you plan to reposition a monitor, confirm the mount offers enough adjustment for your framing needs. Verify compatibility and capacity against the manufacturer’s specifications, not appearance or a similar model name or product description.
Mounting Interface Cheat Sheet
For a secure mounting interface, match the thread size—often 1/4-20—and confirm the mount supports your exact gimbal model. Before buying, verify both sides accept the same screw; a mismatch can leave the mount loose or unusable.
| Check | What you should verify |
|---|---|
| Thread size | Both parts accept 1/4-20 |
| Load rating | Keep monitor at or below 1 kg |
| Alignment | 360° tilt and locking knob prevent ring stress |
| Fit and fastening | Confirm listed model; tighten thumbscrews, using Allen wrench if needed |
For example, listed compatibility may cover CRANE 3S, RONIN-S, Ronin SC, CRANE 3 LAB, WEEBILL LAB, and WEEBILL-S; don’t assume a similar model shares the same interface. After installation, check for play before balancing or operating your rig. Tighten evenly, then recheck the joint after repositioning carefully.
Accessory Function Glossary
Quick-release plates let you attach or remove your camera without resetting its position. Extension rods, tripod bases, and camera cages expand your rig for added reach, stable setup, and accessory mounting.
Lens supports brace heavier lenses, reducing strain on the camera mount.
Quick-Release Plates
When you need to swap a camera or gimbal quickly, a quick-release plate lets you detach and reattach the rig without rebuilding the setup from scratch. It uses repeatable alignment to return your camera to a consistent position, so swapping bodies or accessories is less likely to require full recalibration. Secure locking hardware, often thumbscrews, clamps the plate tightly during movement and helps prevent drift and unwanted micro-movements.
Before operating, check that the plate sits fully in the clamp and that you’ve engaged its lock; a loose interface can introduce play and undermine footage stability. Some plates also provide 1/4-20 accessory mounts for monitor brackets or grips, letting you keep add-ons modular without slowing attachment. Match the plate to your mounting system, then verify the camera remains secure before you move the rig. This repeatable connection can reduce setup time while preserving a dependable mounting position between changes in configuration.
Extension Rods
Extension rods add reach between a gimbal mount and an accessory, letting you position a monitor or light closer to eye level while keeping the camera balanced. Use a compatible interface, often a 1/4-20 mount, to attach the rod and stack hardware without changing your core gimbal setup. Keep the accessory aligned with the gimbal’s center of mass and load path; poor placement can add leverage and cause unwanted nods during acceleration.
The added clearance helps keep cables, batteries, and lens hoods from interfering with the monitor or light. You’ll check the combined payload before mounting, since excess weight can overload the motors and reduce stabilization smoothness. If your accessory mount offers 360-degree tilt, adjust the viewing angle to limit glare, then tighten the connection securely.
Tripod Bases
A tripod base supports your gimbal on the ground, letting you hold locked-off shots or slow movements without carrying the rig. It fixes the lower frame to reduce vibration from walking surfaces, helping you capture smoother pans and tilts with less micro-jitter. Many models include a quick-release plate and 1/4-20 or 3/8-inch threads, so you can swap compatible gimbals or rigs efficiently on set.
Adjustable height and pan/tilt leveling let you match shot height quickly and keep alignment true. For tracking subjects or talking-head setups, you’ll focus on framing and focus instead of operating the gimbal continuously. Check its load rating and footprint, then set it on firm, level ground before a take to limit movement beneath your rig during operation on set safely.
Camera Cages
Built around your camera, a cage provides rigid mounting points, often multiple 1/4-20 threads, for accessories while helping keep the rig’s center of mass stable during handheld or gimbal operation. Many cages add top and side locations for monitors and lightweight components, so you can place gear consistently without improvised clamps.
Their rigid frame limits flex and play compared with one-off mounts, reducing vibration when acceleration or fast pans excite the rig.
On a gimbal, pair the cage with suitable accessory mounts and keep added gear within the payload limit; controlled placement helps preserve smooth axis response. Repeat your accessory positions between shoots to shorten setup and avoid shifting balance unintentionally.
Check thread compatibility and secure each attachment before operating. A cage doesn’t replace careful gimbal balancing: treat every added component as part of the assembled camera package and rebalance as needed before your first move and after any major configuration change.
Lens Supports
When a lens flexes against its mount, a gimbal can struggle to keep framing steady. A lens support braces the lens with a ring or rod clamp, limiting flex and vibration as you move. That keeps the lens aligned with the camera and helps preserve stable framing.
Choose a support with a 1/4-20 or compatible interface, then tighten it so the brace adds no play that could create micro-shakes. Rod-based setups also keep the lens line consistent when you swap lenses or add rig accessories, making balance easier to repeat.
With heavier telephoto lenses, a firm brace reduces lens-induced torque at the gimbal axes and motor workload. It also helps prevent front-end nods under acceleration when the lens mount flexes during a moving shot.
Focus Motors
As the gimbal stabilizes framing, a focus motor drives the lens’s focus mechanism to keep your subject sharp during tracking or rack-focus shots. A properly matched motor applies only the torque and control needed to overcome lens weight and gear resistance, reducing focus hunting: the visible oscillation between focus points.
Modern control systems use precise sensor feedback, often from encoders or IMUs, to keep focus changes stable as you pan or tilt quickly.
With the gimbal maintaining framing, you handle lens focus through a coordinated motor workflow, useful when you’re shooting solo or covering events and travel. Before filming, secure lens support, align the drive gear, and calibrate the motor’s run range. This setup prevents slipping and gives you repeatable follow-focus or manual-focus control.
Tracking Modules
A tracking module lets the gimbal detect and follow a person or object, keeping them framed while you adjust focus or camera movement. Modern built-in AI tracking runs directly in compatible gimbals, reducing reliance on a phone app and helping you maintain responsive framing during a take.
You can use it to keep a moving subject centered as you pan, tilt, or shift focus, rather than manually reacquiring them after each move. Some modules recognize a specified gesture, letting you start or adjust tracking without opening the app. That can simplify operation when you’re filming yourself or covering an event.
For fast-moving people or objects, tracking helps reduce missed framing changes, but it won’t replace careful setup: mount the module securely, select the intended subject, and test its reliable response before recording. Check compatibility and tracking range for your gimbal, and keep the subject unobstructed whenever possible.
Remote Controllers
With a compatible remote controller, you can start or stop recording and adjust pan, tilt, and roll without touching the camera or gimbal handle.
A remote sends commands from your position, so you can correct framing while the rig moves. Some systems add live preview, including detachable displays that work from roughly 10 meters away; use the feed to verify composition during movement.
Tracking and focus controls may let you trigger or refine subject tracking and gesture functions without reaching for a phone. Premium models can also tune follow speed or smooth-follow behavior for consistent motion. Stay focused on framing throughout the move.
Check compatibility: protocols, supported gimbal families, mounts, and connectors vary. Match the remote to your model and confirm supported camera functions.
Mount, Clamp, and Cage Distinctions
A mount gives you a secure attachment point and controls accessory load and orientation; a clamp grips a tube or rail for faster repositioning. A cage surrounds your gear with a rigid framework that protects it and maintains alignment.
Choose a mount or cage when you need rigidity and repeatability, or a clamp when quick attachment matters more.
Mounts: Secure Attachment Points
When you add gear to a gimbal, choose the attachment point to match the load: a mount bolts to the gimbal’s mounting point, often using a standard 1/4-20 thread; a clamp grips a pole or rail without drilling but may trade rigidity for easier repositioning depending on rail diameter; and a cage spreads weight across multiple points for heavier or multi-part rigs.
For an accessory, choose a rigid mount with compatible geometry and secure locking hardware. Standardized threads make swaps repeatable; knobs or thumbscrews let you tighten the joint while an Allen wrench helps secure it. A 360-degree tilt adjustment lets you aim a monitor toward your shooting position without losing control of the load. Check the mount’s capacity and gimbal fit before attaching gear.
Clamps: Quick Grip
For quick accessory changes, a clamp grips a cage bar or compatible rail so you can reposition a monitor or light without disassembling your camera setup. Unlike a simple mount that fixes one interface point, a clamp locks around a bar or plate, letting you position accessories for balance and visibility. A cage is the rigid scaffold supplying attachment points; a clamp is removable hardware that secures to it or a compatible rail.
Before buying, check threads: often 1/4-20 or 3/8″-16, and choose knobs or an Allen wrench for secure, reliable tightening. For example, SmallRig’s monitor mount combines lock knobs with threaded accessory points and supports monitors up to 1 kg. Match the clamp’s rating and interface to your accessory, then tighten it firmly to prevent slipping during movement.
Cages: Protective Frameworks
Because it surrounds the camera with a rigid framework, a cage protects the body from impacts and adds secure attachment points for monitors, handles, and lights.
A cage’s rails give you more secure accessory connections than a bare cold shoe. A mount connects the cage to your gimbal or rig, usually through 1/4-20 threads and tightening hardware that limits wobble during acceleration. A clamp instead grips a rail or gimbal arm with adjustable knob or bolt pressure. You can reposition it quickly, but it’s generally less rigid than an integrated mounting plate.
On a handheld IMU gimbal, flex in added hardware can cause nod under acceleration, so keep the assembly rigid and minimize play. Positioning the payload close to the rotation axes also helps balance properly. Cage layouts may accommodate slip-ring or flex-circuit routing, often allowing about ±180° of travel to reduce cable snagging and stress as the gimbal pivots.
Choosing the Right Support
Choose a mount for direct accessory attachment, a clamp for adjustable positioning on a rail or arm, and a cage when you need several rigid attachment points.
Use a compatible mount to attach a monitor without changing camera balance. SmallRig’s Adjustable Monitor Mount supports monitors up to 1-kg and provides 360° tilt. Check that your gimbal appears on the manufacturer’s compatibility list; models may be limited to specified DJI WEEBILL, CRANE, or RONIN series and Zhiyun or Moza units. For monitors, look for a 1/4-20 fitting and lock hardware such as a lock knob and thumbscrews, which help prevent movement that can spoil framing or reduce control.
Check clamp fit and vibration creep; choose a cage for rigid, multiple-point support when adding accessories.
Attaching a Video Transmitter
A video transmitter (TX) mount lets you send a live camera feed to a remote monitor, with dedicated power and signal routing for a more reliable link. Before you attach it, verify that the mount matches your transmitter’s form factor and that the payload stays within your gimbal’s capacity. Excess weight can overload the motors and compromise smooth movement.
Choose a rigid, vibration-resistant mount, then secure it with locking knobs or compatible 1/4-20 screws. Confirm each fastener is tight. Position your antenna to maintain line of sight to the receiver, minimizing blockage from the gimbal body and camera accessories. If your system offers directional and omnidirectional antennas, select the pattern suited to your setup and receiver position. Test the feed through gimbal movement.
Cable Strain and Clearance
As the gimbal pans and tilts, keep monitor and control cables slack across the full range, often near ±180° on internal flex paths, so fast moves don’t create tension spikes. Add strain relief, then leave clearance around the slip-ring or flex area; a ribbon pulled tight can fail early. Check that tight-connection accessories don’t pinch cables as the mount rotates through 360°.
Even light rubbing wears contacts, risking shorts or open circuits. Keep routing gaps between moving inner and outer rings and the fixed body, so cables don’t add drag, nod-under-acceleration, or vibration. Before use, run a lock-to-unlock test at high loads and watch for cable wrap.
Flex and slip-ring failures are common field issues, with service life around 500–2,000 operating hours; inspect routing.
Monitor Mount Articulation
When you need to check framing or focus from different operating positions, an articulated monitor mount lets you tilt or rotate the screen, often through 360°, without changing the gimbal’s balance. A lock knob secures your angle, helping prevent drift as you walk, orbit, or pan. Choose a rigid mount rated for your monitor’s weight; some support up to 1 kg.
- Set tilt or rotation to keep the display visible from your operating position.
- Check focus and framing without shifting the gimbal or changing its balance.
- Use the lock knob to hold the angle and limit movement-induced drift.
- Confirm the mount’s load rating; SmallRig’s SKU 2889 supports monitors up to 1 kg.
- Tighten thumbscrews with an Allen key; use 1/4-20 threads for brackets or lights.
Conclusion
Before you buy an accessory, verify its thread size, load rating, and clearance against your gimbal’s mounting interface. Choose a mount for positioning, a clamp for gripping compatible rails or tubes, and a cage when you need multiple attachment points.
Secure transmitters with short cables, then check that connectors won’t bind through the full range of motion. Adjust monitor articulation only after balancing the camera. Recheck fasteners before each shoot to keep your rig stable.
Phone Gimbal Fit Checker
Check if your phone, case and lens fit a gimbal: compares width, thickness and total weight against the clamp range and rated payload.
Gimbal Stabilizer App Finder
Find the official companion app for your gimbal by brand, model, phone OS and feature, with exact publisher names and official download links.