What Tripod Height Do You Need? Match It to Your Eye Level
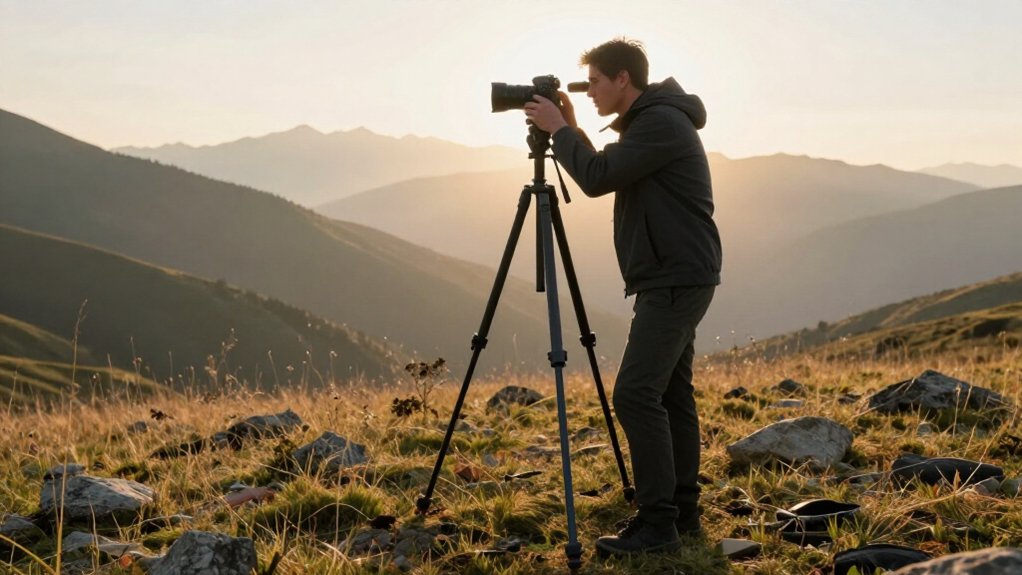
Choose a tripod whose legs, with the center column down, place your viewfinder near eye level. Since the camera sits above the mounting plate, subtract roughly 6–8 inches from your eye height when comparing listed tripod heights.
For many photographers, a leg-only height around 50–70 inches works, but your camera and stature matter.
Keep the column lowered for steadier framing, using it only when you need extra reach. The details below help you refine it.
Eye-Level Height Benchmark
Set the tripod legs so the camera’s viewfinder or lens sits near your standing or seated eye level, without raising the center column.
Use your natural eye line as the benchmark, then account for the camera and viewfinder sitting above the tripod’s mounting point. Subtract roughly six to eight inches from your eye-level measurement when comparing listed tripod heights; this keeps the finished viewing position near your eyes.
For many photographers, that no-column target falls around 50–70 inches (127–178 cm), depending on your stature and camera size. Treat that range as a reference, not a specification. Don’t accept a viewfinder position below your eye level as comfortable; you’ll likely crouch to compose, slowing your work and making framing less consistent. Keep this benchmark practical.
Tripod Height and Camera Setup
With the center column down, adjust the legs so the viewfinder or LCD sits near your eye line; for many photographers, that means a tripod height about 8 inches below their eye height to account for the camera above the mount.
A 60-inch (152 cm) leg-only height gives many full-size photographers a starting point, but fit the camera position to your eye line. For portraits, keep the camera at standing eye level—typically 60–65 inches, or up to 70 if you’re tall—to match your subject’s gaze comfortably. For landscapes, aim for 50–70 inches of leg-only height to clear grass or fences while staying steady. Test your setup: pan slowly at maximum height, then reframe at mid-height; check for wobble and slipping locks.
Center Column Extension Limits
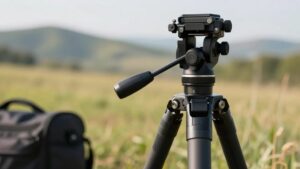
At eye level, extend the tripod legs fully and keep the center column down whenever possible; raising the column lifts the camera beyond the support of the legs and increases wobble, especially with a heavy camera and lens. Treat column travel as a last step, not your framing method. Reach eye level with the legs extended—often about 50–70 inches, depending on your height—and leave the column lowered.
| Situation | Choice |
|---|---|
| Eye-level reach | Legs extended |
| Extra height | Column, briefly |
| Low-angle work | Reversible column |
| Lateral reach | Extend if repositioning’s impossible |
A raised column moves the load above the legs’ support triangle, increasing movement with heavier rigs. Use it only when needed. Before buying, check whether the column removes or the tripod sits flat for low-angle shots.
Camera Height Above Eye Level
Set your camera slightly above eye level when you want a controlled high-angle portrait, but check that the angle doesn’t distort facial proportions.
For overhead shooting, raise the camera only as far as the composition requires and confirm your tripod remains stable. Keep the lens angle intentional to avoid unflattering views from below or above.
Slightly Above Eye Level
For comfortable, steady framing, position the camera’s viewfinder or LCD slightly above your eye level so you can look at it without hunching, especially during long shots.
A practical rule is to extend the legs fully and keep the center column down; the camera should sit about eight inches above your eye line to account for its height above the tripod. For a six-foot user, a tripod height near 60 inches offers a baseline, but verify the screen or viewfinder in the setup.
If your head detaches, subtract its height when comparing target readings; specifications may include or exclude the head and center column. Avoid extending the center column to reach eye level, since it can reduce stability at height, particularly with heavier lenses.
High-Angle Portraits
For a subtle high-angle portrait, place the camera about 2–6 inches (5–15 cm) above the subject’s standing eye level, then tilt the lens down to frame the shot. Because this angle requires extra height, choose a tripod that reaches your target without extending its center column; that keeps the setup steadier. Set the viewfinder near your own eye level so you can frame. Raise the camera to change the subject angle rather than hunching.
On uneven ground, adjust the legs to keep the head level while the camera sits above your subject.
For a longer lens or heavier portrait setup, don’t rely on maximum extension. Choose a rigid tripod that stays stable at 65–70 inches (165–178 cm) for taller adults, then fine-tune framing with the head for your portrait.
Overhead Shooting Positions
When you need an overhead angle, raise the camera clearly above your eye level and leave enough clearance to reframe without leaning or hovering awkwardly.
Use your eye line as the baseline, then account for camera and viewfinder height to calculate how far you must raise the tripod to clear the subject. For normal shooting, set the tripod near your eye line; extend the legs first, and use the center column only if necessary.
At overhead height, keep the center column down and spread the legs wide whenever possible.
This reduces flex and keeps the camera rigid.
Test at your working height with your usual lens. Tilt and pan slowly, then reframe quickly.
Confirm the leg locks hold and the camera doesn’t drift before shooting.
Avoiding Unflattering Angles
To avoid unflattering angles, set the camera near your natural eye line: account for the viewfinder or LCD sitting about 8 inches below the top of the tripod. That offset means you should choose leg height so the viewfinder lands at your eye level when you stand naturally.
Don’t compensate by stretching onto your toes or bending; either posture shifts your viewing angle and weakens framing consistency. If the camera sits below your eyes, you shoot upward, which can make a subject look less flattering. If the camera’s above eye line, downward perspective may feel equally awkward.
Extend the tripod legs as needed, but keep the center column lowered whenever possible: a raised column increases vibration and makes high framing less stable. For portraits, target roughly 60–70 inches (152–178 cm), depending on your setup.
For landscapes, eye-level framing keeps the horizon natural without tilting composition upward or downward. Check the LCD position after mounting camera before locking legs.
Low-Angle Shooting Options
For low-angle work, check the tripod’s minimum usable height against your lens position; close-to-ground scenes often need a lens height of 10–15 in (25–38 cm). Spread the legs wide, adjust them independently on uneven ground, and use a reversible or removable center column to reach lower positions without sacrificing stability.
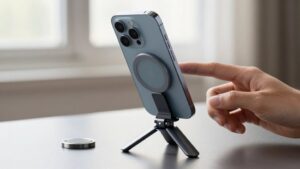
For tabletop framing, consider a compact tabletop tripod, then test the head and leg locks at your lowest working height with your lens attached.
Minimum Tripod Height
At the low end, judge a tripod by its usable height with the head attached and set at a workable angle, not by its collapsed marketing spec. That measurement tells you whether the legs can spread wide enough to put your camera near the ground while keeping the head level and the platform stable.
For macro or product work, you may need a working height of roughly 10–15 inches (25–38 cm), or lower. Avoid treating a short center-column position as a substitute for a stable three-leg stance; a raised column can compromise support.
Test the setup with your camera and typical lens at the intended minimum. Check that you can reach the viewfinder or LCD at a comfortable viewing angle without shifting the legs or making the head awkward to operate. If you can’t compose comfortably at the bottom of its range, the quoted minimum won’t serve your shooting position.
Reversible Center Column
When a subject sits close to the ground, a reversible center column lets you flip the camera below the tripod head for a low-angle view without forcing the legs into awkward positions. That setup brings your lens close to tiny details and can give you eye-level framing of a snake.
It also helps in tabletop work or tight spaces, where you can keep a head angle without bending down excessively. Keep the camera supported by the legs rather than raising the center column high; column extension reduces stability compared with legs-only height.
Before you buy, verify that the column is removable and reversible on that model. Check that the tripod remains flat and stable at low angles with your camera and head attached, since they affect the usable setup.
Ground-Level Leg Angles
A reversible center column can reach near-ground viewpoints, but wide leg angles are the steadier choice for routine low-angle shooting. Set each leg to its widest useful angle and lower the head without extending the center column; this keeps the load low. Independent angle control lets you level the camera on rocks, roots, or soft sand while preserving your viewpoint.
Before relying on a minimum height, set the legs low with your gear. Check that the viewfinder or LCD reaches workable framing, and watch for movement as you compose. At this stance, secure leg locks and stiffness matter: uneven contact or a shifted head load can introduce shake. Treat a reversible column as a situational route to a low perspective, not your default method.
Tabletop Tripod Options
For close-to-ground macro or product shots around 10–15 in (25–38 cm) high, or lower, a tabletop tripod can reach angles that full-size models often can’t.
Choose one for its working low capability: leg spread and head tilt matter more than maximum height. At these positions, minimum usable height determines whether you can frame the subject without awkward compromises. For eye-level viewing, check that the head places your viewfinder or LCD near your eye line without extending the center column.
Prefer a wide base and rigid head; thin legs or slack locks can introduce visible wobble as you reframe. A reversible or removable center column can help you work near the surface or create ultra-low top-down and over-object perspectives. Confirm the column design supports removal before purchase.
Folded Length for Travel
Before comparing a tripod’s maximum height, check its folded length against your travel bag or luggage; a model that won’t fit is impractical on the road.
Check whether the collapsed height clears rails and doorways during transit; tripods for street and travel use commonly fold to about 15–25 inches (38–63.5 centimeters). A compact minimum height helps you frame low angles, while easy leg adjustment gets you from carry mode to eye-level shooting quickly.
Don’t judge practicality by maximum height alone. Confirm you can reach your working eye level without raising the center column, which can affect stability. When comparing specifications, check whether stated height includes the head or an extended center column; these details affect working height and folded dimensions. Choose a model that fits your travel kit, with minimal setup delay.
Leg Lock Durability
Once a tripod fits your travel kit and reaches your working height, check whether its leg locks can hold that height reliably.
Twist-locks generally offer better durability because their locking mechanism sits inside the collar and stays less exposed to sand and weather than external flip-locks. Flip-locks deploy faster, but frequent adjustments can expose their reputation for failure in field use. At full extension, verify that every section stays put without slipping.
Each additional leg section adds another lock whose wear can increase wobble and soften image sharpness.
If possible, test the tripod with your camera setup. Extend it to your working height, then make slow pans and quick reframes. Watch for creeping sections, shifting collars, or any need to retighten a lock. Reliable.
Check Maximum Load Capacity
Choose a tripod rated for at least twice the total weight of your heaviest camera body, lens, accessories, and separate ball head; this safety margin helps keep the rig stable under load. Add up your complete rig, including external flashes or monitors, then multiply by two. Check the rating at your actual working height: extended legs and a raised center of gravity can reduce real-world stability. If you’ll frame at eye level with the center column down, confirm the rating remains adequate in that configuration.
- Mount your heaviest body, lens, accessories, and separate head.
- Raise the tripod to your intended eye-level position.
- Check for leg-lock slip, flex, or bounce at the top.
Don’t compensate for an under-rated tripod by tightening harder; flex and wobble can soften images. Test the full rig, not merely the low tripod, before relying on it in the field. A matching height means little if your support shifts during exposure or framing.
Spiked Feet for Soil
On soft soil, grass, or loose ground, spiked feet bite into the surface to resist sinking and twisting as you pan or reframe. Extend the legs until each spike fully penetrates the soil, not merely touches it; then set your camera at your target eye-level height to preserve a stable working stance.
- On dry, crumbly ground, spread the legs wider and hang a weight from the bag hook; spikes can break loose soil and lose grip.
- On compacted dirt or rocky soil, spikes may skid; use rubber feet or locate firm contact points.
- At working height, pan slowly and watch for micro-movement or listen for leg-lock slippage; incomplete engagement can still let your framing drift.
Recheck your footing after adjustments, especially on uneven ground.
Conclusion
Choose a tripod that places your camera near your eye level with the center column lowered; this gives you a stable, natural framing height. If you need extra reach, extend the column sparingly, since added height can reduce rigidity.
For low angles, check leg spread and minimum height. Before buying, compare folded length, lock design, load rating, and foot type with your camera kit and terrain. Then choose for conditions you encounter most often.