How to Calibrate a Phone Gimbal When the Horizon Keeps Drifting
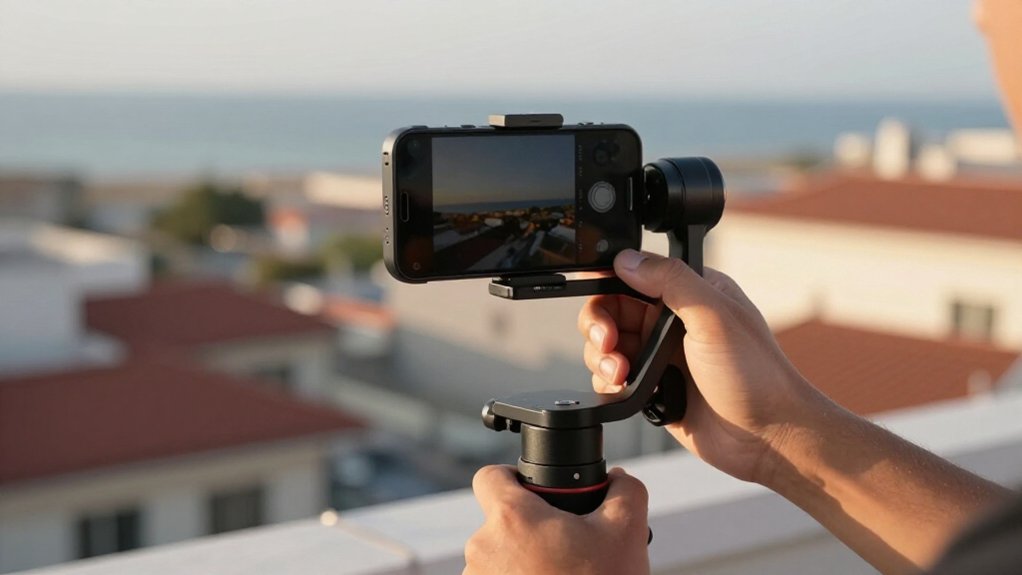
To stop horizon drift, fully charge your gimbal, update firmware and app, then reboot and sync. Move away from magnetic objects and calibrate on level ground. Balance your phone with motors off, checking the roll axis and clamp position.
Run IMU calibration or Auto Calibration while the rig stays motionless; recenter when it finishes. If motors warn or the horizon leans, stop and rebalance. A test clip and screw inspection can reveal what to fix next.
Phone Gimbal Horizon Drift
Start by placing the phone perfectly level, checking the gimbal body with a bubble level, then run the full IMU or “cold IMU” calibration as instructed. You should let calibration finish; when cold, allow extra time for it to settle.
A static balance rated “Excellent” on all axes doesn’t confirm a level horizon. If the horizon leans when the motors engage, run a recalibration and recenter cycle. Don’t rely on joint-angle offsets; recentering may restore the original tilt.
Next, distinguish roll bias from tilt that changes over time; drifting behavior may require calibration changes rather than roll trim. Test outdoors on flat ground. Watch whether yaw changes or left-to-right movement triggers horizon tilt, confirming an IMU issue rather than mounting imbalance.
Before Calibrating: Battery and Firmware
Before recalibrating, check power, firmware, and physical alignment. Fully charge the gimbal and install fresh batteries or connect reliable power; stable motor current helps prevent a roll bias when you engage the motors.
- Confirm that your phone mount and gimbal arm sit level using a bubble level or separate level; calibration can preserve an initial tilt.
- Check for the latest gimbal firmware and app version; some models need updates to correct horizon lean.
- After updating, reboot and sync the gimbal so calibration uses its new settings. Then run IMU calibration.
If the horizon leans immediately when motors engage, verify firmware and power first. Don’t begin calibration or offset and joint-angle recentering until those checks pass. This order isolates setup faults before changing calibration values.
Step 1: Clear Nearby Magnetic Objects
Once power and firmware checks pass, rule out magnetic interference: turn off compass-related phone settings and move at least 1–2 meters from speaker magnets, power supplies, car mounts, metal tools, and reinforced walls. Nearby ferrous materials can distort the local field and confuse a gimbal that uses a compass reference. Choose an open outdoor area, or another location with minimal electronics, and keep chargers, laptops, and power banks beyond arm’s reach.
Once you’ve relocated, run the gimbal’s compass calibration again so its heading baseline reflects the cleaner magnetic environment. Then check horizon stability briefly after the move without changing other setup conditions. If the horizon settles immediately, local magnetic interference was likely contributing to the drift; if it still wanders, continue troubleshooting other causes.
Step 2: Balance the Phone Clamp
At a level surface, balance the phone so its center of mass sits over the gimbal’s roll axis, near the roll joint. With the motors off, check the phone on a level surface; your bubble level should read level before you engage the motors. Any tilt already present can become more obvious when the motors lock.
If the horizon leans as they engage, loosen the clamp, shift or rotate the phone in small increments, retighten it, and repeat the static check until it rests level. Set the gimbal’s phone-size or weight option, if available, and verify that its profile matches your mounted model; a mismatch can skew its interpretation of roll balance.
Recheck after changing accessories; small shifts can cause a persistent roll lean.
Step 3: Select Auto Calibration Mode
If the horizon still leans after balancing the phone, open the gimbal’s calibration menu and select Auto Calibration, often labeled Auto Tune or Auto Cal, rather than relying only on manual recentering. This mode lets the firmware re-estimate roll-sensor offsets instead of merely changing the joint-angle reference. Keep the gimbal and phone rig motionless throughout the calibration cycle; interrupting movement can compromise the measurement.
Wait for the completion indicator before proceeding. Then recenter the gimbal and verify that its horizon reading is level before you engage the motors. Start the motors and inspect the horizon immediately. If it leans again, don’t force a correction with joint-angle recentering alone; repeat Auto Calibration so the firmware can address the underlying sensor estimate.
After calibration, check for available gimbal firmware or app updates, install them as directed, and repeat the startup test. Record whether the lean returns, so you can distinguish a persistent sensor-calibration issue from a setup error.
Step 4: Calibrate on Level Ground
Set the gimbal on level ground and verify the surface with a physical bubble level; you can also confirm it with the app’s level indicator.
Then power up the gimbal and camera on that same surface before engaging the motors. Run the standard calibration so the roll-axis reference aligns with the horizon.
Keep the setup undisturbed until the process finishes; temperature-related calibration may take several minutes. Recheck the surface level before lifting the gimbal.
If the horizon still leans or drifts, repeat calibration at a lower temperature or your expected operating temperature. A cold IMU calibration can stabilize the roll reference.
After calibration completes, perform the gimbal’s recenter or reset. Engage the motors and verify that the horizon remains level immediately, not only in static mode.
Step 5: Adjust Roll-Axis Fine-Tuning
Once the phone camera and gimbal arm are level and the setup is stable, adjust the roll-axis fine-tuning in small increments. Verify level with the bubble level first. Engage the motors, then inspect the horizon immediately; drift can appear as soon as they engage.
Make one minimal adjustment, not a large correction, and check the horizon. Watch the roll joint angle. If it stays within a narrow range, such as -3.8° to -2.2° around -2.7°, correct that steady offset rather than chasing random movement.
After changing the offset, recenter the gimbal. If the original lean returns, repeat the fine-tuning and recenter sequence without changing the gimbal’s physical level orientation. Recalibrate after firmware updates; fine-tune at a similar temperature, since sensor temperature can shift the offset.
Step 6: Power Down Before Storage
After fine-tuning the roll axis, power the gimbal down completely before storing it; standby can let IMU-related horizon offsets persist between sessions. When you’re finished, stop recording, then detach your phone if the app suggests it. Turn the gimbal off and wait briefly for its motors to stop before placing it in the case.
Don’t store it in standby or with the motors engaged: the roll axis could rest at an unintended joint angle, while an active IMU state may retain an offset. If you need an IMU or cold-IMU recalibration, first ensure the gimbal has powered down fully and returned to a stable condition; follow the model’s calibration procedure only then. At your next startup, check level again and correct it if needed. Treat full shutdown as a routine storage step, not an optional reset; it reduces the chance of recurring horizon drift across sessions.
Record a Stationary Test Clip
To distinguish true drift from a fixed offset, mount the gimbal on a tripod and record a 60–120-second stationary clip.
Before recording, seat your phone firmly in the mount, rebalance it if needed, and run the standard calibration. Keep the phone flat and the gimbal arms motionless.
Start recording as soon as the motors engage because the horizon error may appear immediately.
Don’t touch or bump the setup during the test. Watch each frame for a changing tilt rather than an offset that remains constant. To verify the result, review the clip and zoom in on a clear horizon line or use a bubble or reference overlay. Compare the tilt at the beginning and end; note whether its magnitude changes over the full duration. This isolates motion from alignment error without introducing handling movement.
Fixing Motor Overload Warnings
Don’t recalibrate while the motors are straining or showing an overload warning; first balance the phone on the roll axis and check that the phone and gimbal arm sit level with the motors off. If an overload warning appears, reduce tilt mismatch by shifting the phone mounting position, then retighten clamps before recalibration. Don’t power through the warning; the setup can overload motors as they engage.
| Check | Action | Result |
|---|---|---|
| Motors off | Level phone and arm | Reduce strain |
| Roll balance | Reposition payload | Limit tilt mismatch |
| Warning clears | Calibrate while still | Allow convergence |
Once the warning clears, hold the gimbal perfectly still during calibration so its IMU and motor controls can converge without correction load. Then test a slow left/right roll. If overload returns at engagement, stop and rebalance; don’t repeat offset calibrations.
Inspect Axis Arm Screws
Power off the gimbal and inspect the roll-axis arm-to-shaft joint screws, especially on the side matching the horizon’s lean.
Check that each screw is present and tight. Confirm the heads sit evenly with no gaps; inspect for stripped threads or failing thread-lock residue. A slightly loose roll-arm screw can let the horizon drift as motors engage.
If screws are removable, tighten them to the manufacturer’s specification. Don’t over-torque them; excessive force can warp the arm and worsen alignment.
After calibration, reseat and recheck the screws. If the gimbal returns to the same unlevel position, suspect mechanical looseness. Once screws are secure, perform a balance check.
Then engage the motors and watch roll-angle and joint-angle readings. Mechanical slip usually produces a bias at startup.
Conclusion
If the horizon still drifts, you’ll get results by checking the setup in order: charge the gimbal, update its firmware, remove nearby magnetic objects, and balance your phone in the clamp.
Then run auto calibration on a level surface. Power down before storage, and review a stationary test clip to confirm stability.
If motor overload warnings persist, inspect the axis-arm screws and correct binding before calibrating again. Small, repeatable checks help isolate the cause.