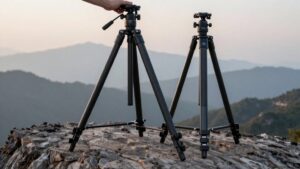
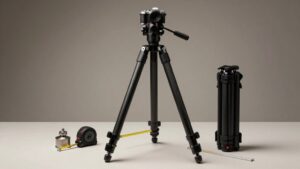
Do You Need a Tripod for Long Exposure? What Works When You Don’t Have One
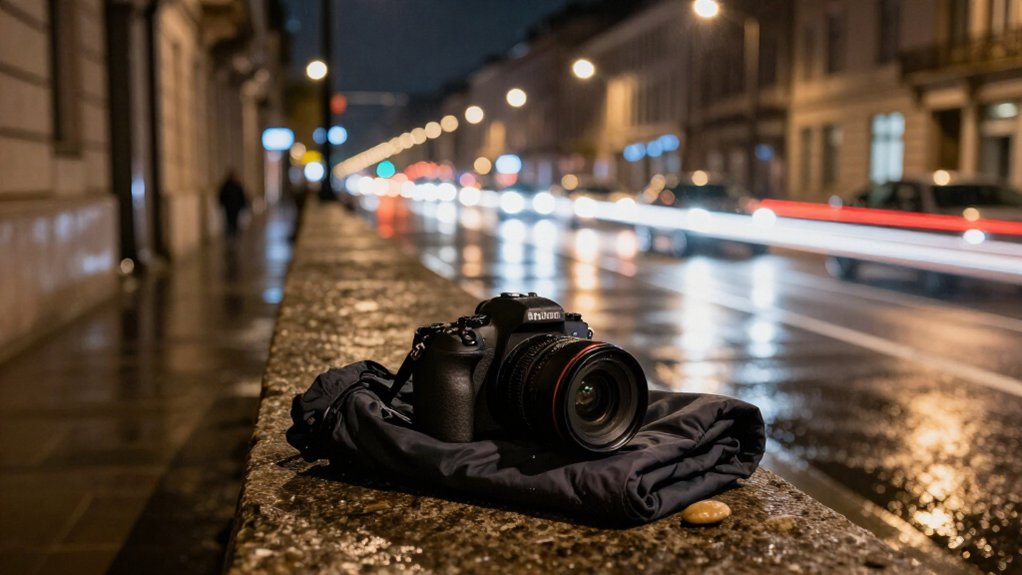
You don’t always need a tripod for long exposures, but you must stabilize the camera if static details need to stay sharp.
Handheld, keep shutter speed faster than about 1/(2× focal length), roughly 1/70s at 35mm, or brace against a solid wall, rail, rock, or bench.
A beanbag or secure clamp also works; trigger with a two-second timer, and avoid touching the setup.
In wind, keep supports low and firm.
Options below help you choose.
Handheld Shutter-Speed Limits
When you try a long exposure handheld, you must balance motion blur in moving subjects against camera shake in static details. A practical 1/(2× focal length) rule sets an upper limit on exposure time: keep your shutter faster than that value to reduce shake-driven blur consistently. At 35mm, that means faster than about 1/70 second; at 400mm, use faster than roughly 1/800 second.
Longer focal lengths magnify angular movement, so the safe threshold rises accordingly.
If you can’t meet it, brace the camera on a wall, rail, rock, bench, or beanbag rather than trusting handholding. Use a two- or ten-second timer to prevent your release touch from adding vibration. Stabilization can help, but it won’t compensate when the exposure remains too slow for your focal length and conditions.
Subjects Requiring Sharpness
Keep static elements such as rocks, trees, and buildings sharp while the water or clouds blur by stabilizing the camera throughout the exposure. As you lengthen the shutter speed, camera movement increasingly softens fine detail. Once the shutter falls below your handheld limit, roughly 1/(2×focal length), your hands may introduce visible blur, even if the moving water looks right.
Without a tripod, brace your camera firmly on a solid wall, rock, or rail. Set a two- or ten-second self-timer so pressing the shutter won’t cause vibration. If you can’t hold the camera steady enough, shorten the exposure or raise ISO to preserve sharpness, accepting less motion blur. Also account for subject movement: wind can shift branches, grasses, or reeds, which camera support can’t prevent. Choose calmer conditions or accept softer detail in those elements.
Wind and Ground Conditions
In wind, even a rigid support can shift, so keep tripod legs low and leave the center column down. Extend only the lower, sturdier sections; raising the column even slightly increases leverage.
| Condition | Support choice | Likely result |
|---|---|---|
| Wind | Low tripod, weighted hook | Less movement |
| Soft ground | Rock or board beneath feet | Reduced sinking |
On sand, mud, or grass, test feet; a leg that settles can blur the frame.
Carbon fiber damps vibration better than aluminum, and a sandbag on its column hook adds wind resistance. Without a tripod, brace against stone, solid rails, or grounded objects; avoid handholds that flex. Choose subjects with motion: leaves and grass smear unpredictably in gusts, while smooth water and clouds produce even blur. Recheck stability before the timer.
Remote Shutter Release
A remote shutter release triggers the exposure without camera contact, preventing shake that can blur static detail during long exposures. Choose a wired or wireless release; if you don’t have one, use your camera’s self-timer to let vibrations settle before the exposure starts.
On improvised supports, avoid touching the camera and confirm how your timer handles bracketing before relying on it.
Preventing Camera Shake
Even with your camera locked to a tripod, pressing the shutter button by hand can introduce enough vibration to soften a long exposure’s finest details. Set your camera’s built-in 2- or 10-second self-timer, then keep your hands off the body as the exposure begins. The delay lets vibrations from your touch settle before the shutter opens, which matters when a long exposure can record even slight movement as softened detail.
If you don’t have a remote release, the timer is an alternative to pressing the button directly. Without a tripod, rest the camera on a stable wall, rock, or bench and use the timer; movement then ends before capture starts. Some models can also trigger an exposure bracket when the timer expires, letting one touch start a sequence. A remote can start the exposure without contact, but brace the camera and support against wind or lens weight during the shot.
Choosing a Remote Release
A remote shutter release triggers the exposure without touching the camera, reducing blur from hand movement during long exposures. Even without a tripod, this matters: any small movement at the moment of triggering can keep static elements—rocks, trees, buildings—from rendering sharp while motion blur happens elsewhere in the frame. A remote release earns its place when you need precise, repeatable timing, such as running the same long-exposure settings across multiple frames for direct comparison.
Since you’re not pressing the shutter button by hand, every exposure starts identically, without operator-induced shake skewing your results.
If you’re bracketing exposures, check how your camera handles the trigger: some models fire the entire bracket sequence the instant you activate the remote, which affects how consistently those frames align with your intended timing.
Using the Self-Timer
When you don’t have a remote release, use your camera’s 2- or 10-second self-timer to prevent the vibration caused by pressing the shutter button from softening a long exposure. Choose the two-second delay, or select ten seconds when you’re working with a longer exposure. The extra time lets you finish composing, remove your hands, and allow camera vibration to settle before the shutter opens.
If your camera supports it, enable self-timer triggering for a bracketing sequence; it can capture successive frames without further contact. When shooting without a tripod, rest the camera on a firm support, such as a wall, rock, or beanbag. The timer minimizes shutter-induced shake, while the support limits drift. This matters most when your shutter speed extends beyond handheld limits.
Remote Release Alternatives
If you don’t have a remote shutter release, use the camera’s 2- or 10-second self-timer to let button-press vibration settle before the exposure begins. That delay reduces movement caused by your finger, but it can’t stabilize a camera resting on an unstable surface. For a long exposure, brace the camera and lens on a wall, rock, railing, or beanbag; support prevents subject framing from drifting while the timer addresses shutter-button movement.
Image stabilization can help with residual camera motion, yet it may not correct the quick displacement caused by pressing the shutter at exposure start. If your camera offers wireless remote control, use it when available, but you don’t need extra gear: the self-timer remains a dependable substitute. Check your model’s bracketing behavior, too. Some cameras fire a bracketed sequence after the timer expires; others may not. Test the sequence in advance before relying on it in the field.
Low-Cost Stabilization Options
You don’t need a dedicated tripod to shoot sharp long exposures, you just need to eliminate movement by any means available. Rest your camera on a stable surface like a wall or railing, brace yourself against a solid structure, or anchor a budget clamp to a fixed object to kill vibration.
Even a camera strap, pulled taut against your body, adds enough tension to steady a shot when nothing else is at hand.
Use a Stable Surface
A solid, immovable surface, a wall, railing, fencepost, flat rock, stump, bench edge, or bridge parapet, can keep the static foreground acceptably sharp while your subject blurs. If you’re without a tripod, rest your camera or lens hood on a stable surface. Fine-tune your framing before the exposure, then leave the setup untouched; even slight contact can soften detail during a long shutter interval.
If your lens is heavy, support its front with a lens hood, filter case, or battery case to prevent weight from tipping the camera. Set a two-second or ten-second timer so pressing the shutter doesn’t introduce vibration. For added damping, place the camera on a beanbag, such as a backpack on the ground. Once fully supported, turn image stabilization off for long exposures.
Brace Against Structures
When no tripod is available, brace your camera or lens against a solid structure—such as a rock wall, railing, fencepost, or bridge parapet—to steady the static scene while moving subjects blur.
Compose first, then nudge the camera while braced. Use a hat, glove, or strap only for tiny adjustments; don’t let it float on an unstable surface. Prefer rigid, immobile contact. If the body won’t sit securely, support the lens front with its hood, a filter case, or a small prop to counter its weight and prevent tipping that softens the image.
Once settled, trigger a two- or 10-second self-timer to avoid vibration from pressing the shutter. When your exposure exceeds handheld limits—roughly slower than 1/(focal length), such as 1/50 second at 50mm—this contact point provides a practical, low-cost substitute for tripod stability.
Try a Budget Clamp
For low-cost stabilization, clamp your camera securely to a railing, fence, or thick branch so the support, not your hands, holds it steady at slower shutter speeds. A clamp works best when you brace it against a solid surface that won’t vibrate. Use a self-timer set to two or ten seconds so pressing the shutter doesn’t shake the camera.
Choose a clamp that resists wind and your lens’s weight; if it slips, the entire frame can drift, softening static details as well as moving water or clouds. Start around 1/8s to 1/4s, depending on brightness, then lengthen exposure cautiously until moving water looks silky without visible drift. Once the camera is firmly clamped, turn off in-body or optical stabilization to reduce the risk of unwanted micro-movement.
Use a Camera Strap
If you don’t have a tripod, tension your camera strap against your body to help steady the camera at slower shutter speeds. Pull the strap taut, tuck your elbows, and adopt a stable stance; this “poor man’s tripod” reduces shake but can’t eliminate body movement.
For silky water at 1/4s to 1s, brace the camera or lens against your chest or a solid surface, then time the exposure between breaths. Use a 2-second or 10-second self-timer to avoid adding vibration when you press the shutter. Check static rocks, trees, and buildings for sharpness.
Strap support suits modest attempts when you lack a tripod, but it won’t reliably hold still for star trails or in wind; use a tripod for those exposures whenever conditions demand.
Camera-And-Lens Clearance Checks
Before a long exposure, verify that your improvised support securely bears the lens barrel so the camera can’t tip forward, especially with a heavy lens or hood.
Check clearance around moving parts: your hood, filter ring, and straps must not strike the support or one another as you tilt the camera to compose. Leave room for a timer or intervalometer; your hand and shutter button shouldn’t touch the body during exposure. On steps, parapets, or fence posts, position the camera so the support doesn’t block the front element, focusing ring, or stabilization switch, and confirm the platform keeps the camera level.
If you rely on stabilization rather than firm support, test your actual shutter speed at your focal length. Use 1/(2 × focal length) as the minimum handheld guideline: at 35 mm, shoot faster than 1/70 second. Clearance can’t compensate for motion blur. Recheck framing after each adjustment before you start the exposure.
Battery Life and Cold Weather
Once your support and framing are secure, account for the battery’s reduced capacity in cold weather: lithium-ion batteries can lose tens of percent of their runtime, so carry a spare and keep it warm in an inner jacket pocket. Swap the spare in when the active battery’s voltage sags or your camera warns of low power. Cold temperatures can make readings misleading; let a chilled battery warm before you reuse or charge it.
During tripod-free long exposures, slower shutter settings may keep the camera awake longer; metering, display, autofocus, and repeated image searches all draw power. Image stabilization can reduce the need for ultra-slow shutter speeds, but it consumes energy in cold conditions. Enable it only when its stability benefit justifies the drain.
Bulky Tripod Leg Locks
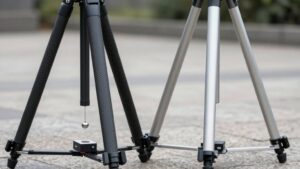
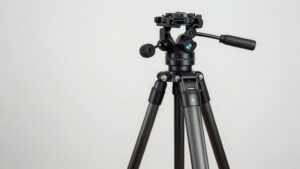
Bulky or stiff leg locks can slow setup and leave joints slightly loose, introducing micro-vibrations that blur long exposures. Multi-section legs take longer to extend and retract, and each joint needs firm engagement; a tiny slip can soften a slow-shutter frame. Awkward locks may tempt you to raise the center column, trading convenience for stability and greater blur risk.
- Close every lock fully, then recheck all joints after setting final height; one loose section can transmit vibration.
- Choose a lighter design with fewer, simpler locks; compact lever locks can be easier to operate than bulky mechanisms.
- If you can’t secure the legs quickly, brace the camera on a solid wall, rock, or bench instead.
This avoids precise leg adjustments when time or access is limited.
Quick-Release Plate Compatibility
After securing the leg locks, check that your support system’s quick-release clamp matches your camera plate; Arca-Swiss style plates fit many tripods and clamps. Keep one compatible plate attached to your camera so you can switch between handheld shooting, improvised support, and tripod-like stability without remounting.
- Match plate height and screw type; most plates use a 1/4″-20 thread, and incorrect engagement can leave the fit loose.
- On a wall, rail, or beanbag, seat the plate against a compatible accessory so the camera can’t slip.
- If you remove the camera often, verify the lever lock engages fully; plate movement can blur a long exposure.
Before exposing, tug the camera to confirm the clamp holds; slight play can undermine sharpness when shutter speeds stretch into seconds.
Conclusion
You don’t always need a tripod for long exposures, but you must control camera movement. Handheld shutter speeds work only when your lens stabilization, focal length, and subject allow them.
For results, brace your camera on a surface, use a timer or remote release, and check camera-and-lens clearance before shooting. Wind, unstable ground, and cold batteries can complicate tripod use, while a compatible quick-release plate speeds setup. Choose support based on exposure time and sharpness.