How to Plan a Slider Shot: Framing, Speed and Foreground Tricks
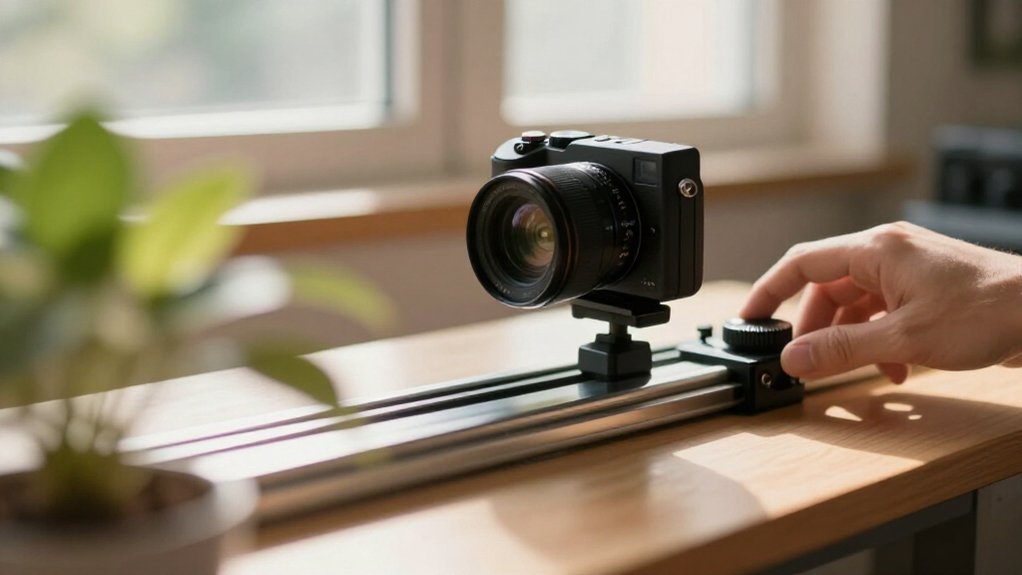
Lock your starting frame before setting the slider’s A-to-B path, placing the subject within a deliberate stack of foreground, subject, and background planes.
Clear distracting elements along the route, then choose a close foreground anchor to create visible parallax.
Move slowly and consistently so the shift feels intentional, and mark both endpoints for repeatable takes.
Secure the camera plate, stabilize the support, and check focus at each stop.
Next, refine the setup to prevent vibration and keep motion smooth.
Framing, Speed, and Foreground Tricks
Lock the composition before you set the slider’s A-to-B path: place the subject where it carries the story, then make the move reinforce that framing rather than fix it. Keep the slide slow and consistent; a steady pace lets viewers read the perspective shift as intentional, not as a camera whip.
Bring a near foreground element close to the lens. As you move laterally, its displacement against the background creates parallax, while your subject remains the visual anchor. This layered separation adds depth without obscuring the action.
Choose a stopping point that strengthens the narrative impact. Rehearse the same movement parameters each time: consistent speed and timing prevent micro-jitters and distracting variations that expose the rig. Watch how the foreground crosses the frame and.
Set the Slider’s Starting Frame
Before you mark the slider’s start, choose the strongest A-to-B composition and place the camera so its first frame matches that view, with the subject anchored where it belongs. Check the depth stack before locking the rail: a near-lens edge, your subject, and the distant background should occupy deliberate planes.
Set a precise start mark so you can return to the same perspective for alternate takes. Your opening frame should already communicate the scene; if the move adds no new information, refine the composition before traveling. Keep the camera level and steady, then rehearse a slow, repeatable path.
- A foreground leaf crosses the frame edge as the subject holds its mark in focus.
- The rail’s start key point returns the lens to the same perspective on every take.
- A level horizon keeps the opening view composed, not tilted or drifting.
- Slow travel carries you from a readable first frame into fresh spatial information.
Step 1: Clear Distracting Background Elements
Once the starting frame is set, scan the full A-to-B path for background distractions. Remove people, hanging cables and flickering screens; movement exaggerates parallax and makes these elements feel chaotic.
Build a shallow, consistent depth plan: keep your subject in focus and place the background farther back, so shapes blur throughout the slide. Choose a backdrop with uniform texture or tone, such as a plain wall or dense trees; this keeps high-contrast details from pulling the eye as you glide.
Use foreground occlusion. Set an object just beyond the subject’s edge to mask clutter during the move. Before rolling, check the endpoints. Watch for a bright object swapping behind your subject. If it does, reframe or shift the subject 30–100cm to break line of sight.
Step 2: Lock the Camera Plate in Place
At the start of the move, clamp the camera plate firmly to the carriage and check that it can’t shift as the slider changes speed or direction. Before powering the slide, press the plate by hand. If it rocks even slightly, tighten the mounting screws or locks and recheck alignment.
Align the plate with the slider’s axis, not at ninety degrees, to distribute the load and prevent lateral skating. Where applicable, mount it sideways to improve stability and reduce micro-movement as leverage changes. Run a short test at your final speed. Watch the camera and framing through start and stop transitions.
If the plate shifts or framing drifts, stop, tighten the locks, and repeat the test before you begin recording along the full travel.
Step 3: Choose a Parallax Anchor
Choose a parallax anchor, a close, in-focus foreground object that shifts noticeably against the background as the camera slides. Build clear depth layers: place the anchor in front, your main subject in the midground, and the background far behind.
Keep the anchor inside the frame at both endpoints so its changing position remains legible rather than clipping away. Make a slow, consistent A-to-B test slide, then judge whether the relative shift reveals depth without pulling attention from your subject. Keep one purpose, such as revealing depth, throughout the shot, and choose an anchor that supports that intent at both ends. For repeatable moves, program the same travel distance on a motorized slider, such as a Slider-120; the anchor’s parallax will behave consistently from take to take.
Step 4: Track the Subject Smoothly
With your parallax anchor set, align the slider parallel to the subject’s path, or along a clear A-to-B line, to keep perspective changes gradual.
Keep your subject fixed as the visual anchor, then move at a slow, consistent speed. Avoid tiny accelerations; they’ll read as jitter rather than tracking. Build a smooth acceleration, cruise, and deceleration so the move doesn’t snap at either end.
Add depth with a nearby foreground edge, doorframe, or object within the first feet of your lens. As it slides across frame, the background shifts behind your steady subject, strengthening the tracking effect.
Mount your camera rigidly to the carriage and keep a gimbal- or tripod-style stable horizon. This stability holds the subject’s position while parallax changes around them, making motion feel continuous.
Step 5: Tape the Rail Endpoints
Once you’ve locked your A-to-B framing, mark the slider’s left and right rail endpoints with tape so you can repeat the same carriage travel on every take.
Place one strip on the floor or stand and a matching strip on the rail or carriage reference at each end. The paired marks let you realign quickly if the rig shifts between takes. Treat them as the true start and finish positions, not rough reminders: move the carriage to each stop, then check that the camera lands on the intended frame composition at both ends.
For a 48/120 cm slider, mark the specific programmed travel you’ll use; don’t assume the full 47/119.4 cm rail travel matches your shot. Note each tape position beside your speed and take numbers. When you return to the setup, those records and visible marks give you consistent endpoint stops and repeatable framing across every planned camera move sequence.
Step 6: Add a Sandbag for Stability
Add at least one sandbag to each end of the slider’s supporting stands or tripods to damp micro-vibrations and keep the carriage from wobbling during the move.
After mounting the slider head, check that each bag hangs low and its straps or handles are tight. Keep weight centered over the stand feet rather than swinging beside them; a shifting load can rock the rail as the carriage accelerates or stops.
Bias additional ballast toward the rail ends, especially the downstream end, where the moving camera applies greater torque. With a heavy camera or long lens, add weight to counter top-heaviness and keep the support rigid.
Run an A-to-B test slide; adjust bag placement and tension until frame stays steady without settling at either end.
Verify Focus at Endpoints
Mark the slider’s A and B endpoints, then verify focus at each, not just the midpoint, because changing distance or slight carriage tilt can shift the focus plane. At A, magnify your camera’s live view and inspect the subject’s intended focal plane. Repeat at B, checking the same eye, label, or edge rather than judging sharpness in the full frame.
If your subject’s close to the lens or distance changes, focus on the intended plane and test both ends for softness. Lock focus mode, aperture, shutter, and ISO before recording; don’t refocus during the take. Record one smooth A-to-B test pass; inspect both endpoint frames at 100%.
If either looks soft, adjust and retest before the full shot. This catches drift that a sharp midpoint can conceal clearly.
Motor Vibration in Footage
After confirming focus at both endpoints, check for motor vibration: it often appears as micro-jitters or fine, fast shimmer between frames, especially at low speeds when the camera isn’t isolated from the carriage. Record a short A-to-B move with the angle locked, then inspect at 100% zoom.
If shimmer appears, use a rigid rail, solid head, and balanced camera to limit resonance. Increase speed smoothly and keep it consistent; abrupt starts, stops, or long holds can reveal banding.
| Symptom | Likely clue | Test |
|---|---|---|
| Micro-jitters | Low-speed move | Raise speed |
| Shimmer | Long hold | Shorten hold |
Enable stabilization when appropriate, but test it: some systems mask vibration; others add artifacts. Change variables individually—mount, head, speed profile, or rail smoothness—to isolate the cause.
Clean Slider Bearings
For smooth starts and stops, keep the slider bearings and carriage clean and lightly lubricated. Before filming, wipe the rails and bearing surfaces to remove dust and grit; these particles cause micro-jitters. Apply a light, rail-appropriate silicone lubricant, such as Pro-Power, rather than coating the track heavily.
Before mounting your camera, roll the carriage through its A-to-B travel. Check alignment and feel for rough spots or side-to-side drift; correct binding before you shoot.
For motorized moves, free-running bearings let your programmed speed repeat without compensating for mechanical drag. If the carriage stutters, don’t mask the problem with added inertia. A flywheel can smooth motion, but it can’t remove contamination or fix binding.
Clean bearings give you controlled acceleration, crisp endpoints, and a stable frame.
Conclusion
Before you roll, set your starting frame and clear distracting shapes from the background. Lock the camera plate, then choose a foreground anchor that makes the move’s parallax visible. Add a sandbag to steady the slider, and check focus at both endpoints.
Move at a controlled speed; even motion keeps depth readable. If vibration appears, inspect the motor mount and clean the bearings. You’ll get a smooth, deliberate shot with every layer working in frame.