How Do Camera Gimbals Work? Motors, Sensors and Stabilization Basics
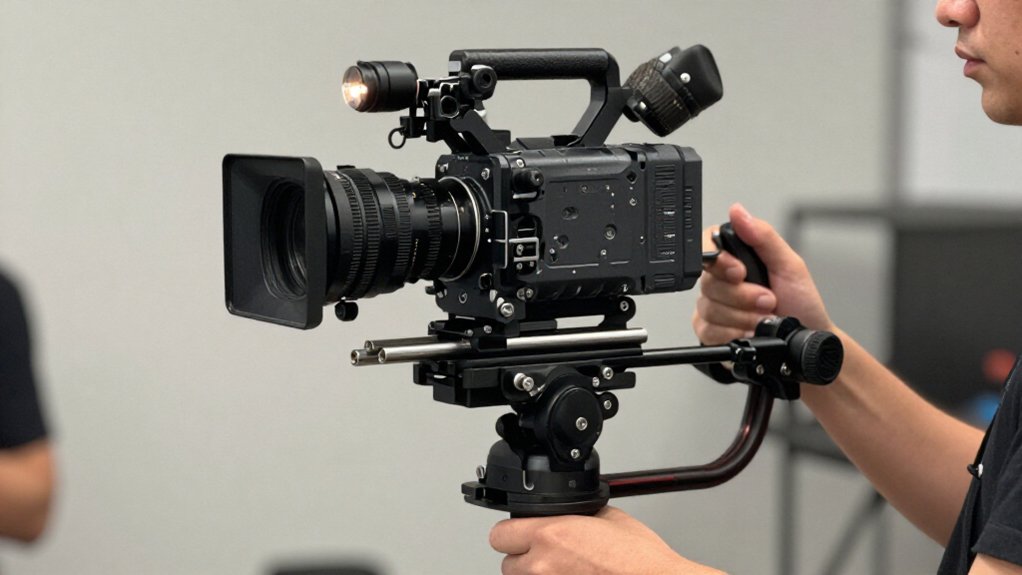
A camera gimbal uses gyroscopes and accelerometers in an IMU to detect unwanted pitch, roll, and yaw. Its controller separates shake from your intended movement, then commands brushless motors to rotate the camera against each disturbance.
Feedback keeps your framing steady without digitally cropping the image. You’ll get results when you balance the camera and calibrate the axes before powering on.
Payload, follow modes, and movement limits shape performance. Sections ahead explain these factors.
Motor-Sensor Feedback Loop
As the gimbal moves, its IMU measures rotation and acceleration in real time and sends the readings to the controller. The controller estimates unwanted motion from these signals, then commands each relevant brushless motor to apply torque in the opposite direction. This continuous feedback loop corrects orientation moment to moment, because brushless motors respond with fast, precise torque.
You get coordinated corrections across the pan, tilt, and roll axes: each motor acts on an orthogonal axis using the live IMU error signal. The controller also distinguishes deliberate operator input from small disturbances, so it won’t fully oppose your intended pan, tilt, or roll. Instead, it suppresses unwanted motion while preserving the commanded movement. This keeps the camera’s orientation steady without interrupting your movement throughout each adjustment.
Camera Shake in Frame Moves
When you walk with a camera, small pitch, yaw, and roll movements make the frame shake. Your phone or camera also shifts slightly through space, so nearby subjects drift across the image. A three-axis gimbal uses an inertial measurement unit, or IMU, whose gyros and accelerometers detect these motions in real time.
Its controller distinguishes your deliberate joystick or hand movement from incidental shake, then commands brushless motors to counter motion on the affected axis. Continuous feedback keeps the camera’s orientation level, canceling most shake and making your footage resemble a smooth track or dolly. Unlike electronic image stabilization alone, mechanical correction doesn’t crop the image or typically cause reduced resolution and jelly-like distortion on fast moves, unlike EIS-only methods that crop the frame.
Correcting a Mid-Take Bump
If you bump the gimbal mid-take, its IMU detects the sudden pitch, roll, or yaw change and estimates the unwanted motion in real time. Brushless motors on the affected axis then command counter-rotation to cancel frame rock. The payload’s residual tilt follows θpayload = θframe × (1−η/100), where η represents isolation efficiency. At ideal 100% efficiency, the pivot mirrors the bump, leaving θpayload at 0°, so your camera stays level without a dip.
A larger bump or limited axis travel near 90° can reduce correction and create a larger-than-usual transient, since the gimbal approaches its motion limit and gimbal-lock risk. If your setup isn’t balanced, the motors must work harder during recovery. That effort can increase overshoot and jitter while lowering effective η temporarily.
Balancing Before Power-On
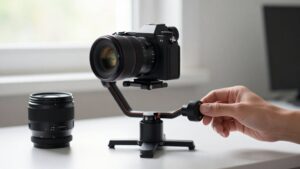
Before powering on, mount the camera securely and align its center of mass over the quick-release plate. Loosen the axis locks and adjust the roll and pitch axes until the camera stays level when you release it.
Test the balance before startup; if the camera drifts, keep adjusting so the motors won’t fight its weight.
Mount and Align Camera
To prepare the gimbal for stabilization, attach your camera or phone to the quick-release plate, slide it forward or back until its center of mass aligns with the mount, then tighten the clamp.
Level the gimbal body, or use on-screen or LED bubble guidance. With motors off, confirm the camera rests neutrally without tipping forward or backward. This balance reduces motor load and helps prevent shake. A tilted load makes stabilization harder.
Before powering on, move the yaw, pitch, and roll arms through their range. Check that arms don’t hit stops or cables restrict movement, which can disturb stabilization. Power on only when the payload’s balanced.
If you change cameras or mounting position, rebalance and recheck clearance; small shifts can cause shake. The motors can’t correct an uneven load as smoothly.
Adjust Each Axis
Balance each axis with the gimbal powered off so the camera can hold its position without falling under gravity.
Configure the rig as you’ll use it, including camera orientation, lens, rig length, and any counterweights. Then adjust each axis until it stays neutral and moves smoothly by hand. For tilt, shift the camera vertically and reposition the plate so its center of mass sits correctly relative to the tilt axis. For roll, move the camera or counterweight sideways until the rig doesn’t rotate left or right with the roll motor off.
Balance pan as well, adjusting the assembly so it doesn’t drift around that axis. This setup reduces the corrections the motors must make. Once every axis is balanced, power the gimbal; its IMU-controlled brushless motors can stabilize around neutral starting points.
Test Balance Before Powering On
Once each axis moves freely and holds its position by hand, check the balance before powering on. Loosen axis locks and slide the plate until the camera’s center of gravity aligns with the axes. Tilt each axis by hand; the camera should stay level rather than fall forward, backward, or sideways.
Balance pitch first, then pan and roll, following your gimbal’s order. An imbalance on one axis can reduce control authority on others. Check that the camera isn’t biased forward or backward, or left or right, then tighten the axis arms.
This lets the motors hold attitude with minimal corrective torque. If you’re using a different lens, cage, battery, plate, screen, or attachment, rebalance before powering on. Small shifts can weaken stabilization or trigger overload.
Lens and Payload Differences
When you change lenses, you change the rig’s total payload and center of mass, so rebalance it to limit drift and motor strain. Check your gimbal’s payload capacity: a long, heavy lens can overload a phone gimbal or push a larger camera rig toward its limit.
With each lens change, adjust the camera’s position on the axes to account for its weight distribution and lever arm.
Lens Weight And Balance
Because a gimbal stabilizes rotation around its axes, the camera and lens must sit with their combined center of mass on or very near those axes. If your lens shifts that center, motors must fight gravity, increasing noise and weakening stabilization. A long telephoto lens creates a larger moment arm, so a small position change can cause drift during pans or tilts.
| Axis | Check | Effect |
|---|---|---|
| Roll | Slide camera | Prevents drift |
| Tilt | Move lens | Reduces motor effort |
| Pan | Recheck position | Limits vibration |
| Lens swap | Rebalance | Restores alignment |
After swapping lenses, recheck balance and recalibrate if needed; old clamp and counterweight settings may no longer suit the new distribution. Precision rigs may target center-of-mass alignment within about 0.1 mm.
Balance each axis each time before operation.
Payload Capacity Limits
Even after you balance each axis, the camera-and-lens combination must stay within the gimbal’s payload capacity. Smartphone models often support roughly 260–400 grams, while mirrorless and DSLR gimbals commonly carry up to 1.5–2 kilograms. These ratings describe more than total weight: a long, heavy lens shifts the center of mass and increases torque on axes.
When the load exceeds the motors’ operating range, they can saturate, producing uncontrolled shake rather than smooth correction. Stabilization works reliably only within the gimbal’s torque and control-loop sweet spot. Heavy lenses and AI tracking demand more motor effort, leaving less safety headroom. Even systems built for payload changes may lose effective capacity after a body or lens swap, since modest weight or geometry differences alter motor demand.
Adjusting For Different Lenses
A lens change alters your rig’s center of mass, so rebalance the gimbal with the exact camera-and-lens combination before powering it on.
Heavier or longer lenses shift the center of gravity forward or backward and demand more motor torque. Rebalance after every lens swap; powering on without doing so can make the gimbal drift, hunt, or wobble because its axes tolerate only small alignment errors.
Check your gimbal’s payload specifications against the lens’s weight and size; an oversized setup can saturate brushless motors and weaken stabilization. If you add a follow-focus, matte box, microphone, or tripod plate, rebalance again. Each accessory changes total mass or lever arm, increasing the torque the motors must counteract before operation to preserve smooth, accurate camera movement in use.
Walking Through Doorways
Before walking through a doorway, balance your camera or smartphone so the gimbal can hold a level zero orientation without fighting the setup.
A three-axis gimbal uses gyros and accelerometers in its IMU to detect pitch, roll, and yaw changes from your footsteps. Its control loop continuously commands brushless motors, countering vertical and lateral jolts as you cross the frame. Unlike electronic image stabilization, this keeps framing steady without digital cropping.
| Moment | Gimbal response | Your move |
|---|---|---|
| Approaching | Holds level | Keep pace even |
| Crossing | Counters jolts | Move smoothly |
If you speed up or twist your wrist, the system can’t infer your intent perfectly. Deliberate steps help prevent motor saturation and visible catch-up corrections. Tracking modes can follow a subject or direction, but tight doorway angles may require re-aiming or re-centering so motors don’t resist an abrupt turn. Make the transition smoothly.
Battery Drain and Heat Limits
When a gimbal works harder, it draws more power and generates more heat: heavier payloads, active AI tracking, and frequent fast movements raise motor demand and can cut real-world runtime by roughly 20–30% from rated figures of 8–12 hours. Heat accumulates inside motors during sustained stabilization; warm conditions and recordings accelerate buildup.
If temperature rises too far, your gimbal may throttle to protect its electronics, slowing response or tracking and transport speed, which changes the smoothness you expect. Brushless motor control draws high current, while IMU sampling adds load, so an aging battery or poorly balanced rig wastes power on corrections.
Balance your camera before powering on, avoid needless motor retriggers from mode switching, and carry spare batteries or use pass-through charging for sessions.
Incorrect Axis Calibration
Even with a well-balanced rig and cool motors, incorrect axis calibration can make a gimbal fight your movements. Your gimbal’s inertial measurement unit (IMU) reports rotation relative to calibrated motor axes. If that mapping is wrong, a left pan may trigger overcorrection and drift. After a payload change, rebalance and run startup calibration before powering on; otherwise, motors may leave the camera at a residual tilt instead of neutral.
- An uncalibrated roll axis can let the horizon slowly tilt gradually.
- Roll errors may produce twisting or jitter distinct from walking shake.
- Axis-dependent vibration means one axis feels smooth while another oscillates repeatedly.
- Misaligned pitch, yaw, and roll assumptions reduce motion-isolation efficiency during operation.
- Recheck calibration whenever you change the camera or rig before each powered shot.
Compare Follow Modes
Follow modes determine which camera movements a gimbal tracks and which it resists. In Follow Mode, you can pan or tilt; the gimbal keeps the horizon level and matches those commands. Its IMU and brushless-motor feedback loop cancels unwanted shake.
| Mode | Tracks | Resists |
|---|---|---|
| Follow | pan and tilt | shake |
| Pan-Follow | pan (yaw) | roll and pitch drift |
| Tilt-Follow | tilt (pitch) | yaw drift |
| Lock | none; orientation held | handle movement |
Use Pan-Follow to track across a scene without pitch changes steering the camera. Tilt-Follow suits upward or downward framing, such as signs or facades, while limiting left-right drift.
In Lock Mode, your handle movement prompts the motors to preserve camera orientation. You can tune sensitivity and speed in many gimbal apps; these settings control correction response and perceived lag. Choose a mode that follows your intended movement while resisting unwanted axes, for steadier, more deliberate camera operation during each shot.
Conclusion
When you understand the motor-sensor feedback loop, you can see how a gimbal counters camera shake and corrects sudden bumps. Balance your payload before powering on, then calibrate each axis for the lens and camera you use.
Choose a follow mode that suits your movement, especially through doorways. During long takes, monitor battery drain and motor heat. These basics help you get smoother footage while keeping the gimbal responsive and within its operating limits.