Why Does My Gimbal Vibrate? Common Causes and Quick Fixes
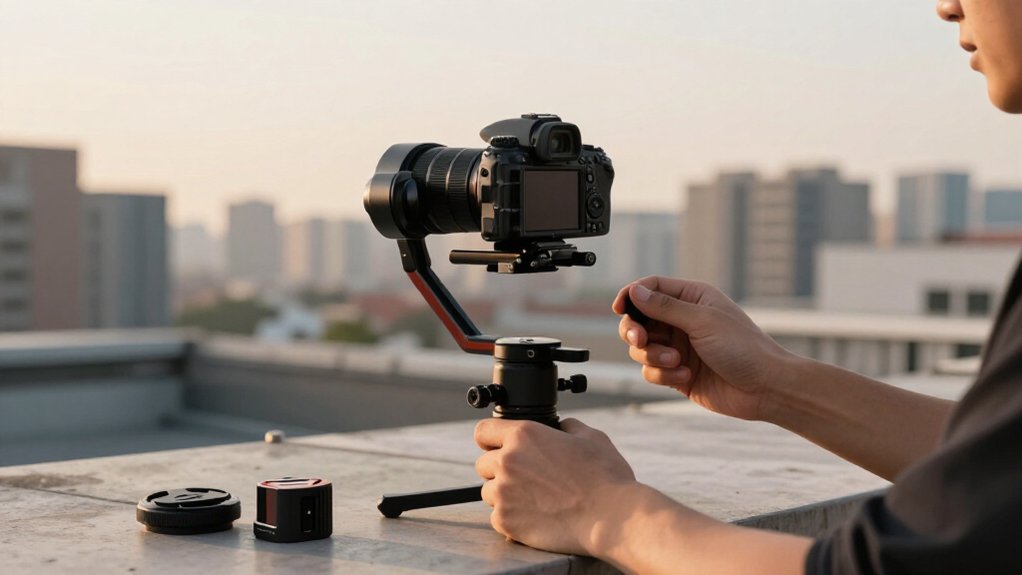
Your gimbal may vibrate because the camera sits off balance, its payload exceeds or falls below motor limits, a motor is poorly tuned, or an arm joint is loose.
Rebalance every axis after changing lenses, secure clamps, and check mounted weight.
Identify which axis jitters, then reduce only that motor’s power in steps.
Test with propellers removed; stop if a motor overloads.
If vibration depends on angle, inspect for interference or resonance.
The checks below can help pinpoint the cause.
Motor Power Adjustment
When a gimbal vibrates with a payload that’s too light, lower Motor Power in SimpleBGC’s Basic or related motor settings; the controller may be applying more power than the setup needs. Before changing values, save a profile copy or screenshot settings so you can restore them if testing worsens vibration.
If you can identify whether yaw, pitch, or roll is vibrating, reduce Motor Power for that motor instead of changing every axis. Make an adjustment, then test stabilization and repeat until vibration settles without weakening response. Once you find a value for one camera setup, copy the same Motor Power changes to your two profiles to avoid repeating the trial cycle. For a heavier payload, reverse direction: you’ll need to increase Motor Power.
Balancing Payload Across Axes
Motor power adjustments can’t compensate for a payload that’s unbalanced across an axis. If your camera or lens is too light or heavy on yaw, pitch, or roll, that motor must continually work against the imbalance, often producing jitter.
First, check which axis vibrates during movement; then adjust only that motor’s power in SimpleBGC. Archive your settings before changing anything. A light payload may need lower power because the controller expects a slightly heavier load.
A heavy payload typically needs higher power so the motor can counter added torque without oscillating. Make sure you’ve balanced the camera mechanically before tuning power, or settings may mask the underlying problem. Once one balanced camera profile runs, copy its corrected axis values to your other profiles.
Testing Motors With a Propeller Removed
To isolate gimbal vibration, power off the drone and remove the propeller, or any attached prop or impeller, before testing. With props removed, power the craft and move the camera through pitch, roll, and yaw. Listen and feel for a buzz or oscillation, noting which axis triggers it; yaw or roll motors may resonate at angles. If vibration appears only within a travel range, such as during upward tilt, suspect damper resonance rather than stabilization failure.
Use trial-and-error motor power adjustments, then retest with the propeller removed. In SimpleBGC, lower power for an over-light payload or raise it for an over-heavy payload; confirm the change affects the noisy axis. Stop immediately if the motor overloads or hits its limit. This may indicate obstruction or ribbon-cable damage, not tuning.
Loose Arm Connections
Loose arm joints can let the mount shift under motor torque, causing jitter that may worsen as you tilt the camera. With the drone powered off and props removed, check each joint for play, tighten loose screws to the manufacturer’s specifications, and inspect the arms for damage.
If vibration persists after calibration, treat it as a mechanical fault and avoid repeated power cycles.
Check Arm Joints
A loose or partially seated arm joint can make the gimbal’s motors hunt, producing vibration or jitter. With the gimbal powered off, inspect each arm connection for visible gaps, uneven seating, or movement. Check hinge areas and snap-lip points closely; even slight play can transfer through the frame and disturb stabilization.
Gently move the arm by hand, feeling for uneven resistance or side-to-side rocking. Don’t force the joint or use the motors to test it. Confirm each arm sits fully and evenly beneath its mounting tab or lip. If a connection isn’t seated correctly, carefully reposition and reassemble it without forcing alignment.
Then power on the gimbal and retest stabilization. If vibration remains, inspect other possible causes rather than assuming the joint is responsible.
Tighten Loose Screws
Small amounts of play at the yaw or roll arm screws can let the gimbal flex and vibrate under load.
Inspect arm-to-bracket screws, especially at the yaw and roll connections. Before touching hardware, power down the drone and remove its propellers. Use the correct bit size, then tighten each screw until snug; don’t overtighten, since excess force can damage threads or distort the joint.
Look for uneven gaps between arm segments and the mounting plate, a sign the connection isn’t seated evenly. Recheck screw tightness after transport, a hard landing, or a payload change, when small shifts may trigger oscillation. Then reseat the gimbal assembly and power on for a ground check. Gently cycle pitch and roll within limits. Confirm jitter stops before you fly.
Inspect for Damage
If the gimbal still vibrates after you’ve checked the screws, inspect its arms for loose or partly unseated connections that can let the assembly rock and trigger motor oscillations.
With the drone powered off, gently check each arm sits firmly beneath its lip or tab. Move the gimbal by hand through its normal range; it should travel smoothly, without rocking or catching.
Inspect ribbon cables and flex connections between the gimbal body and arms for damage, strain, pinching, or misalignment. A lifted connector can disrupt the signal and produce jitter. Reseat any connector that appears raised, without forcing it.
Then power on and watch initialization: abnormal buzzing or vibration can indicate a connection fault. Don’t rely on recalibration alone; it won’t correct loose arm connections.
Camera Lens Compatibility
Check that your lens stays within the gimbal’s payload limits; an underweight setup can also strain motor tuning. Confirm the lens model and mount fit, then rebalance after any lens change to keep the center of gravity aligned.
If an axis buzzes or vibrates, adjust its motor power for that lens profile rather than changing unrelated calibrations.
Lens Weight Limits
A gimbal can vibrate when your camera-and-lens setup falls outside its supported weight range, even when it’s too light. Check the payload limits and weigh the complete mounted setup, including accessories. If it’s underweight, the control loop may undercompensate; the motors expect more mass, then overcorrect, producing jitter, shaking, or audible strain.
Don’t assume that adding motor power will help: for a light setup, save your current tuning profile, lower Motor Power in the gimbal software, and test small increments until the image steadies. If the setup’s too heavy, increase Motor Power instead; the correction reverses with the load condition. Once you find a stable setting, copy that tuning to your other profiles, usually through the Basic tab, so you don’t repeat the adjustment process.
Compatible Lens Models
Why can a compatible lens still make your gimbal vibrate? Compatibility is specific to the camera, lens, and gimbal, not just a lens category. Check the manufacturer’s official payload and lens list; a setup near either weight limit can exceed the motors’ stable operating range. For DJI systems, confirm your exact camera model and its stated payload.
Two cameras paired with the same lens class may behave differently, so a similar setup isn’t proof of compatibility. Use listed lenses and approved adapters; improvised parts can change the load the gimbal must control. After a swap, adjust motor power in SimpleBGC or its equivalent, then test stabilization. If vibration persists, recheck the exact camera-and-lens listing for your gimbal model again.
Mount and Balance Fit
Even a compatible camera-and-lens setup can vibrate if it’s loose or poorly balanced on the mount. Check that camera and lens sit flush; tighten clamps and screws. Play or uneven contact can transmit vibration.
Compare rig weight and center of gravity with the gimbal’s rated range. A too-light load may make motors buzz or shake.
Match camera tilt and roll orientation and mounting position to your selected profile; even a few millimeters of shift can upset balance and trigger jitter.
Check long lenses and attached filters or heaters for interference, especially near vertical limits, and exceed the motors’ correction limits.
After each body or lens swap, rebalance and test yaw, pitch, and roll motors. If only one setup vibrates, suspect its fit before software.
Walk-Test Vibration Checks
To isolate a gimbal vibration, power on the drone on a flat, level surface and gently move the camera through pitch, roll, and yaw, noting the angle where the buzz starts or worsens. Record whether onset tracks one axis; a buzz near 30% up that worsens toward full up suggests an angle-dependent balance or harmonic issue.
Listen and feel near each motor. Yaw oscillation may come and go under slight side force. Try slight down force or shift weight; if vibration changes, suspect balance before motor failure.
For cold-only symptoms, leave the aircraft outside for two hours near 45°F, then retest warm.
| Axis | Check |
|---|---|
| Pitch | Test angle |
| Roll | Sweep again |
| Yaw | Side force |
| Next | Save settings |
If an axis correlates, adjust its SimpleBGC motor power for payload weight, saving settings first.
Overheating Motor Risks
A gimbal motor can overheat when it repeatedly fights an unbalanced or obstructed payload, and continuous buzzing or jitter, especially near the top of the camera’s travel, signals excessive load.
When you see oscillation as the camera moves from 30% upward to full up, the yaw, roll, or pitch motor may carry load and build heat. Check balance and clearance: a light payload or an obstruction can keep the axis hunting. Set motor power to suit the payload; low power can make the motor strain rather than hold angle smoothly. Cold conditions can worsen vibration when the setup’s imbalanced. If you notice buzzing, angle-specific control loss, or overload behavior, stop flight.
Rebalance, clear obstructions, and adjust motor power; don’t leave a struggling motor running hot.
Assuming Every Buzz Means Damage
After stopping a hot, struggling motor, don’t assume every buzz means the gimbal is damaged. Many jitters result from balance errors or motor power settings, not broken hardware. Diagnose first:
1. Check payload weight; a camera that’s too light or heavy can trigger oscillation.
2. Rebalance the camera, then adjust motor power in software such as SimpleBGC: lower it for light payloads and raise it for heavy ones.
3. Note which axis—yaw, pitch, or roll—vibrates, and whether shaking changes with camera angle.
Worsening near 30% upward tilt may indicate resonance or imbalance, not immediate breakage.
4. Watch for motor overload behavior or limit-related errors; these suggest the system is straining and nearing control limits, unlike a mild oscillation. Keep movements controlled while you isolate the cause.
Contact a Gimbal Technician
When balancing and motor-power adjustments don’t stop the vibration, contact a gimbal technician before assuming the unit is damaged. A light camera payload may fall below the motors’ working range, making them strain and oscillate; that doesn’t necessarily mean you have a dead gimbal.
Before changing settings, save or screenshot your current SimpleBGC profile. Identify whether Yaw, Pitch, or Roll triggers the jitter, then lower only that motor’s power and test the gimbal after each adjustment.
Trial and error takes time; once one profile runs smoothly, copy its motor-power values to the other two profiles. If your setup exceeds the recommended payload, increase motor power instead: lowering it can worsen oscillation. A technician can confirm the payload range and tune the settings safely and correctly.
Conclusion
If your gimbal vibrates, diagnose the setup before blaming a failed motor. Reduce motor power, rebalance each axis, and test safely with propellers removed where applicable. Check arm connections, lens compatibility, and walk-test footage for repeatable shake.
Stop if a motor overheats; continued use can cause damage. Don’t treat every buzz as a defect. If adjustments don’t resolve the vibration, contact a qualified gimbal technician for inspection and precise diagnosis before you resume regular filming.