Are There Tripods That Convert Into Monopods? How 2-in-1 Designs Work
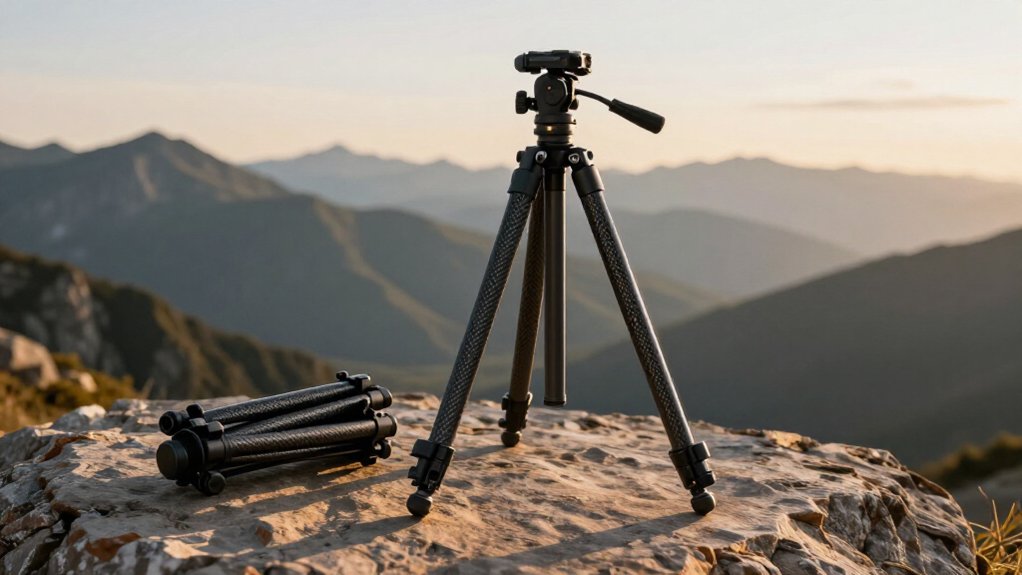
Yes, you can convert tripods into monopods in seconds. With a removable-leg design, you detach one leg and attach it to the center column.
Other models use the extended column itself, sometimes with folded legs as a compact base.
Twist collars or flip clamps secure the parts, so check for play before lifting your camera.
Use the separate monopod payload rating, and remember that extra height, wind, and uneven ground increase sway.
More details follow.
Removable Leg Conversion (3 Words)
Detach one tripod leg from the base, then screw or clip it onto the center column to form a monopod. With this removable-leg conversion, you can usually complete the change in a few seconds in the field. Leave the camera head in place while you move the leg between mounts, then confirm that the connection has engaged before lifting the setup.
The center column or connector must lock firmly; any play can introduce wobble, particularly when you extend the monopod higher. Check the joint by applying light pressure before shooting. If you use a lower-cost aluminum model, inspect the locking interfaces carefully, since flex under torque can make one-handed handling less stable. Keep the camera supported during conversion, and retighten the connection if it shifts.
Convertible Leg Design
In a convertible-leg design, one tripod leg mounts directly to the center column to form a monopod, usually with fewer parts to reassemble and less setup time than a center-column-only conversion. During conversion, you use the detached leg as the monopod’s support, making field changes quick.
Performance depends on a precise fit: loose threads or imperfect machining can cause flex or wobble under torque, especially in cheaper aluminum models. Some designs retain center-column height adjustment and stability geometry in monopod mode instead of relying on the leg alone. Before buying, test the conversion for lateral play and twisting. Check that monopod height and load behavior match the tripod’s stated performance. Speed helps, but a secure, repeatable connection matters most when you’re supporting camera equipment.
Leg Attachment and Center Column
Some 2-in-1 tripods form a monopod by releasing and pulling out the center column while the folded legs remain as a compact base.
In this layout, you keep most of the leg architecture intact; extraction shifts the load path so the center column becomes the monopod’s primary extension.
| Feature | What you’ll find | Practical effect |
|---|---|---|
| Column assembly | Two solid aluminum blocks joined by a dedicated cap | Rigid monopod connection |
| Leg attachment | Folded tripod legs stay together | Compact lower base |
| Rated capacity | Example limit: up to 5 kg | Check before mounting gear |
Depending on the design, you may need to free the leg-side area before drawing out the column, so its geometry determines how the parts join and support your camera and camera lens.
Locking Mechanism Variations
When converting your tripod, you’ll typically release and extend a center column or detach a leg. Twist-lock mechanisms secure the column with a collar, while flip-lock mechanisms use external levers; check that either holds firmly to limit flex.
Threaded leg connections let you attach a tripod leg to the column, but a loose fit can cause wobble.
Twist-Lock Mechanisms
With twist-lock designs, conversion usually takes seconds because you don’t have to fully unscrew every part. You release the center column, pull it free, and use the legs as a compact base. On the Manfrotto Befree 2N1, you release a dedicated leg mechanism, withdraw the column, then screw a cap beneath it to join the monopod sections.
Twist collars may also secure the legs, preserving familiar locking behavior during mode changes and resisting dust or sand outdoors. Check every joint before mounting your camera: the monopod is generally less rigid than the full tripod, particularly when you extend upper sections. Seat the column and cap firmly to limit play as you raise the camera. A hand check helps reveal looseness before you attach equipment.
Flip-Lock Mechanisms
Flip-lock tripods use hinged clamps that you open or close to release or secure each leg section. In a convertible model, these clamps let you adjust leg length quickly, but the tripod-to-monopod change usually depends on how the leg or column detaches. Check that the clamp closes firmly and holds its section without excessive force.
Dust and sand can compromise clamp sealing, so flip-locks may need more cleaning and can lose rigidity outdoors.
When you raise the converted monopod, avoid extending the thinnest sections too far; weaker designs may become less stiff above about 130 cm, and leg geometry can amplify wobble under load. Before buying, practice locking, fastening, and converting the support. Confirm each segment seats fully and the monopod shows minimal wobble.
Threaded Leg Connections
Some tripod/monopod hybrids convert quickly by unscrewing one leg from the tripod base and attaching it directly to the center column. This threaded connection can make conversion faster, but it depends on alignment between the leg threads and the column’s mounting interface. You may need to release fittings on the leg or column before joining them, then lock the assembly so loads pass through the parts that stabilize the tripod.
Check thread engagement first: the joint shouldn’t feel loose or require multiple awkward turns. Poorly matched threads can introduce flex or wobble when torque loads an aluminum design. At monopod height, that lost rigidity becomes more noticeable. Test the conversion motion and confirm the connection seats securely; thread tolerance affects how stable the assembled support feels.
Load Capacity and Stability
Check the separate payload ratings for tripod and monopod modes; a hybrid such as the Manfrotto Befree 2N1 supports up to 8 kg as a tripod but 5 kg as a monopod.
In monopod mode, extension, leg stiffness, and wind affect stability, so treat maximum ratings as near-limit figures and watch for flex or wobble. The 1,660 g aluminum Befree 2N1 also balances differently from a lighter carbon-fiber model, making a stability check with your actual camera setup essential.
Maximum Load Ratings
Load ratings for convert-to-monopod tripods can differ by configuration, so use the manufacturer’s monopod rating as the ceiling; the single support column typically flexes more than the full tripod. Compare each mode’s published limit before mounting your camera, lens, and accessories; count the complete payload, not just the camera body.
For example, Manfrotto’s Befree 2N1 supports up to 8 kg as a tripod but about 5 kg as a monopod. Don’t assume a headline capacity applies to both modes. FREEWELL lists up to 20 kg for its 1.65 kg FW-T2, with height adjustable from 175 to 1,570 mm; verify whether that rating covers monopod use and full extension.
Treat maximum height and extended thin leg sections as load-related factors: rigidity can decline as you extend the support. Stay below the applicable mode-specific limit, especially when you need the tallest working height. Check the manual, since listed payloads may exclude accessories or dynamic forces.
Stability in Monopod Mode
When you convert a tripod to monopod mode, the center column and extended sections carry the entire load, so added reach can increase flex and sway. At full extension, on hybrids reaching 151–157 cm, narrower sections may flex more than in tripod stance.
Check the maker’s monopod rating separately; a tripod payload may overstate capacity after conversion. The Manfrotto Befree 2N1 supports 5 kg as a monopod versus 8 kg as a tripod, indicating reduced stiffness and safety margin.
FREEWELL FW-T2 claims 20 kg at heights up to 1,570 mm, but assess that rating at full extension for flex. Keep thin sections retracted where practical, plant the foot on firm ground, and account for wind. Consistent mounting helps limit lateral torque that amplifies sway.
Weight and Balance
A convertible support often carries less weight safely as a monopod because its single column lacks the tripod’s three-point base. Check the maker’s mode-specific ratings: Manfrotto’s 1.66 kg aluminum Befree 2N1 supports up to 8 kg as a tripod but 5 kg as a monopod. A high payload, such as the FREEWELL FW-T2’s 20 kg, doesn’t guarantee steadiness on one column.
Your load’s height and balance matter as much as its mass. Pulling out the center column and joining monopod sections can raise the center of mass, increasing sway. Keep the camera low, avoid extending sections fully, and consider carbon fiber for better stiffness.
Above 140 cm, reduced triangulation can make a monopod feel wobbly. Maximum extension trades stability for reach, even when the payload stays high.
Wildlife Tracking in Brush
In dense brush, a tripod that converts to a monopod lets you wait with stable, eye-level support, then reposition quickly when wildlife moves. For long waits, use the tripod configuration; when an animal breaks cover, release and pull the center column to form a monopod without removing the legs.
In monopod mode, keep the extended height close to your working level: hybrids often become less rigid above about 140 cm, especially on uneven ground or in winds exceeding 25 km/h. Check the stated monopod payload, often around 5 kg, before carrying a lens and camera; tripod ratings may reach 8 kg but don’t apply in this mode. A closed length near 40 cm and simple conversion steps help you travel ready in cover.
Camera-Mount Compatibility
Because most tripod-to-monopod hybrids keep the same mounting interface across modes, you can leave your camera attached while switching support.
Standardized top fittings—often a 3/8″-16 screw or an Arca-Swiss/Manfrotto-style quick-release—let you transfer the same camera body without changing plates. Check the head and plate specifications before buying; matching standards reduce adapters, while incompatible clamps may require a replacement plate.
Some designs extend compatibility beyond cameras. An add-on interface such as Manfrotto Easy Link can hold a light or reflector, so you can keep that accessory mounted when converting the support. For phone use, the FREEWELL FW-T2 includes a retractable clamp that turns its tripod mount into a smartphone mount without a base-plate swap.
Inverted columns alter low-angle positioning, not the mounting interface.
Monopod Footprint on Uneven Ground
Mount compatibility stays the same when you switch modes, but ground contact does not: a converted monopod rests on one foot, which can wobble on uneven terrain where a three-leg tripod would remain steadier.
On mud, use a spike; on pavement, use rubber, because contact is singular. On sloped rock, rotate the body and adjust height with locked sections, not unlocked conversion parts. Retract thin lower sections when practical; above 130 cm, they may flex and sway under camera load.
- A spiked foot bites into soft mud, but may slip on a smooth stone.
- A rubber pad grips firm ground, yet can’t level a tilted camera.
- Check the frame after settling; wobble, not a stated 5 kg rating, may limit sharpness.
Check Folded Travel Length
Check folded length before judging a convertible tripod’s portability: the Manfrotto Befree 2N1 closes to about 40 cm and extends to 151 cm, so it can fit more easily in a suitcase than a taller model with a longer packed length. But compare packed dimensions across 2-in-1 designs; maximum height won’t tell you how a frame fits your case.
Look for models that use the same main column or leg architecture for monopod conversion, since this arrangement can preserve a compact closed length without sacrificing monopod function. Before buying a system, verify its actual packed dimensions rather than relying on a listing’s specs.
Then weigh the tripod: the Befree 2N1 weighs about 1,660 g, so a short package may still feel heavy. Check your case dimensions and carry limits against the packed setup.
Conclusion
Yes, you can convert tripods into monopods, but check how the design handles attachment, locking, and support before buying. Remove the designated leg and connect it to the center column or head as instructed; then verify every lock.
Match the monopod’s load rating to your camera and lens, and test stability on uneven ground. For wildlife tracking, consider its footprint and handling in brush. Finally, check folded length so the kit fits your travel setup.